
All My Room Makeovers
You often see my personal style reflected in my fashion choices, but after purchasing our first home last year, I was so excited to dress our home up in a way that also reflected my style.
As an HSP (Highly Sensitive Person), I’ve realized how crucial my environment is for maintaining my inner peace and calm. This seems to be even more important in our increasingly chaotic world. When I am in a space that is beautiful, it calms my senses and my whole body can relax. In contrast, if I am in a very messy or cluttered space everything feels overwhelming and overstimulating. I can even become grumpy and frustrated without realizing it.
When it came to designing our new home, I knew it was important that the space feel peaceful, yet still joyful and fun. I wanted it to reflect our personalities and our passions. I wanted to also be able to include many of the heirloom pieces that I’ve collected over the years. I knew this was going to mean combining many vintage and antique pieces with modern pieces as well. Something I already love to do in my wardrobe!
Transforming a room can feel overwhelming. There are so many different directions you can go. What I like to do is start with inspiration. I find that pinning photos that inspire me on Pinterest is the easiest way to organize my ideas. I collect inspiration by room and then narrow down the vibe that I want to go for.
HOW IT STARTED:
We bought a cute house in Bakersfield, CA. Take a tour of the place & what it looked like when we got it! I was so excited to get to work and make our new place feel like ours.

We were so excited to start this new Adventure! Of course, each place we lived before was a fun series of re-decorating too! You can see our previous place in San Fran HERE!
And even farther back our tiny little apartment in San Francisco where I first started my YouTube!
FIRST STEPS TO RENO:
When you first move in you want to redo everything all at once. I had to remind myself that a home is not made overnight, even though many talented YouTubers might make it look that easy!
We decided to start with the worst room first- the Guest Bathroom. With the help of our friends at Rebel + Sage we created our guest bathroom mood board.
BEFORE:
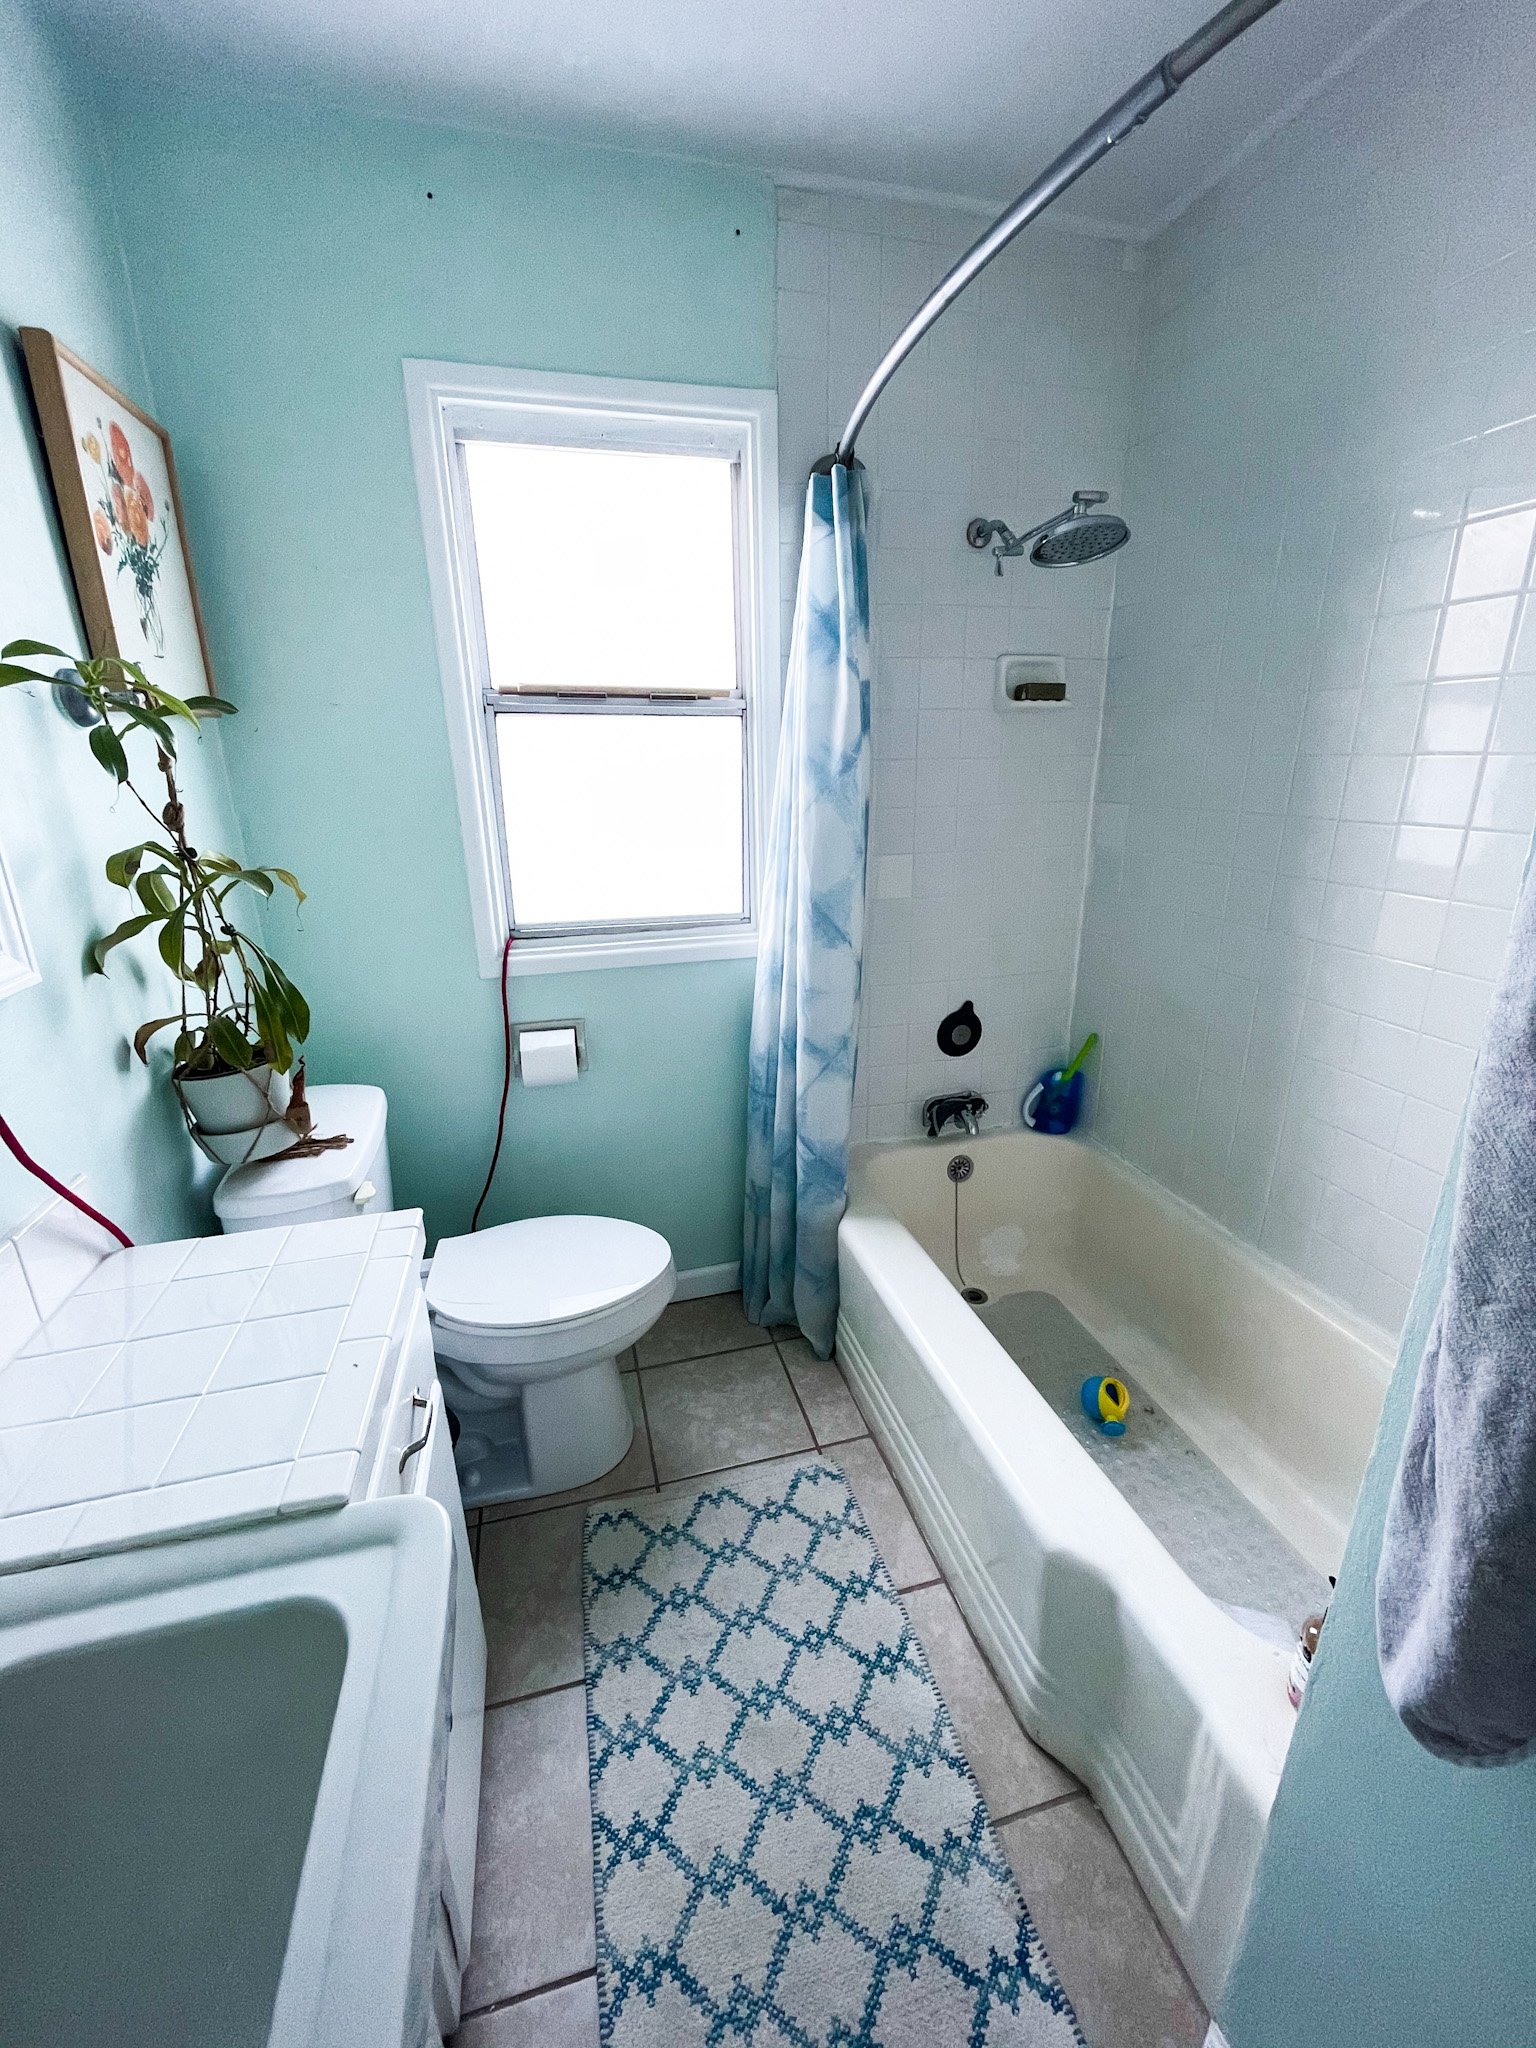
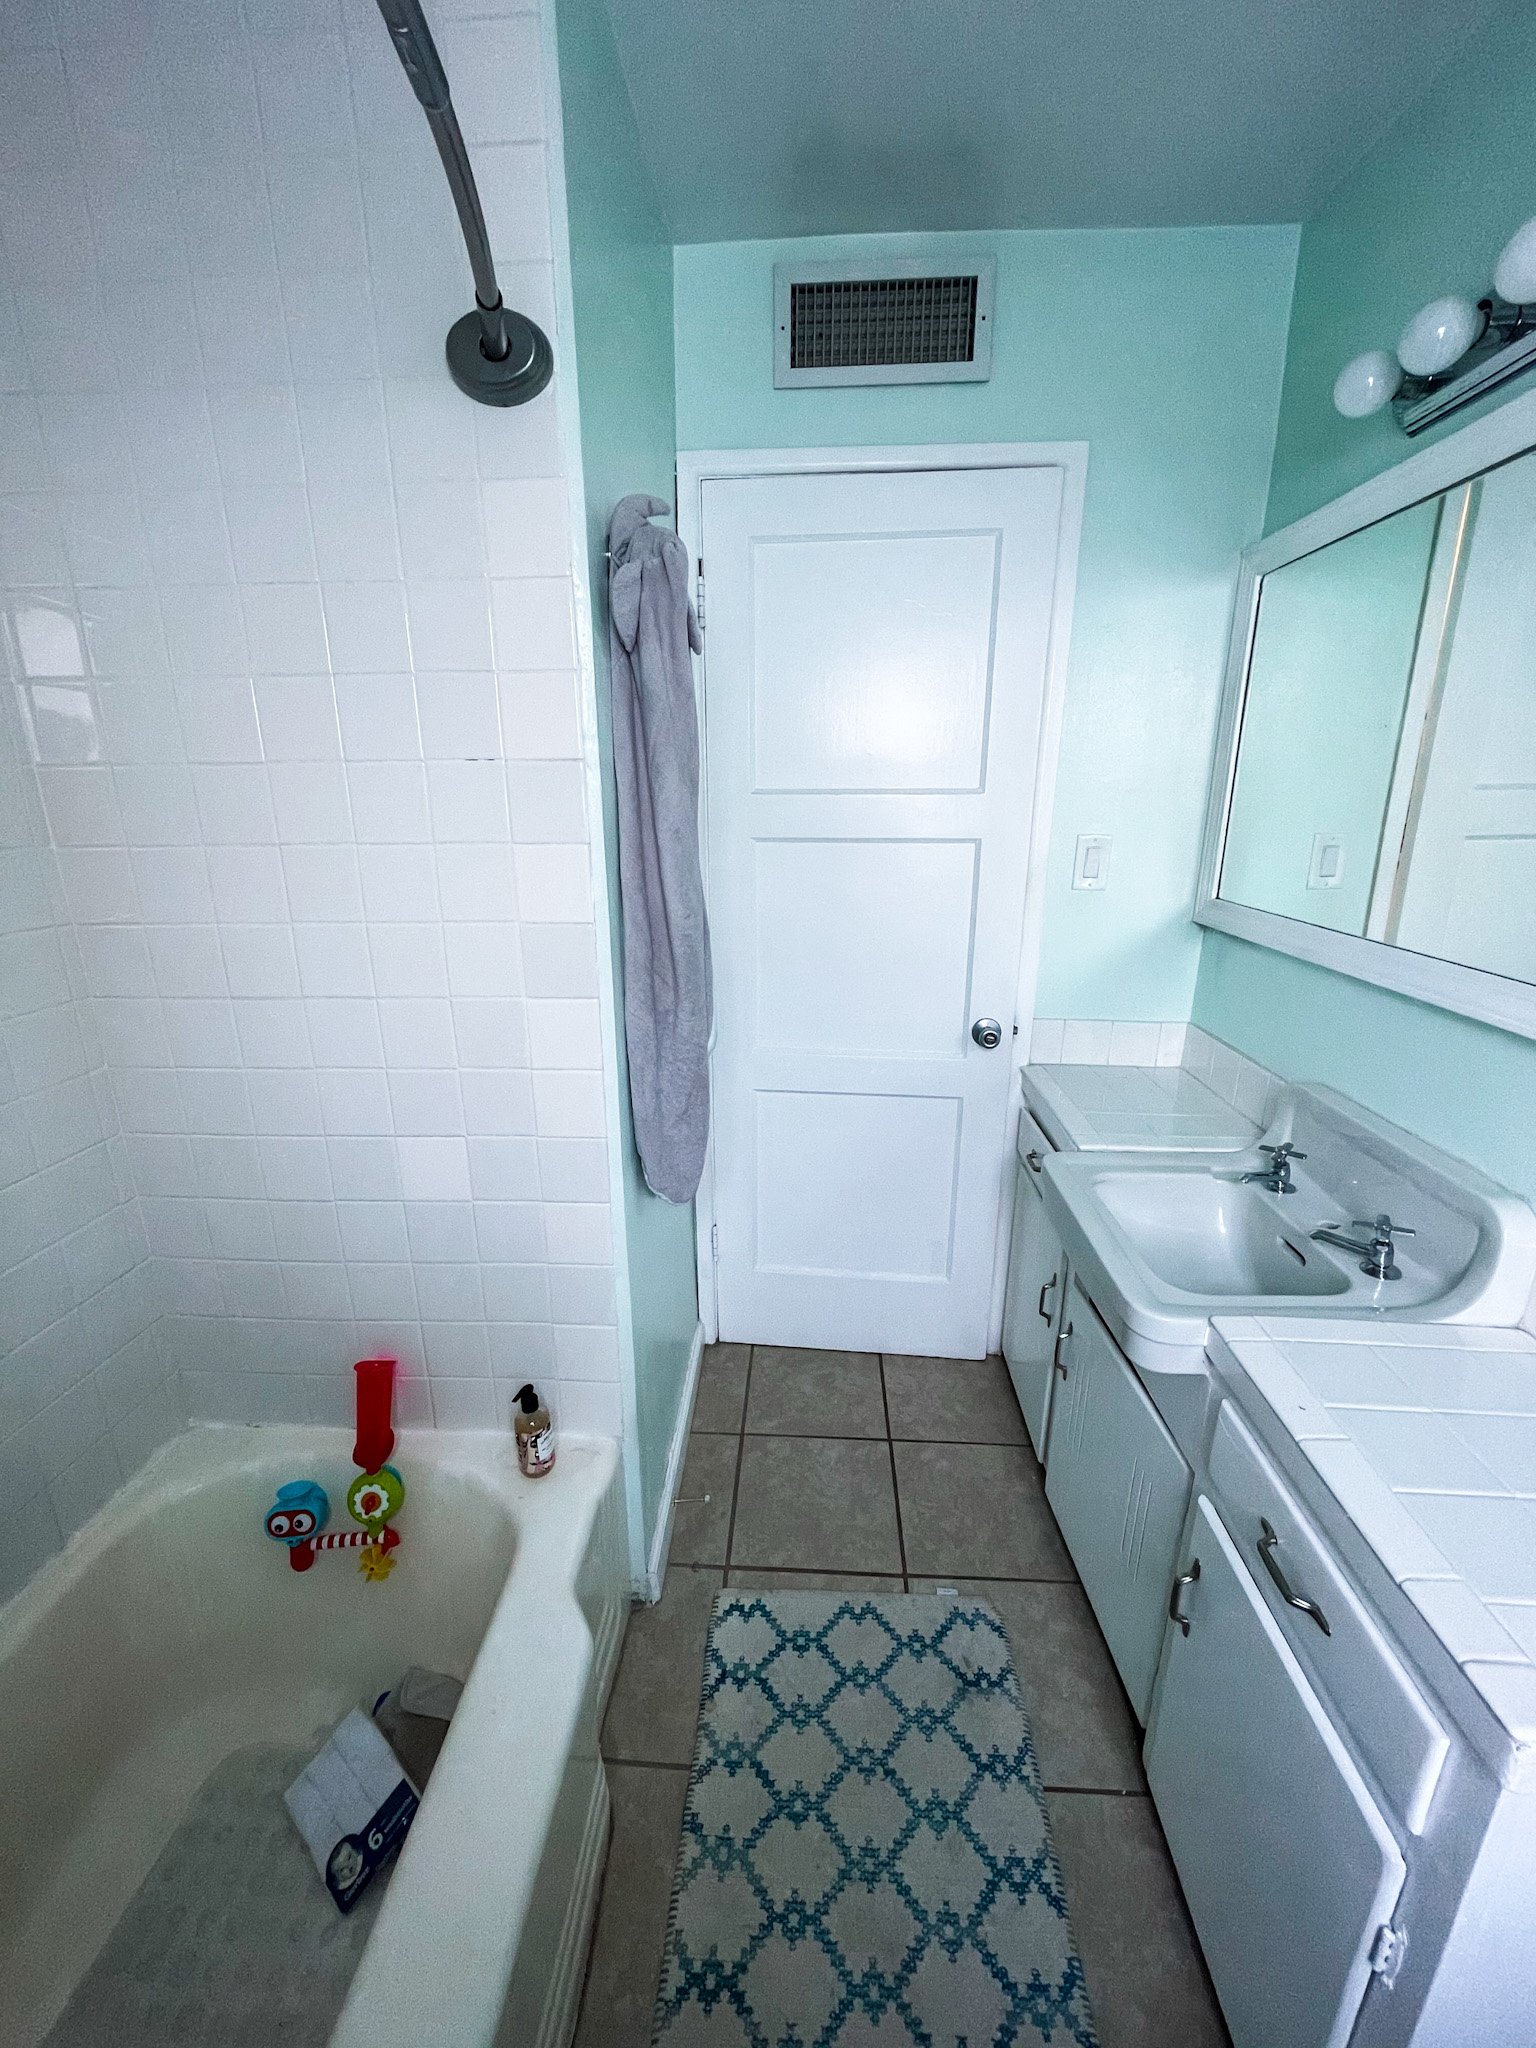
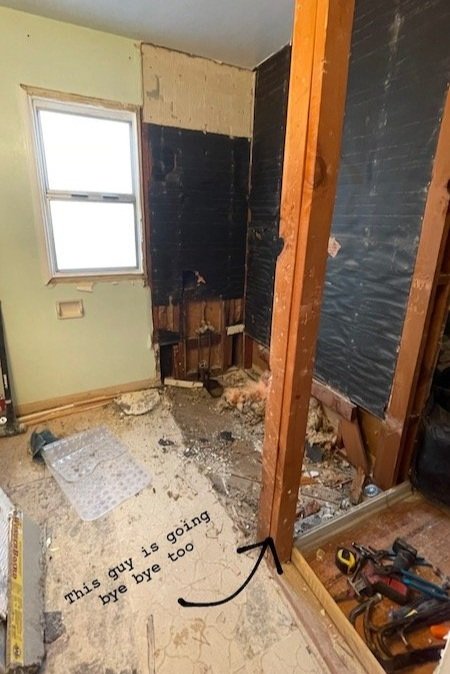
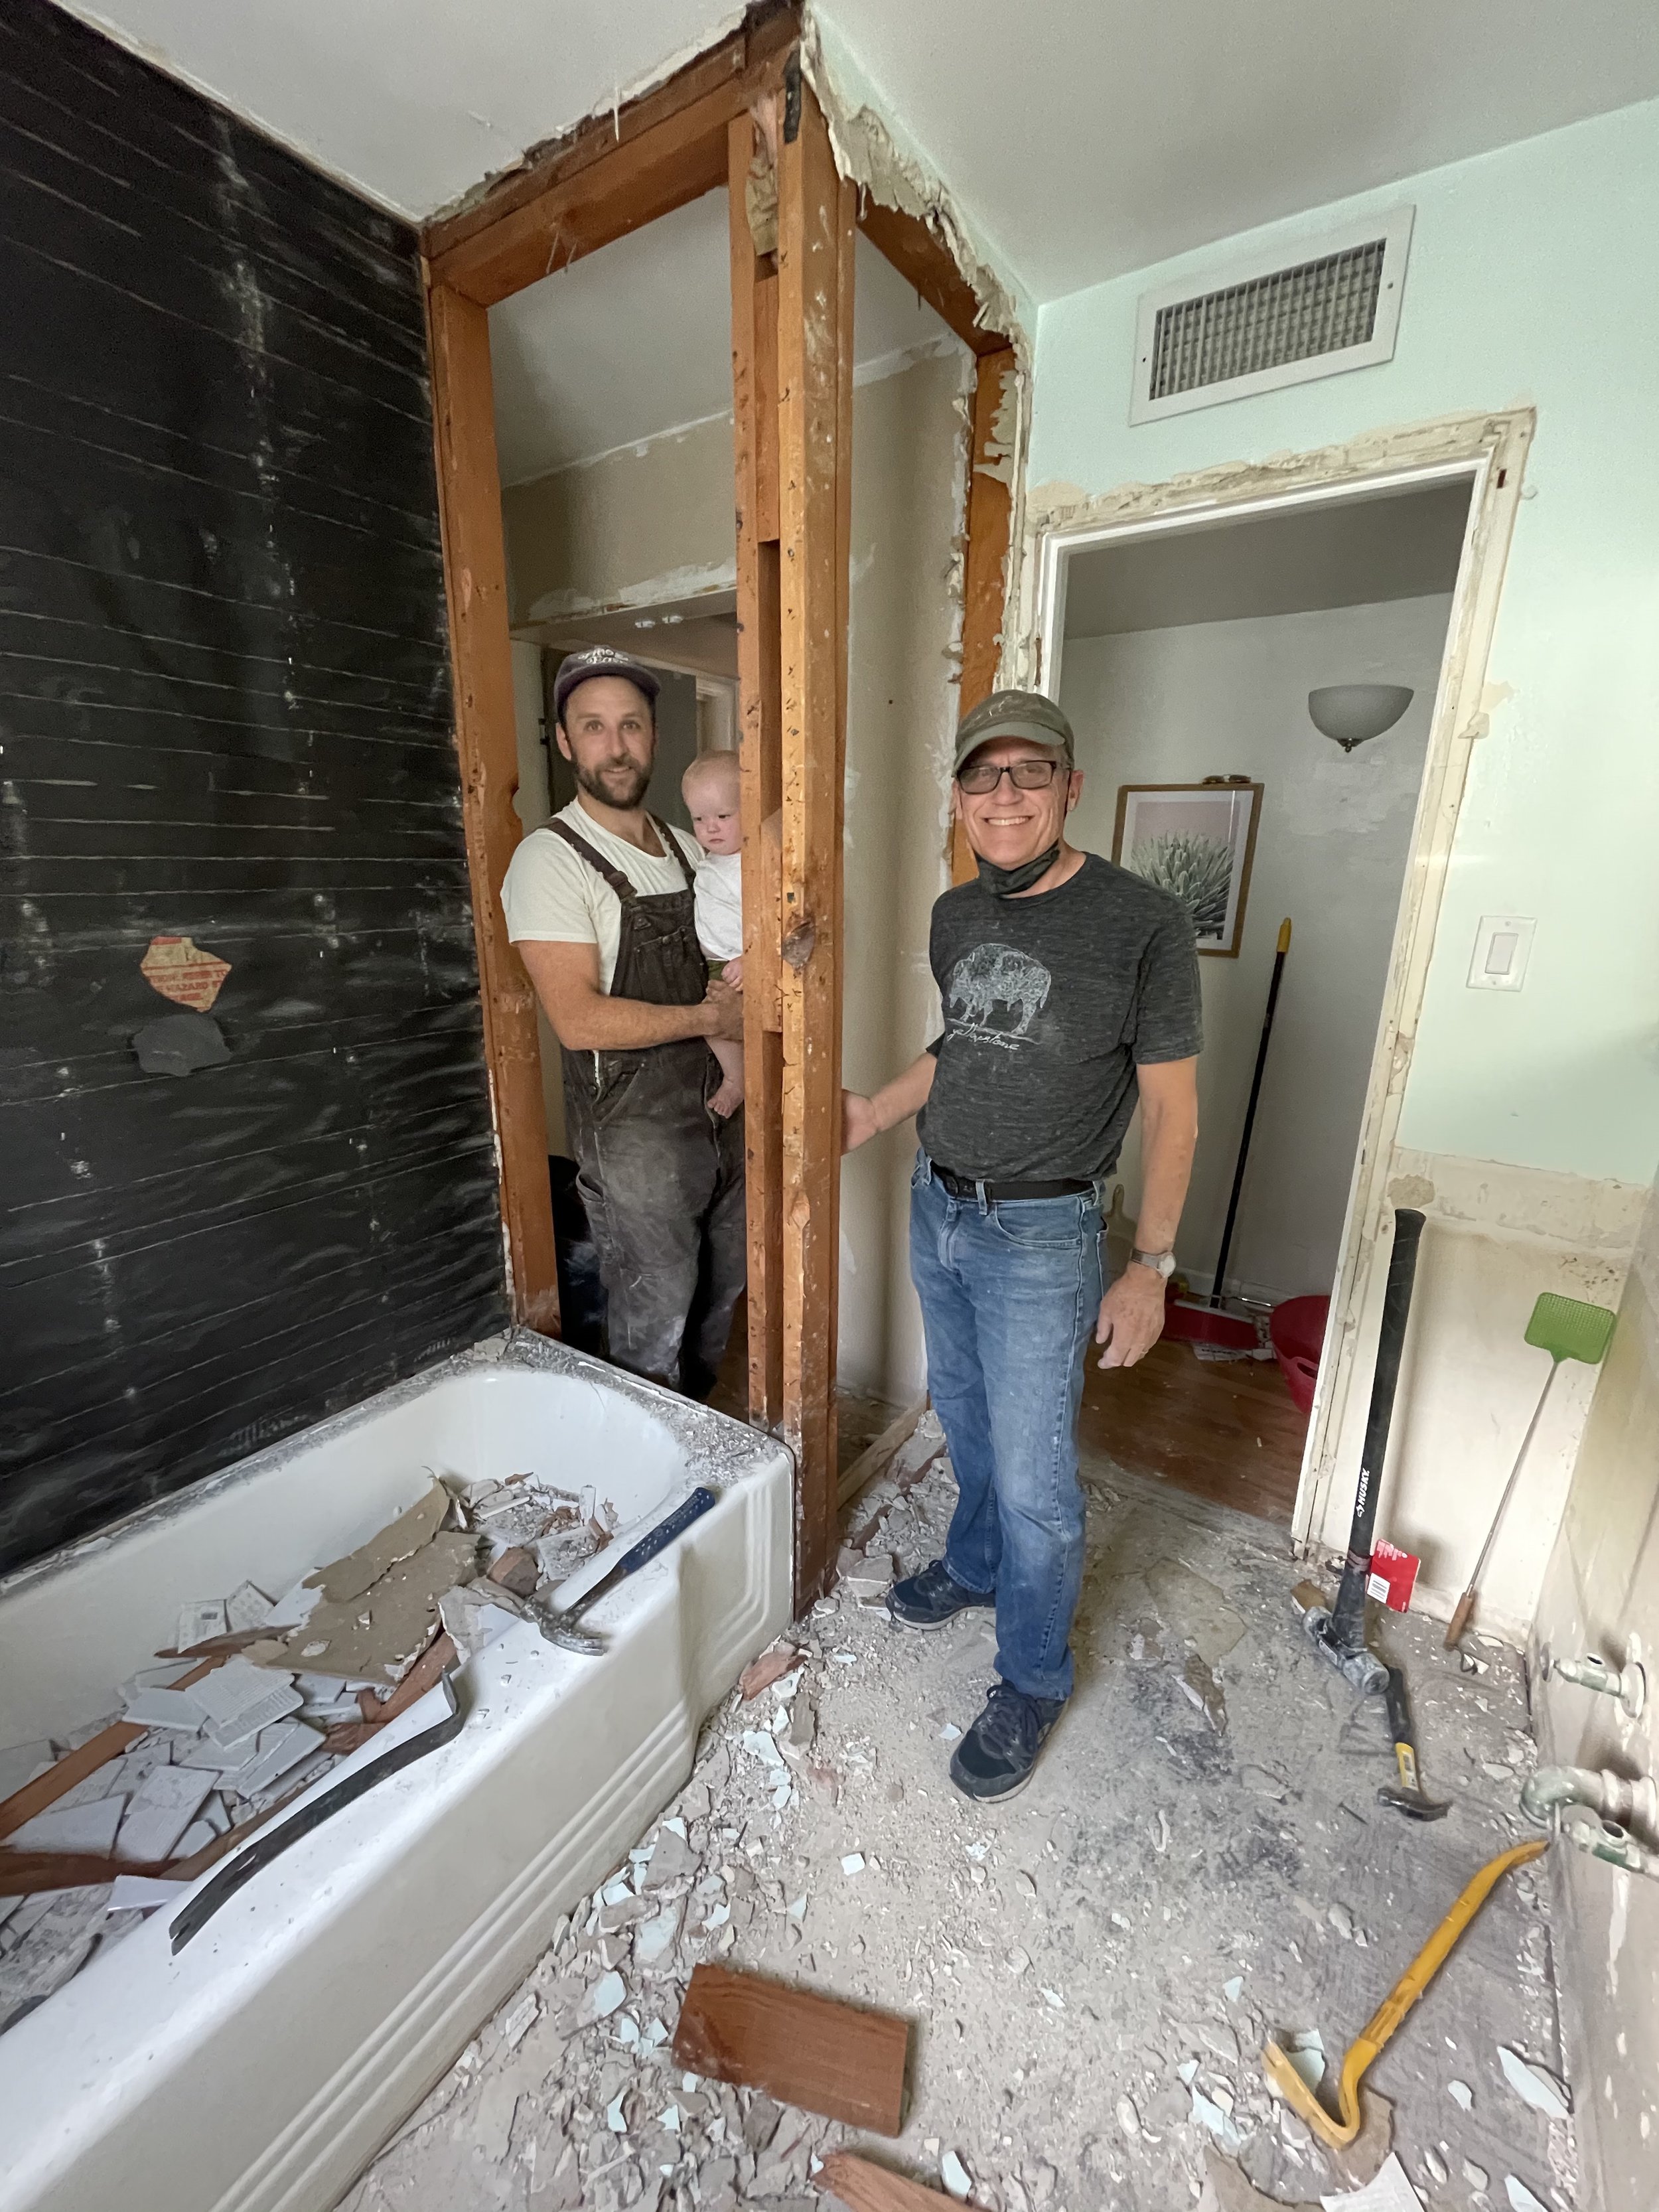
This was our first time remodeling. There are always hang ups when it comes to remodeling- this one took us about 4 months. But it was SO WORTH IT! And we learned so much! You can watch the full reveal here!
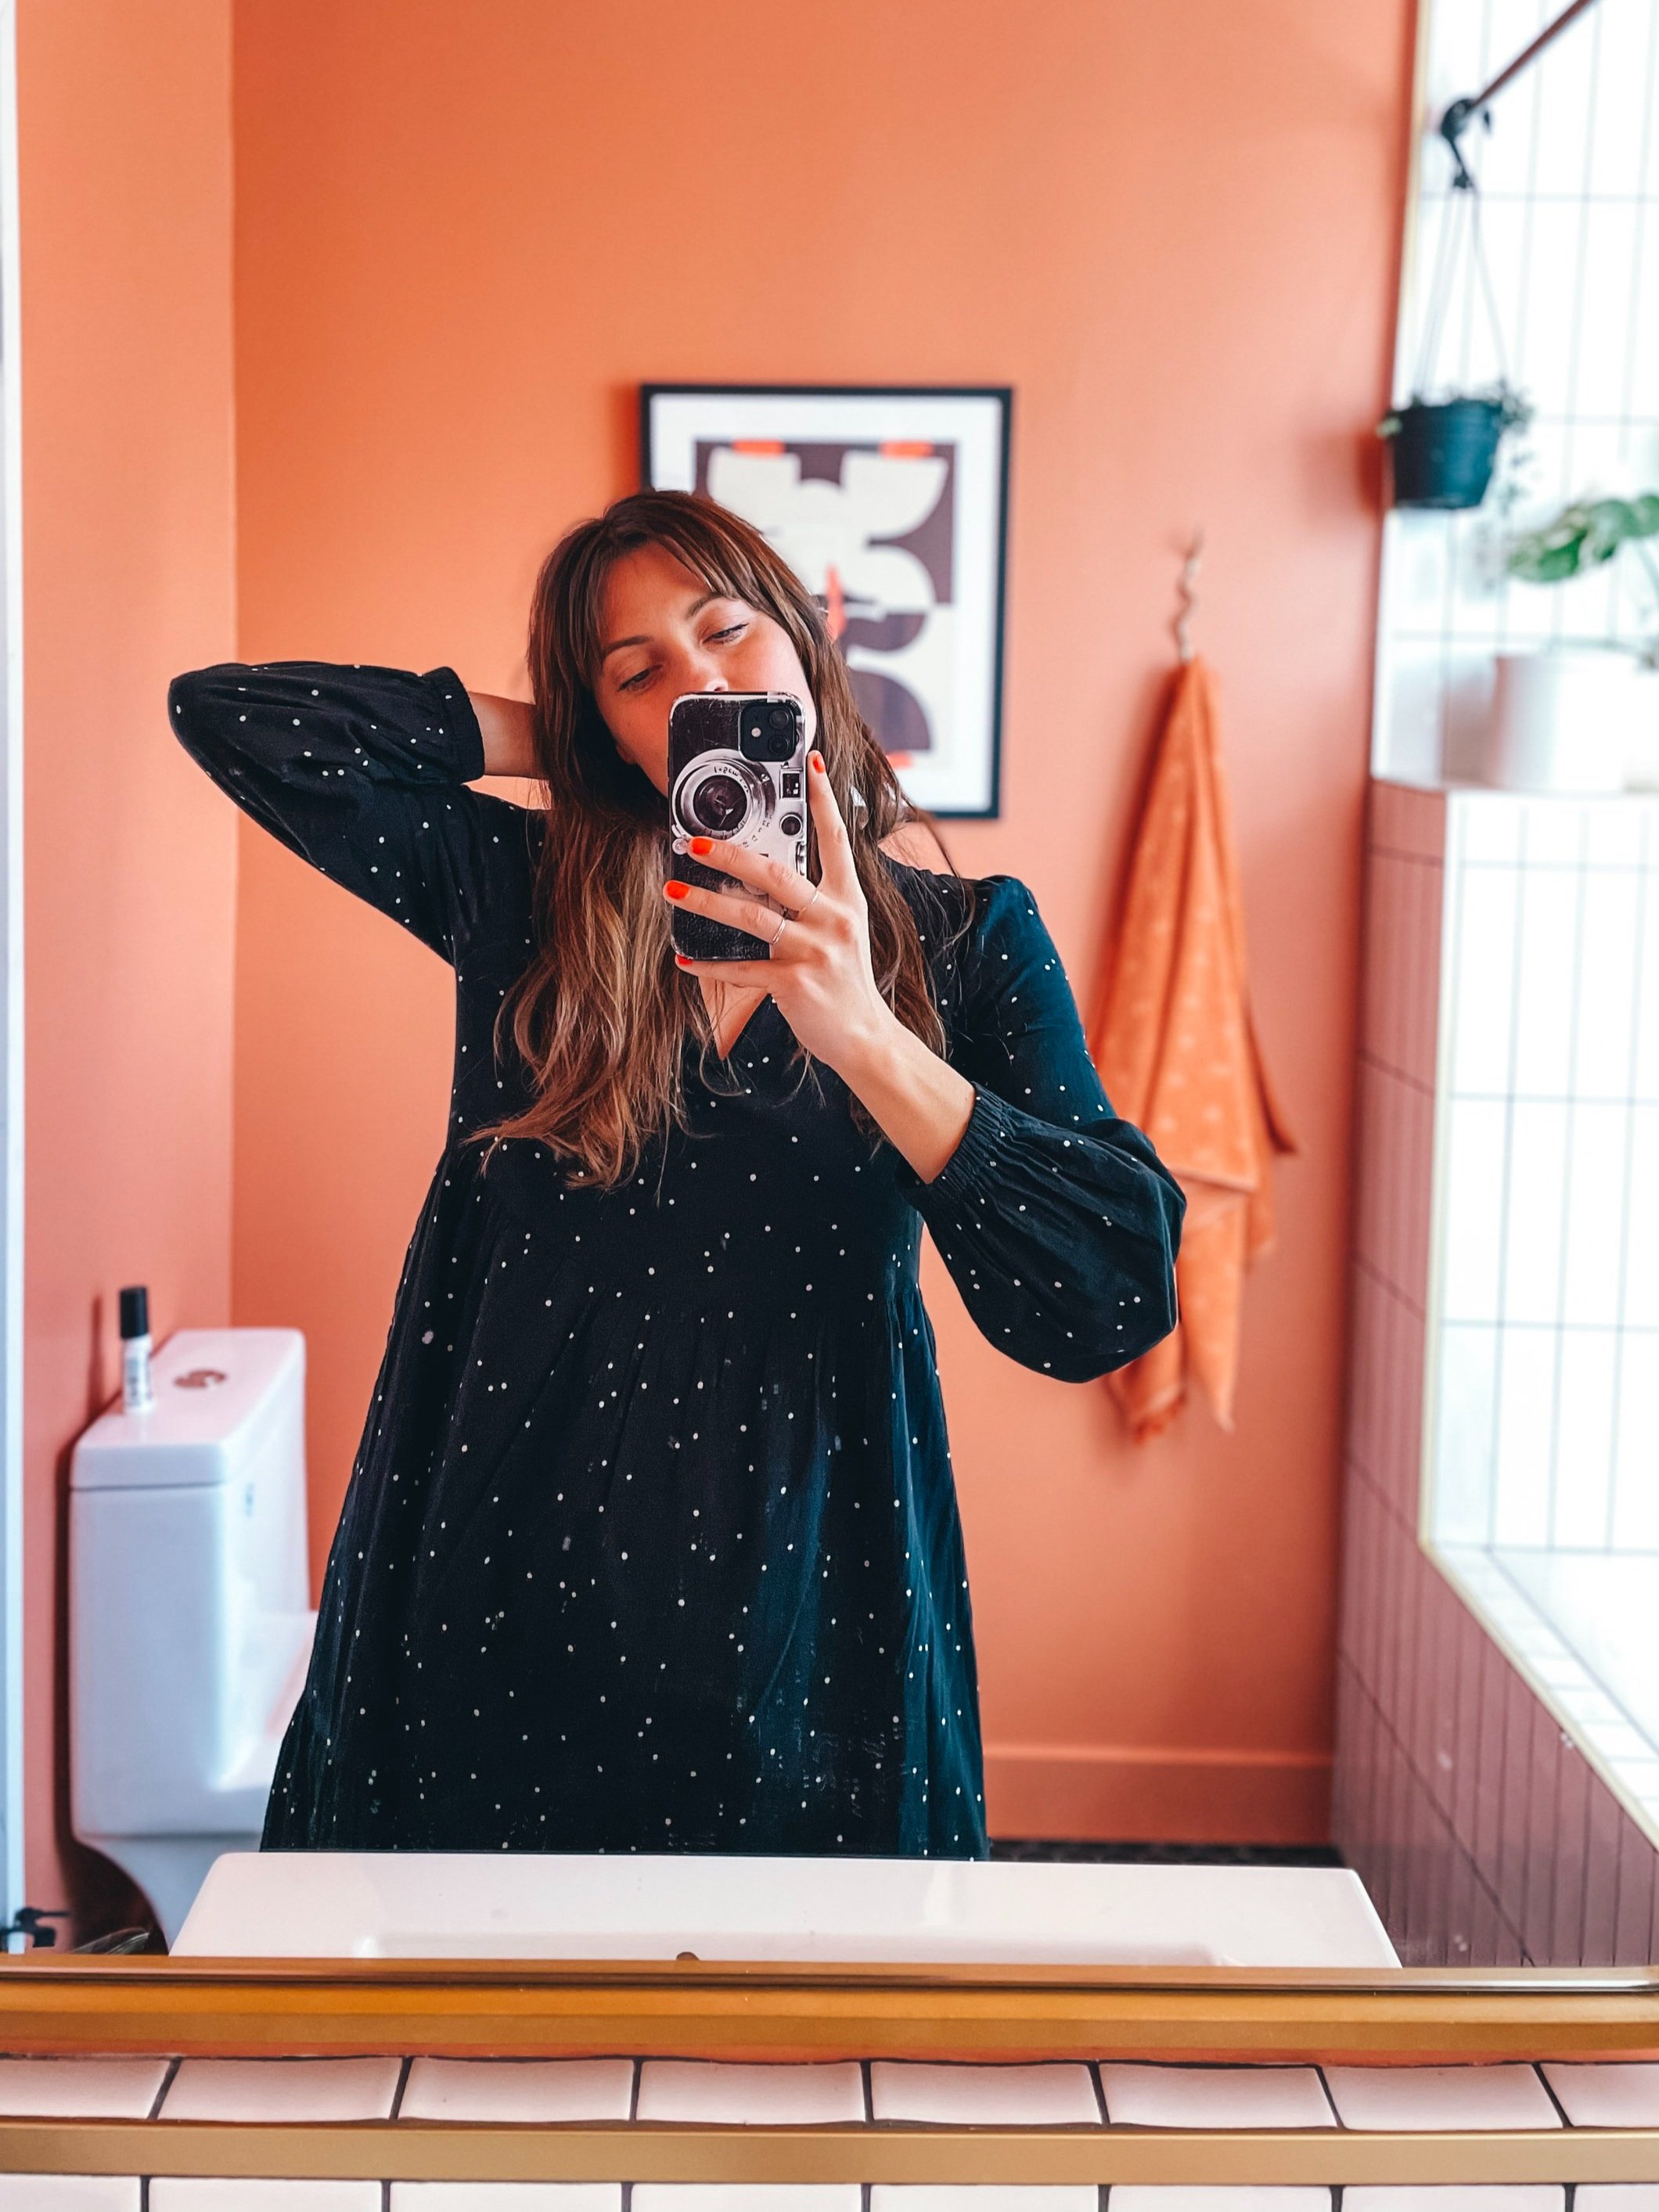
AFTER:
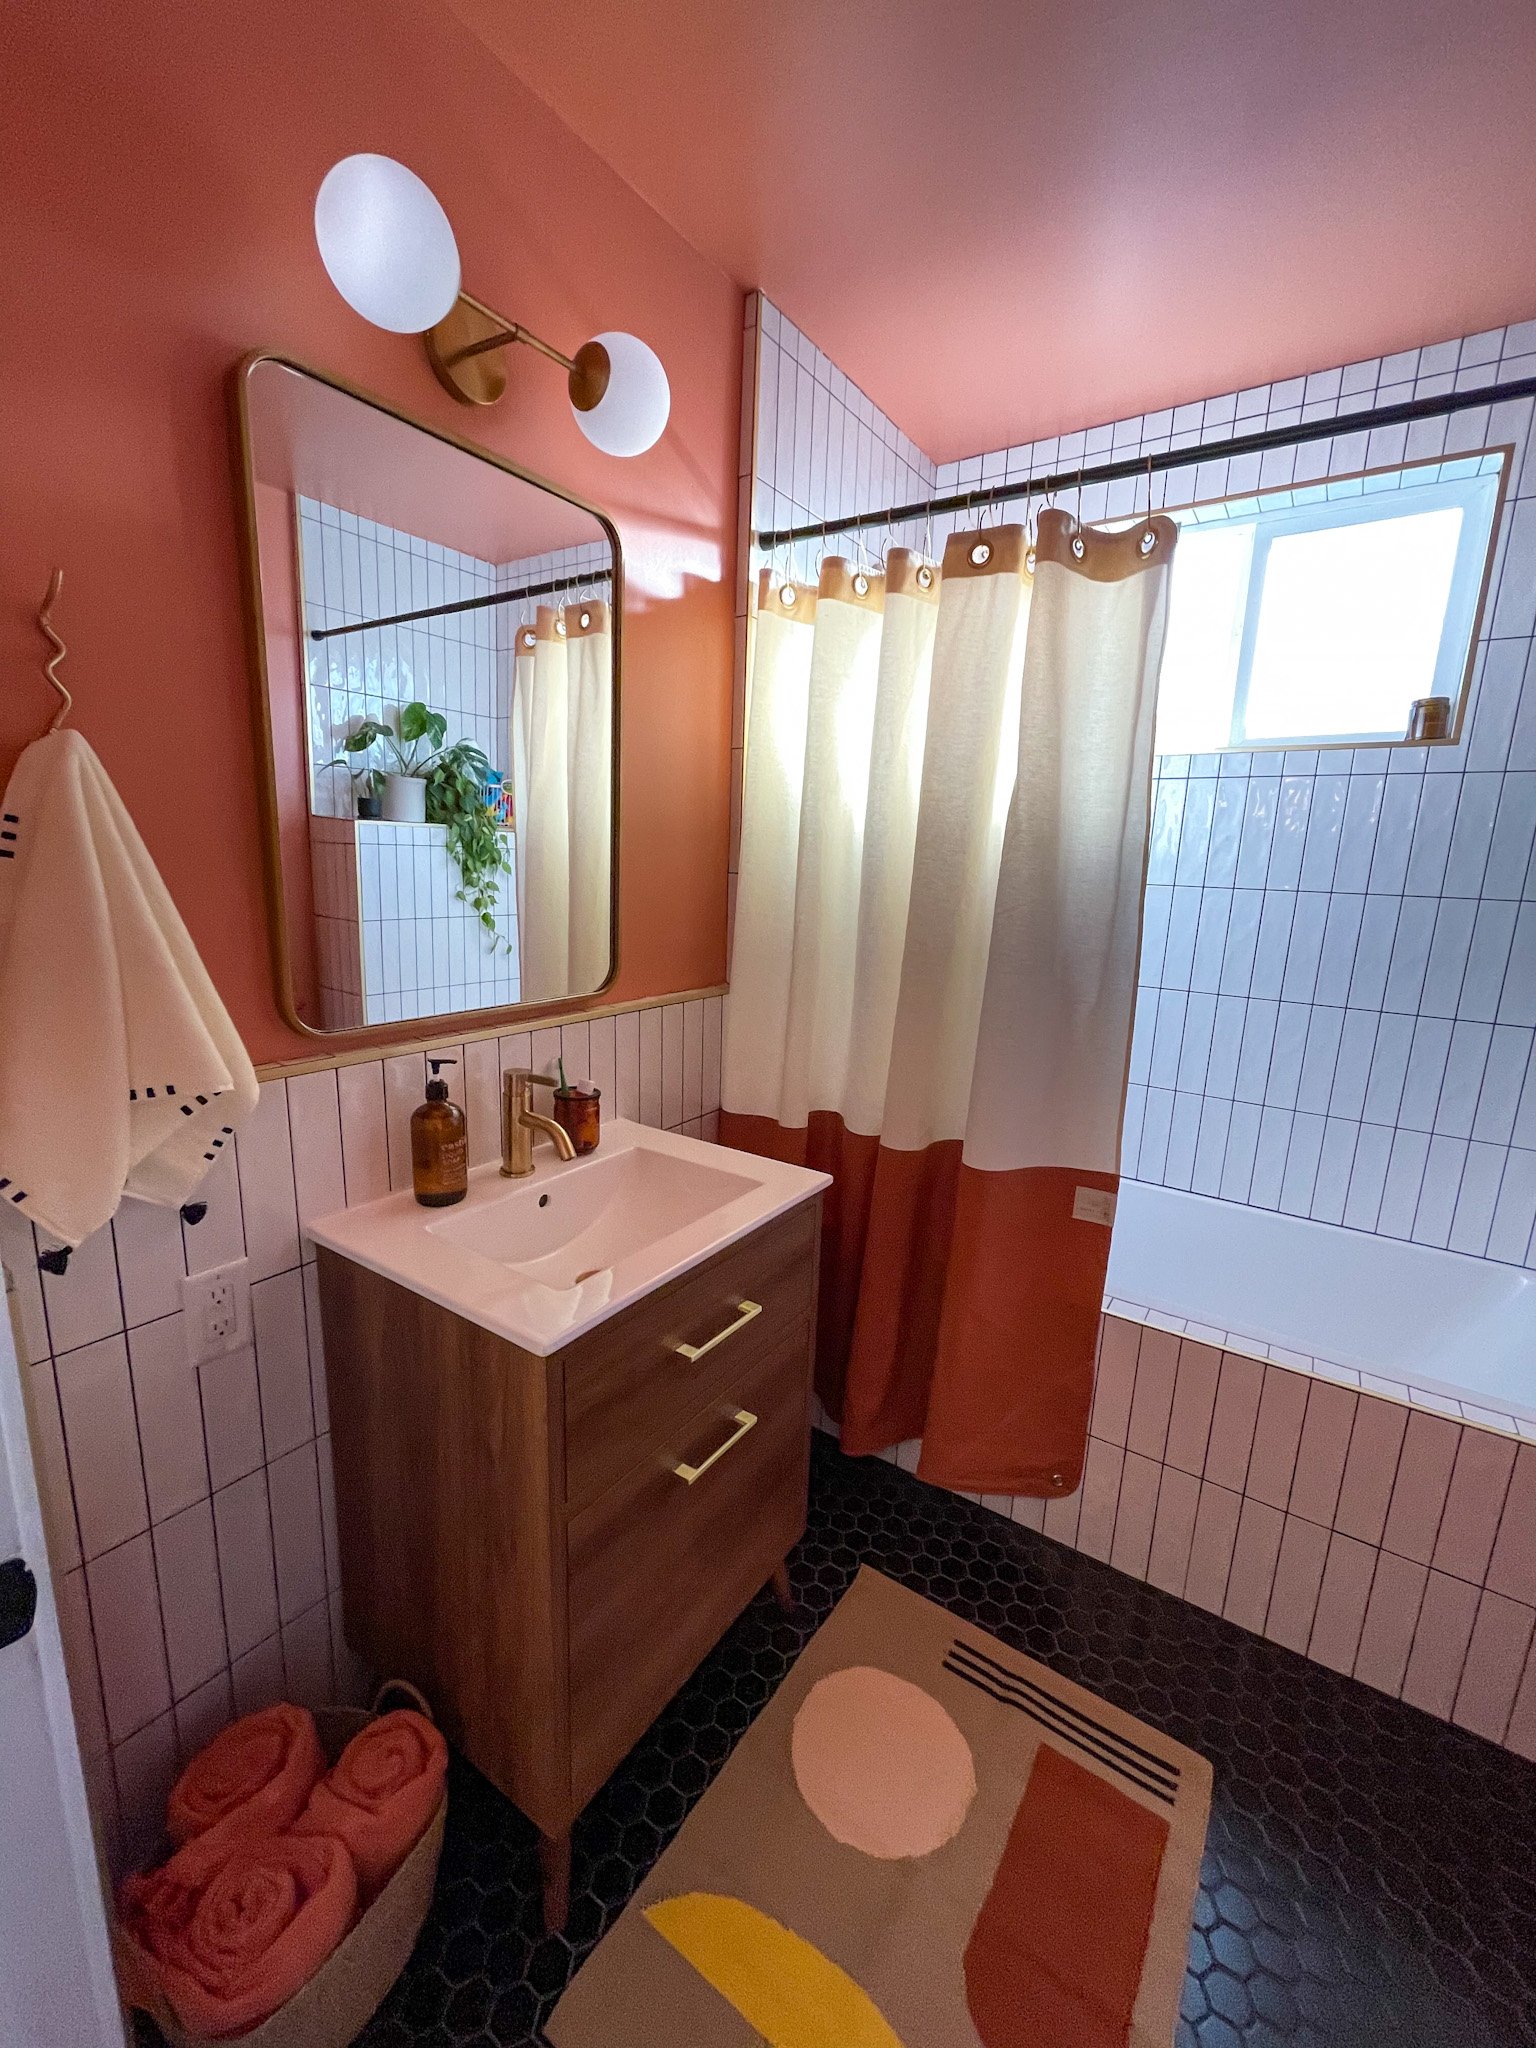
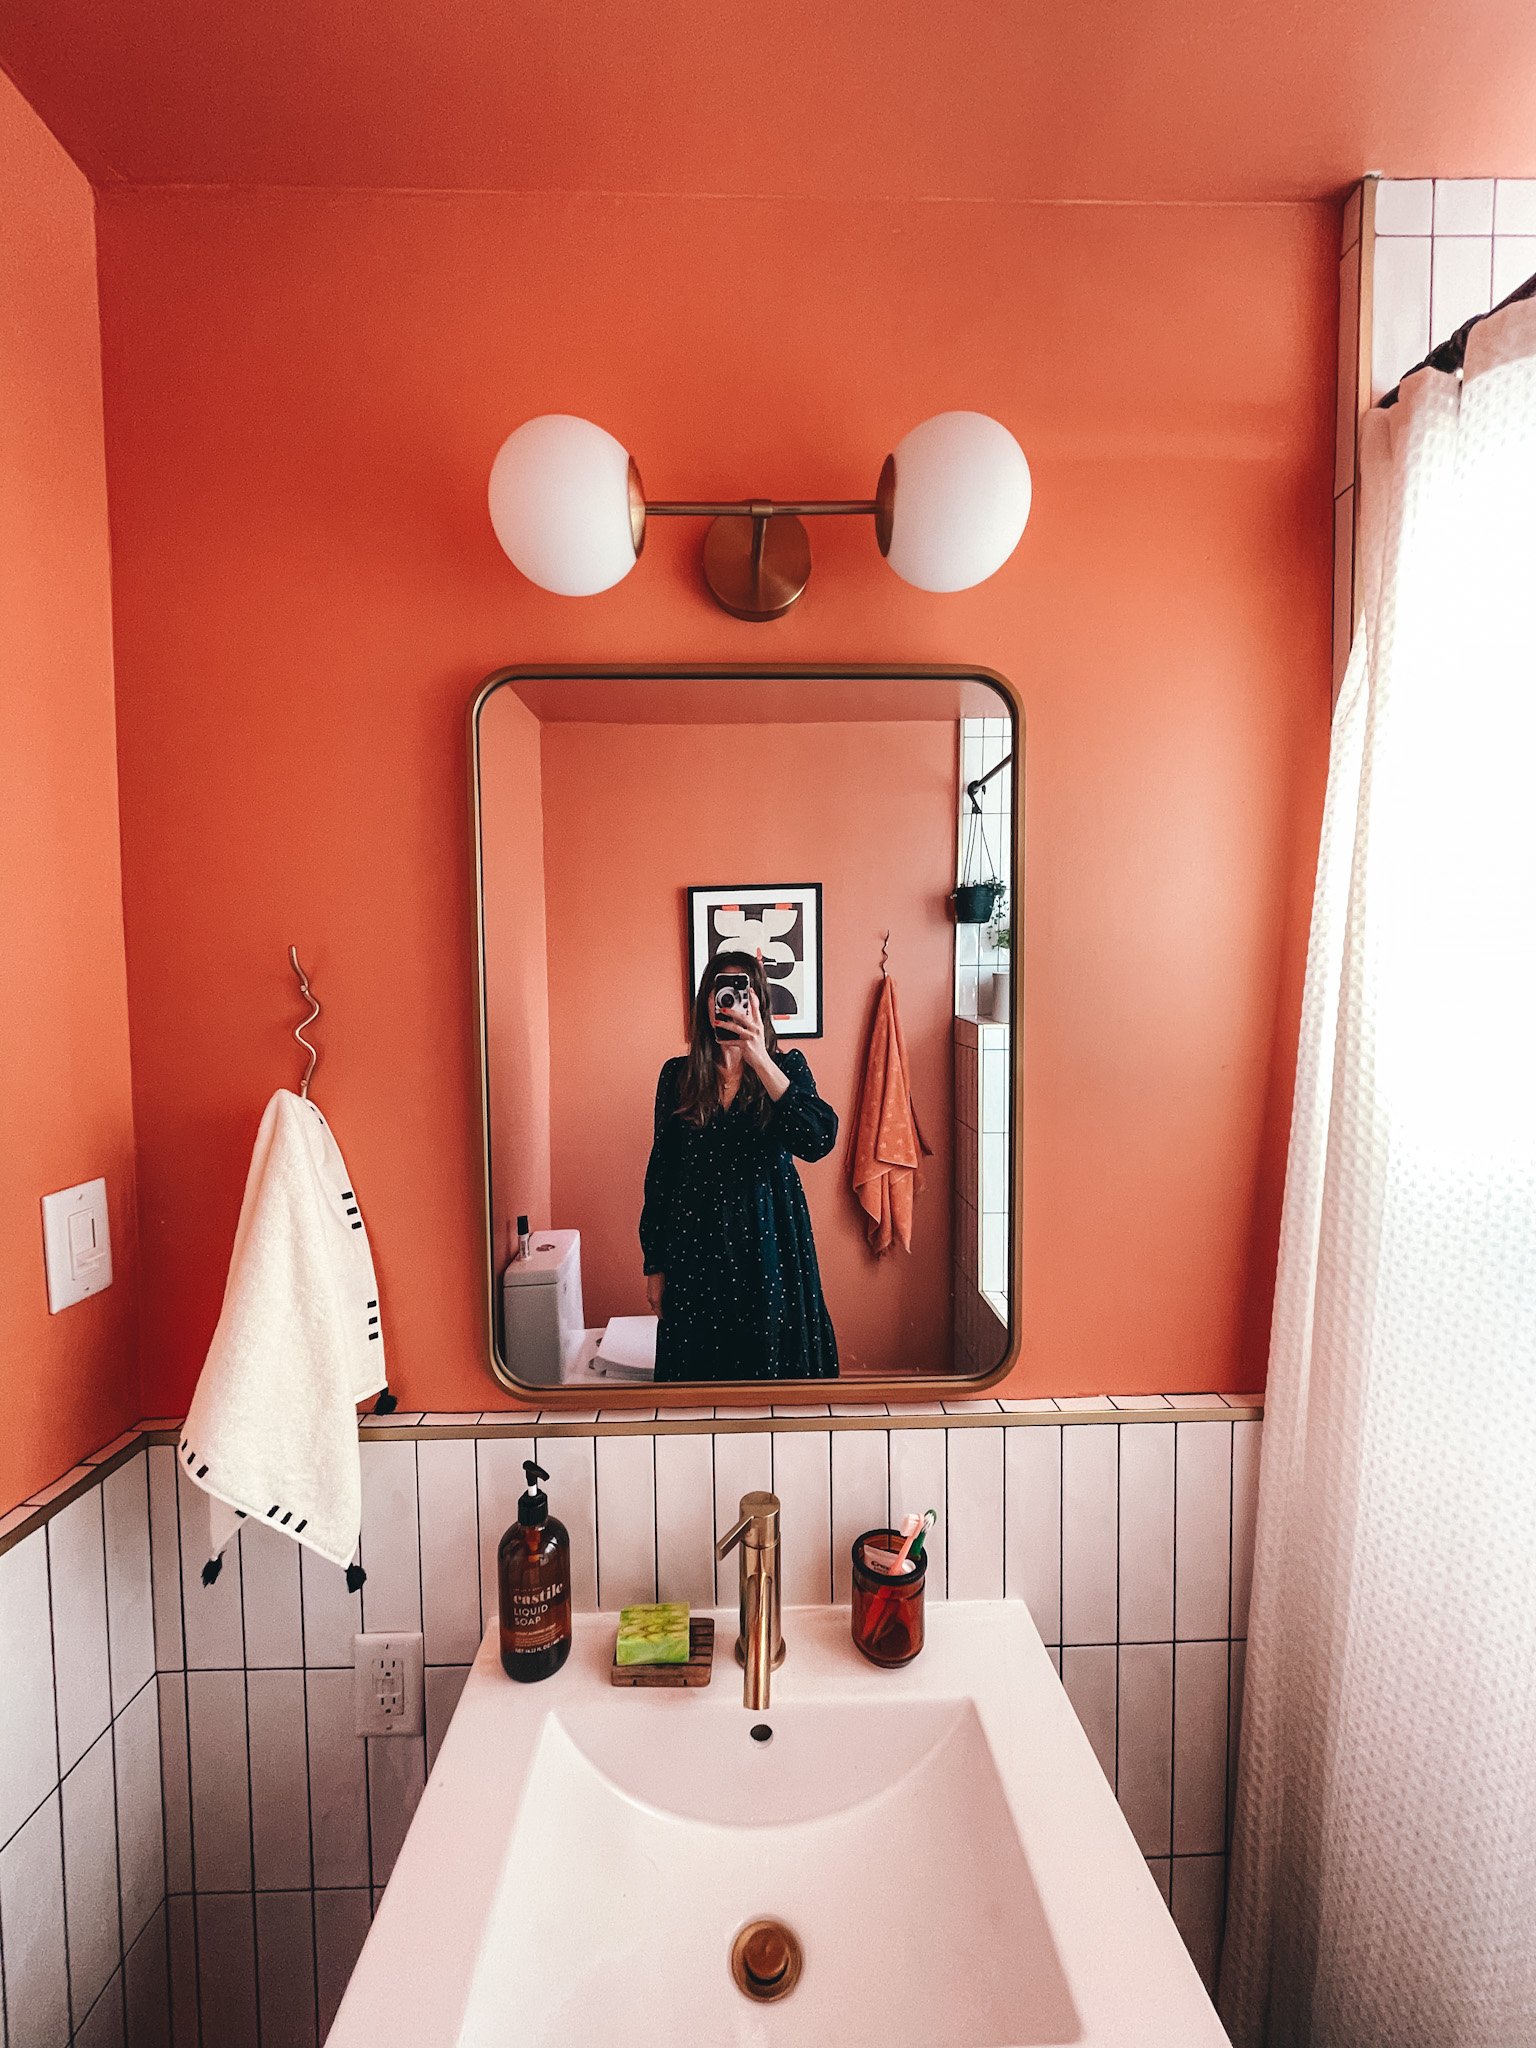
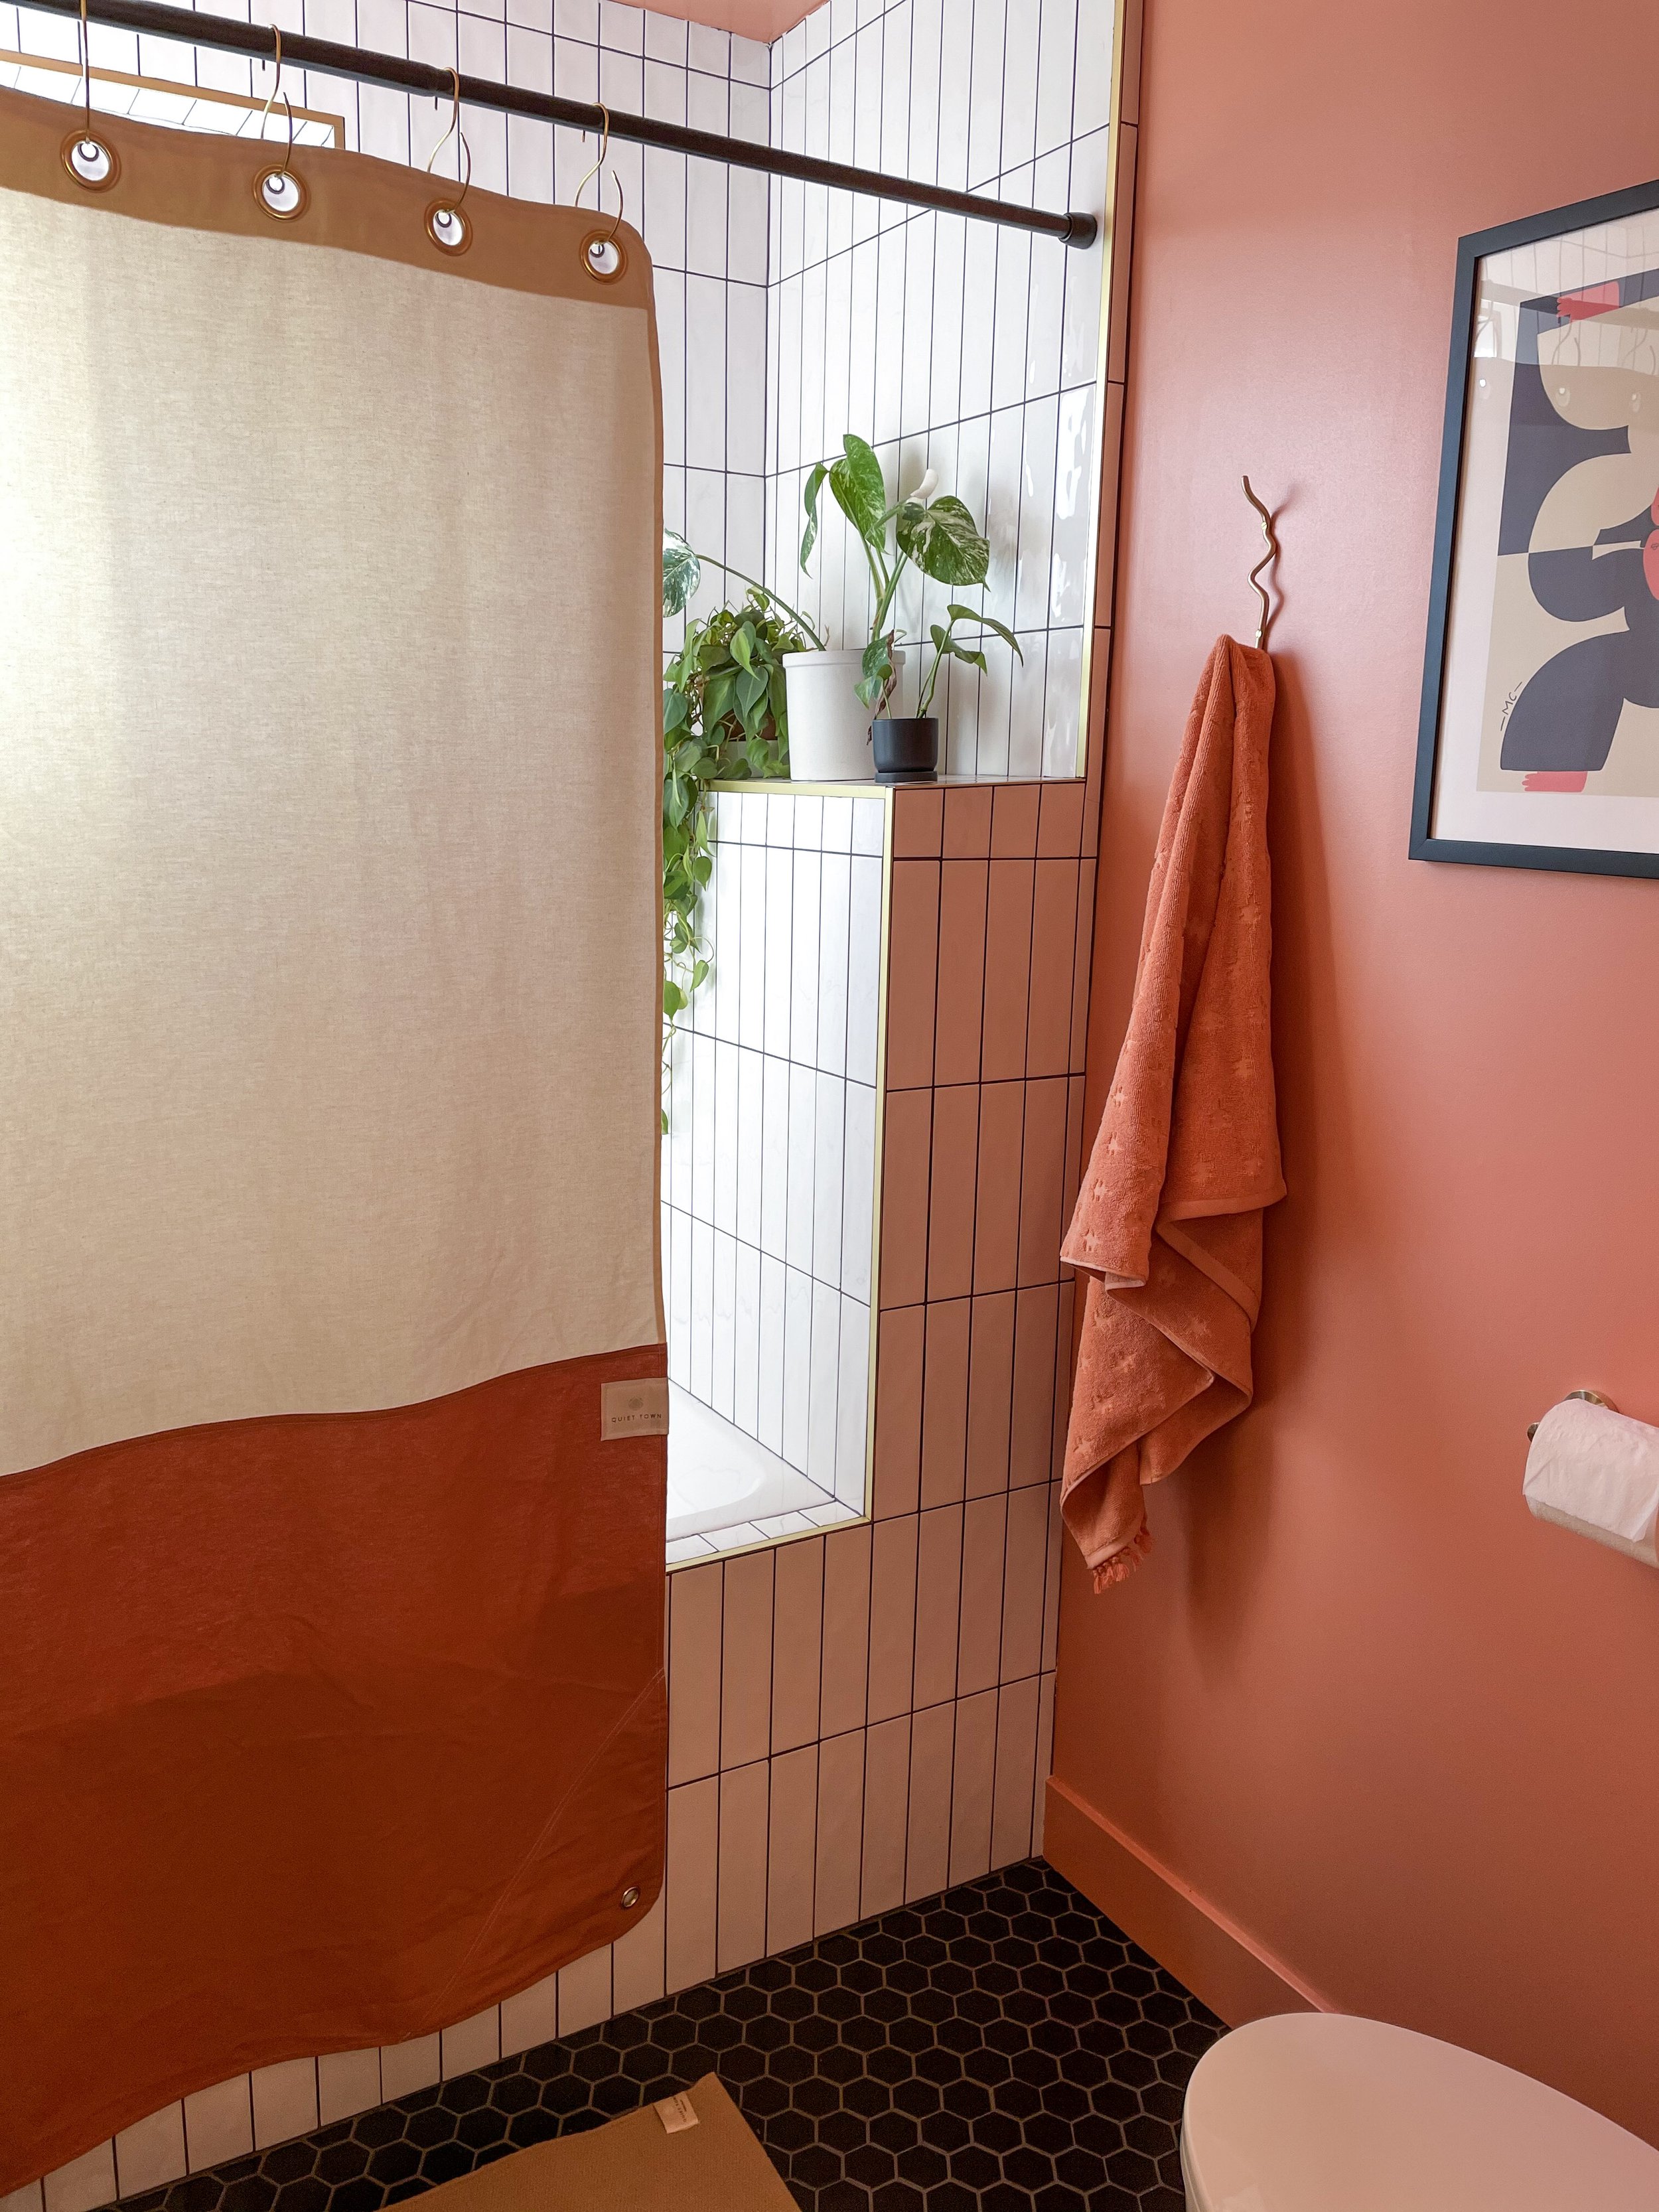
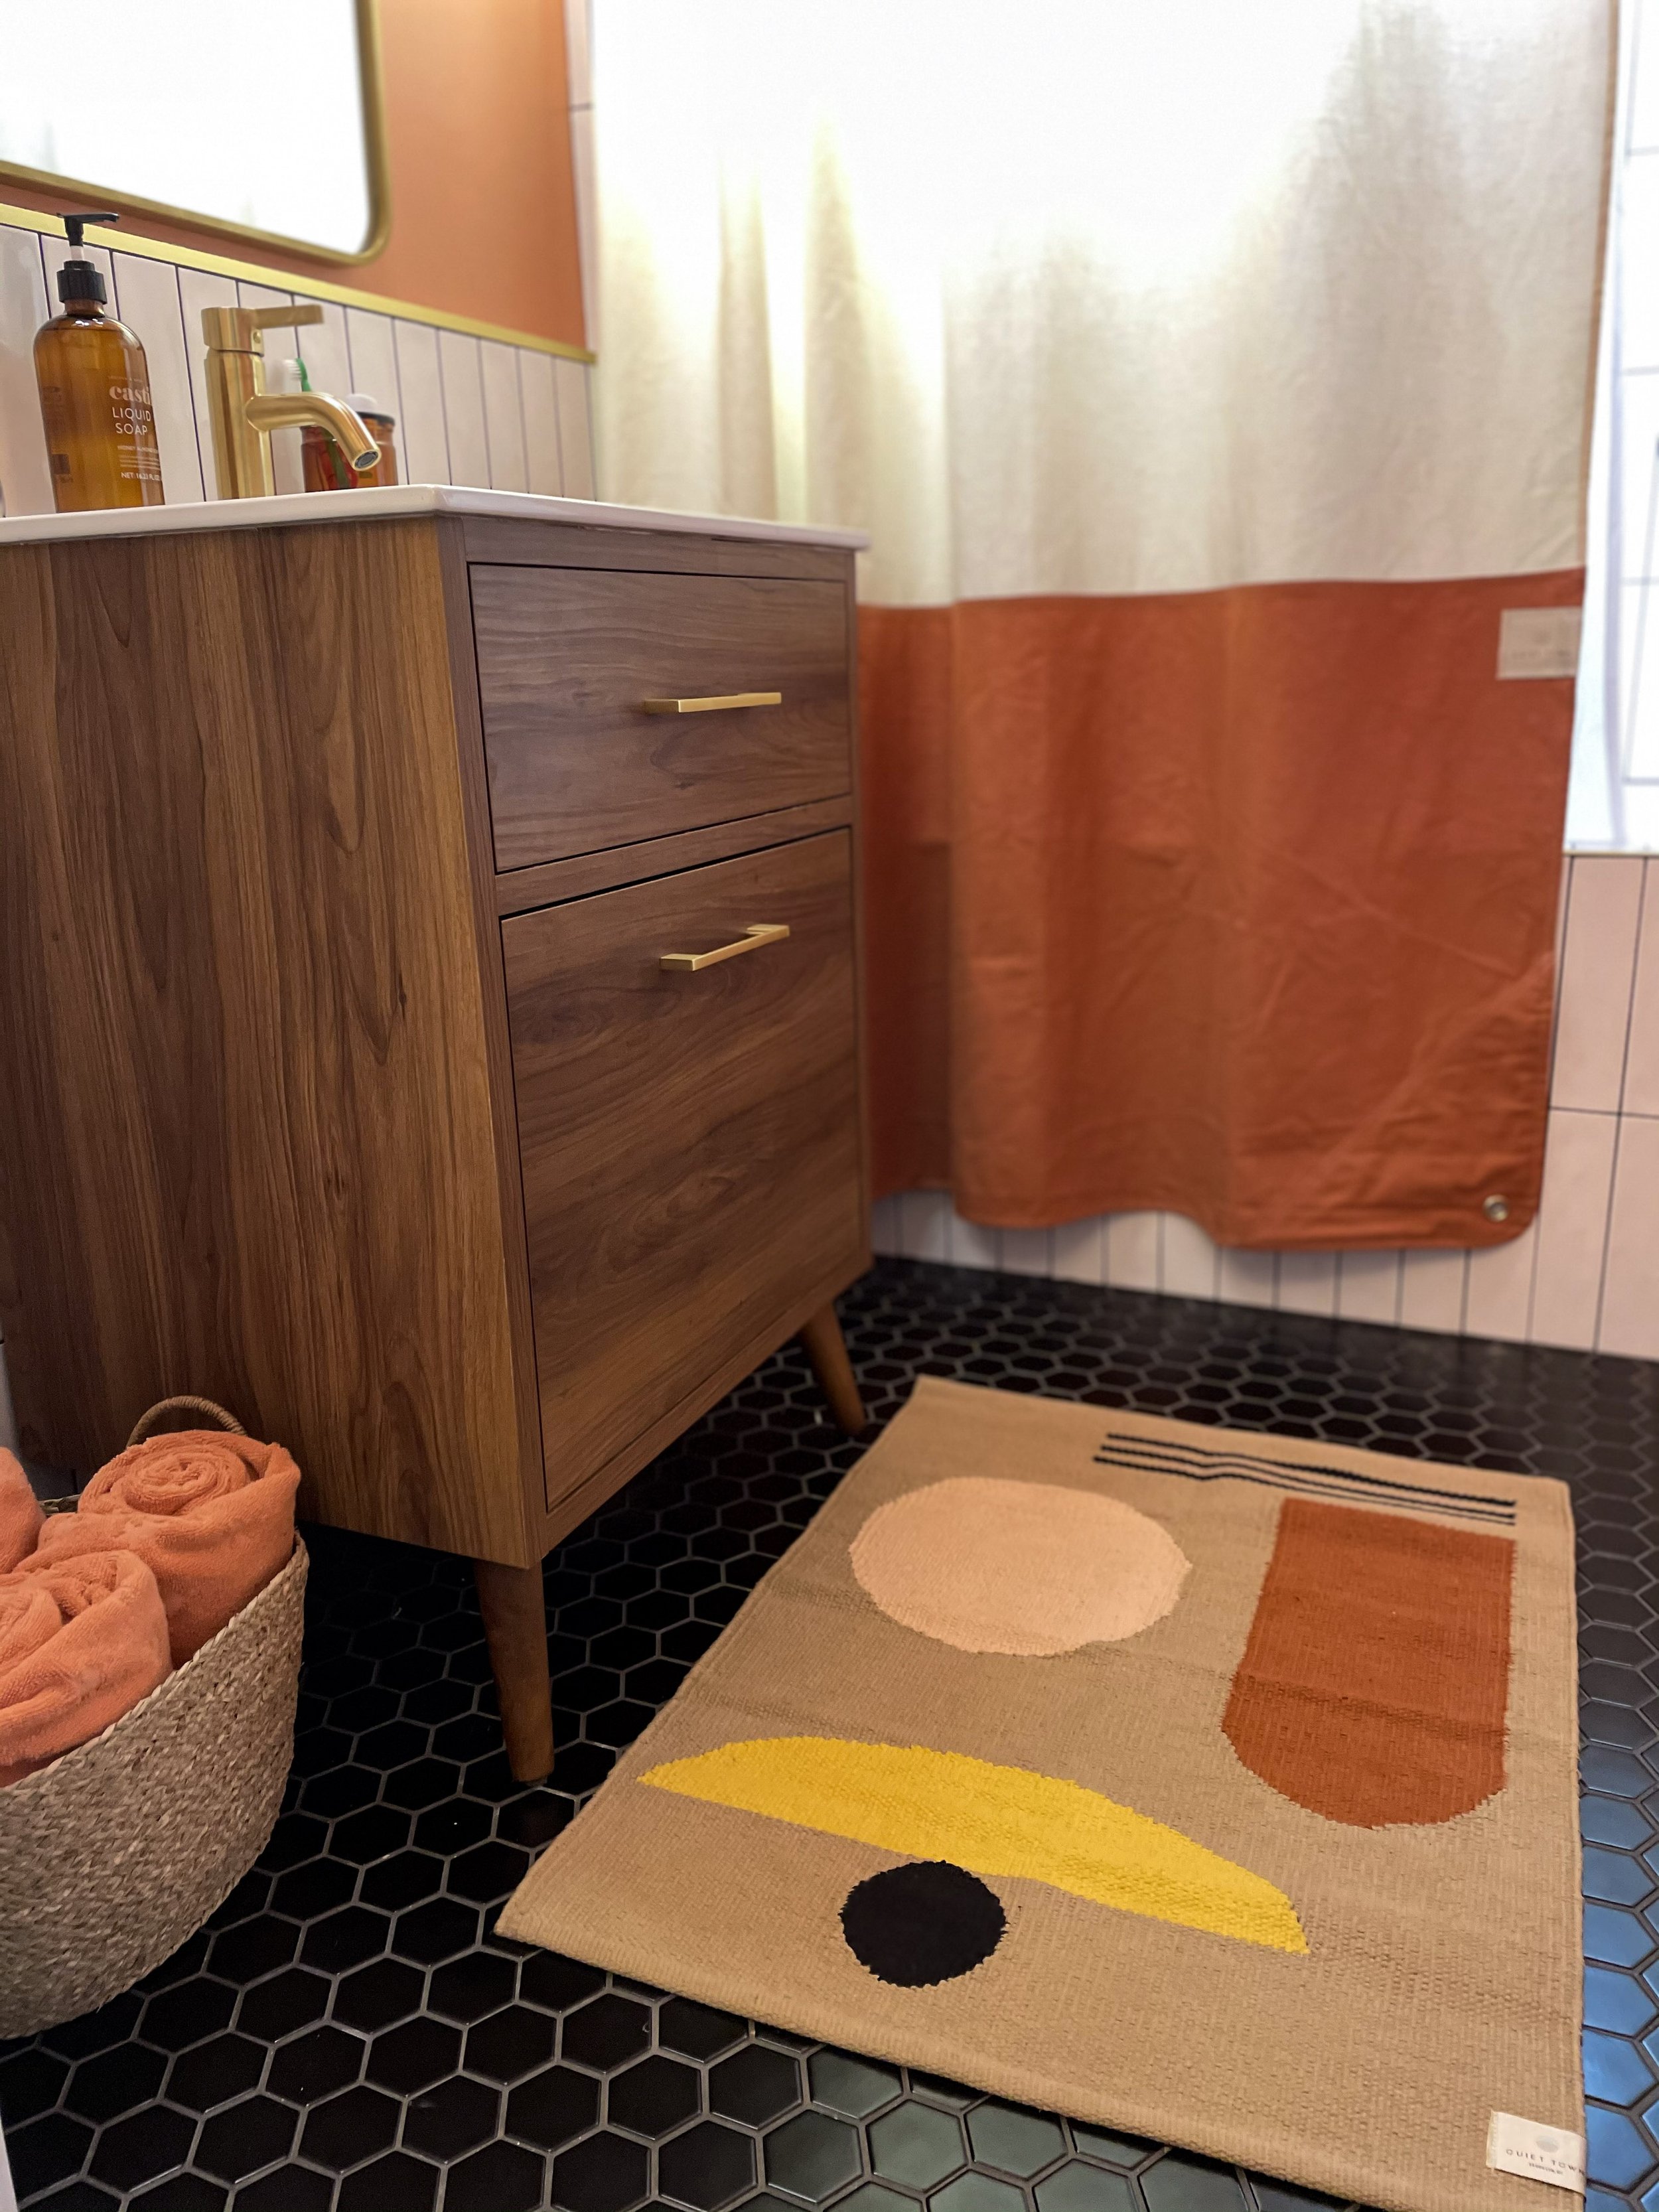

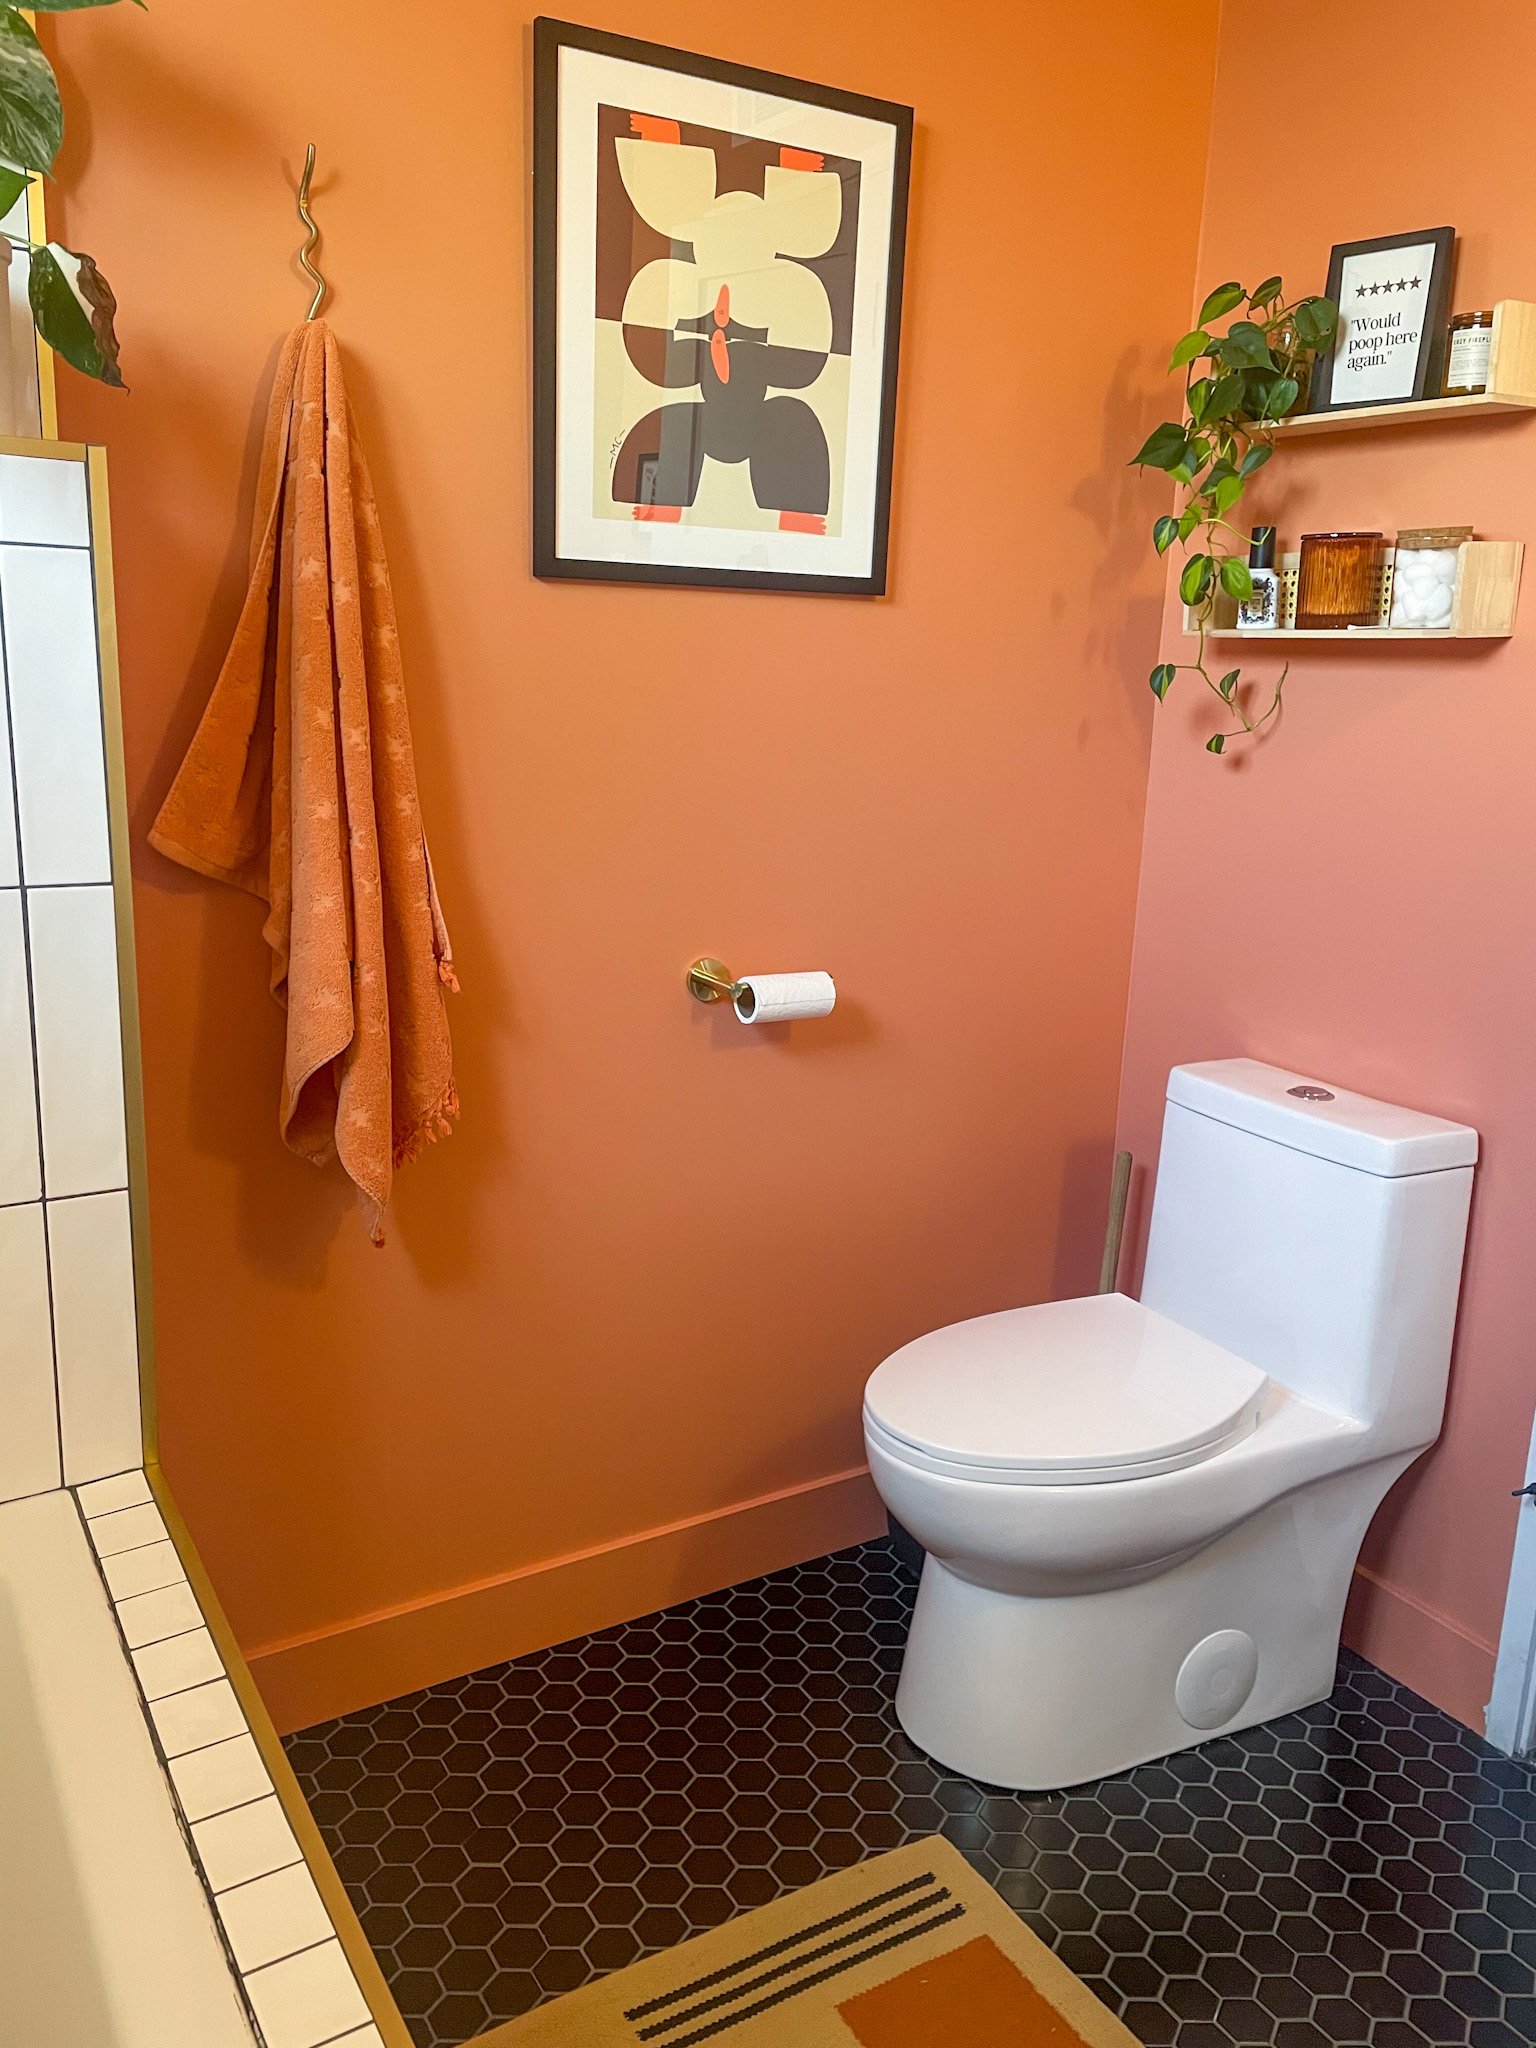
I had always dreamed of a terra cotta colored bathroom and so I knew that was going to be the color. I love how fun and playful it is! I had my eye on this Quiet Town shower curtain for a while and I love how well it went with the paint color we chose. To spruce up the space with some art, I got crafty and painted this little cowboy boot picture and purchased the other wall art from Society 6. Some final touches that pulled it together where bringing in my plants for some liveliness, adding bath towels (from Target) that matched the paint, and grabbing some jars from World Market for the $5 Target shelves. I loved how it turned out!
NEXT UP: LIVING ROOM
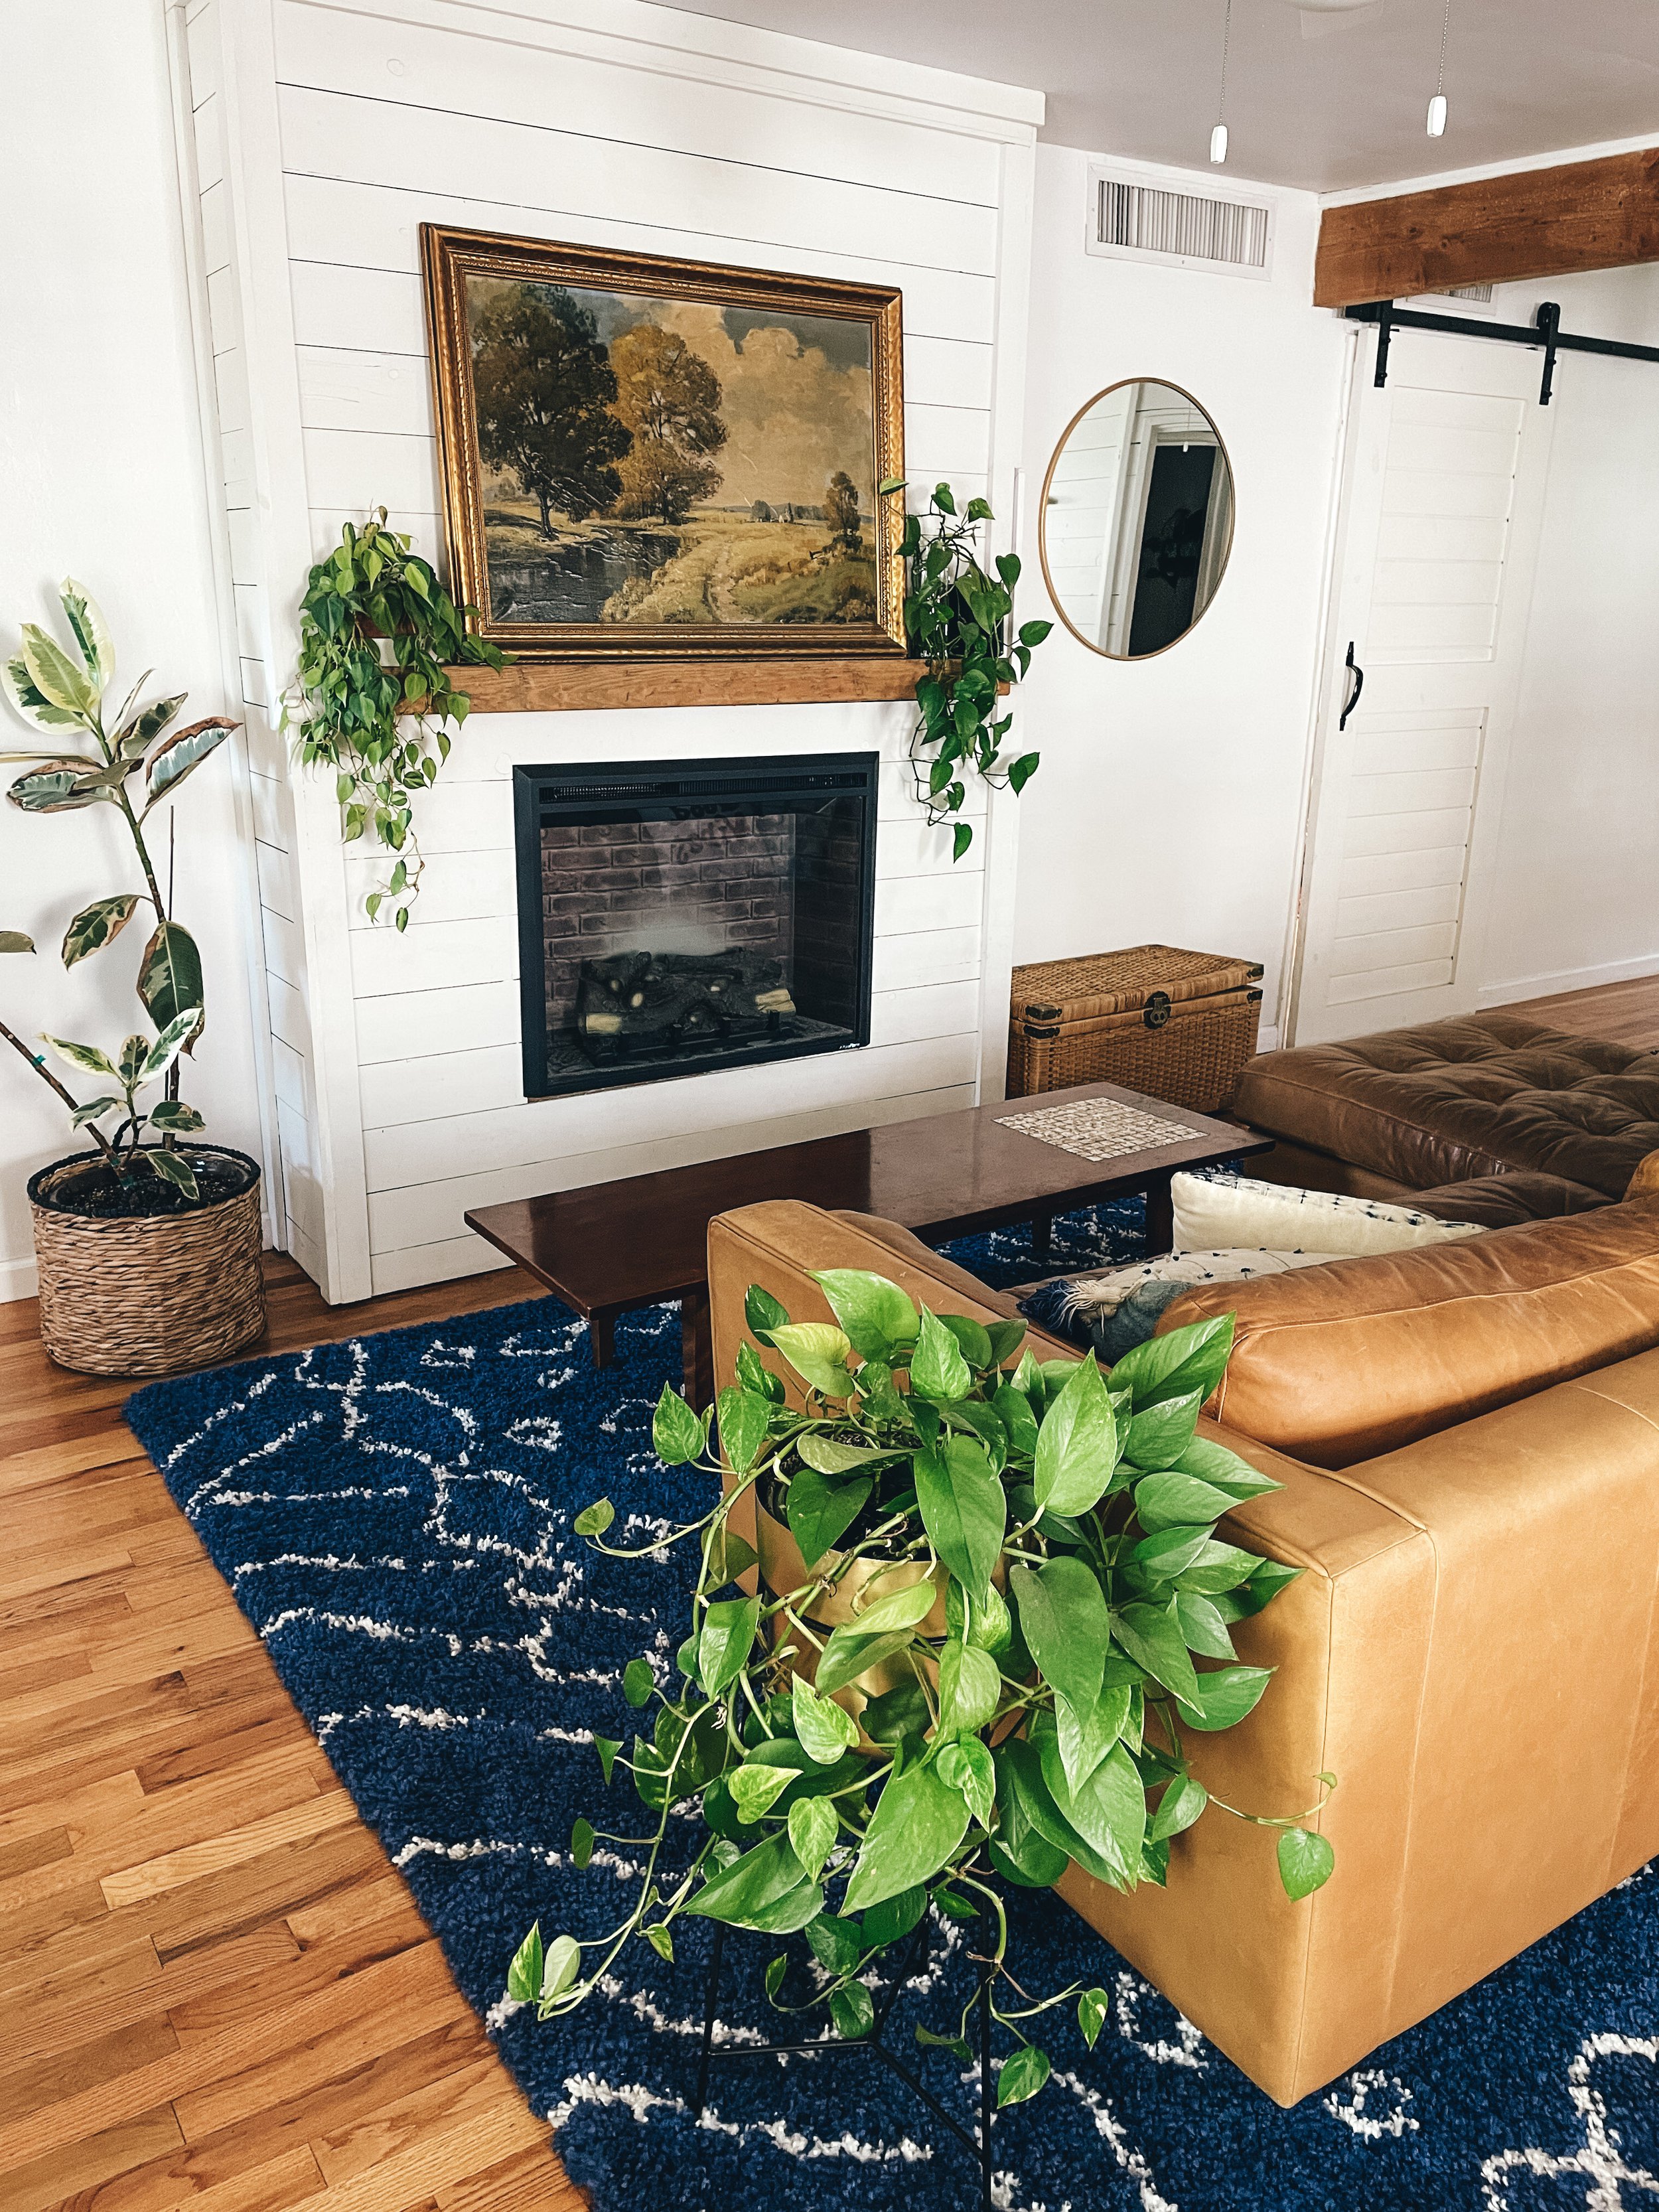
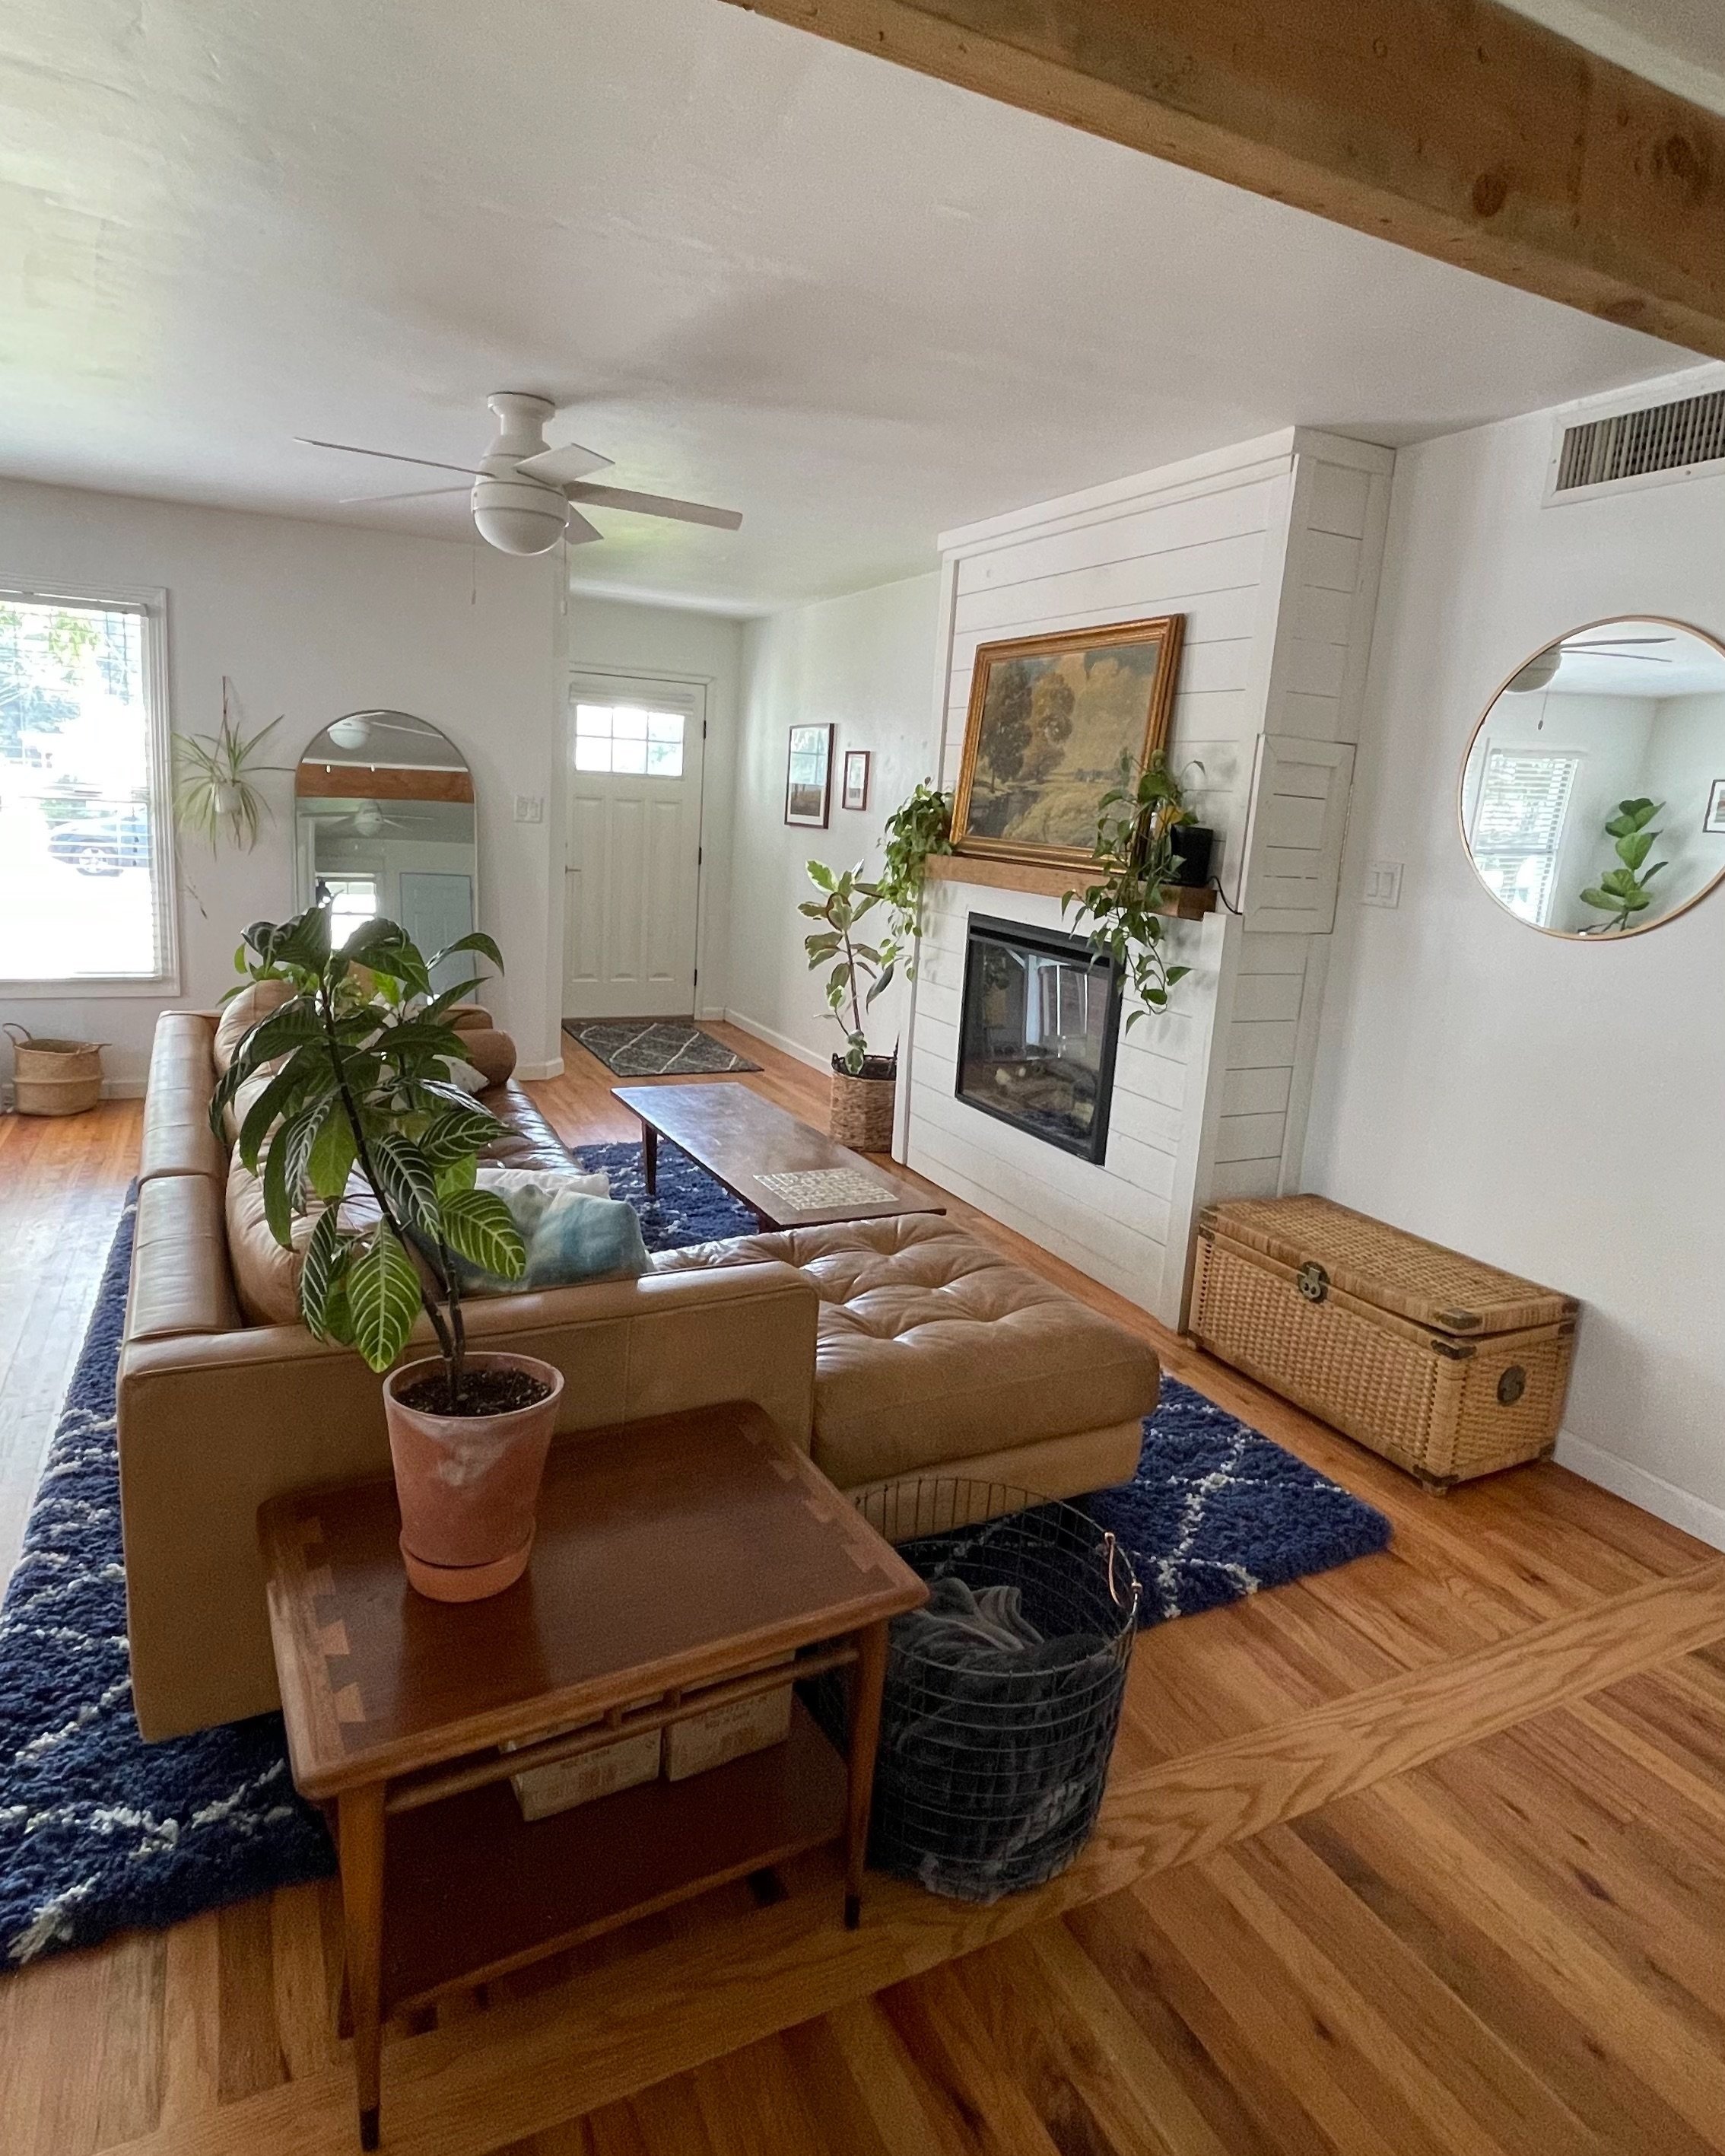
You can find my inspo for this room here! As much as I loved the cozy vibes that the faux fireplace gave, we just didn’t have enough room for seating when guests came over. We knew we wanted to open up the living area by removing the fake fireplace. The design also needed to be cohesive with the kitchen and dining area since they are all in one big open concept space.
I did love having Jason’s great grandma’s painting on the mantle and my grandfather’s handmade tile inlay coffee table. But we had to relocate them for our new design. We put the picture in the office and we stored the coffee table away because if you have a kid you know that pointed corners can be very dangerous!
BEFORE
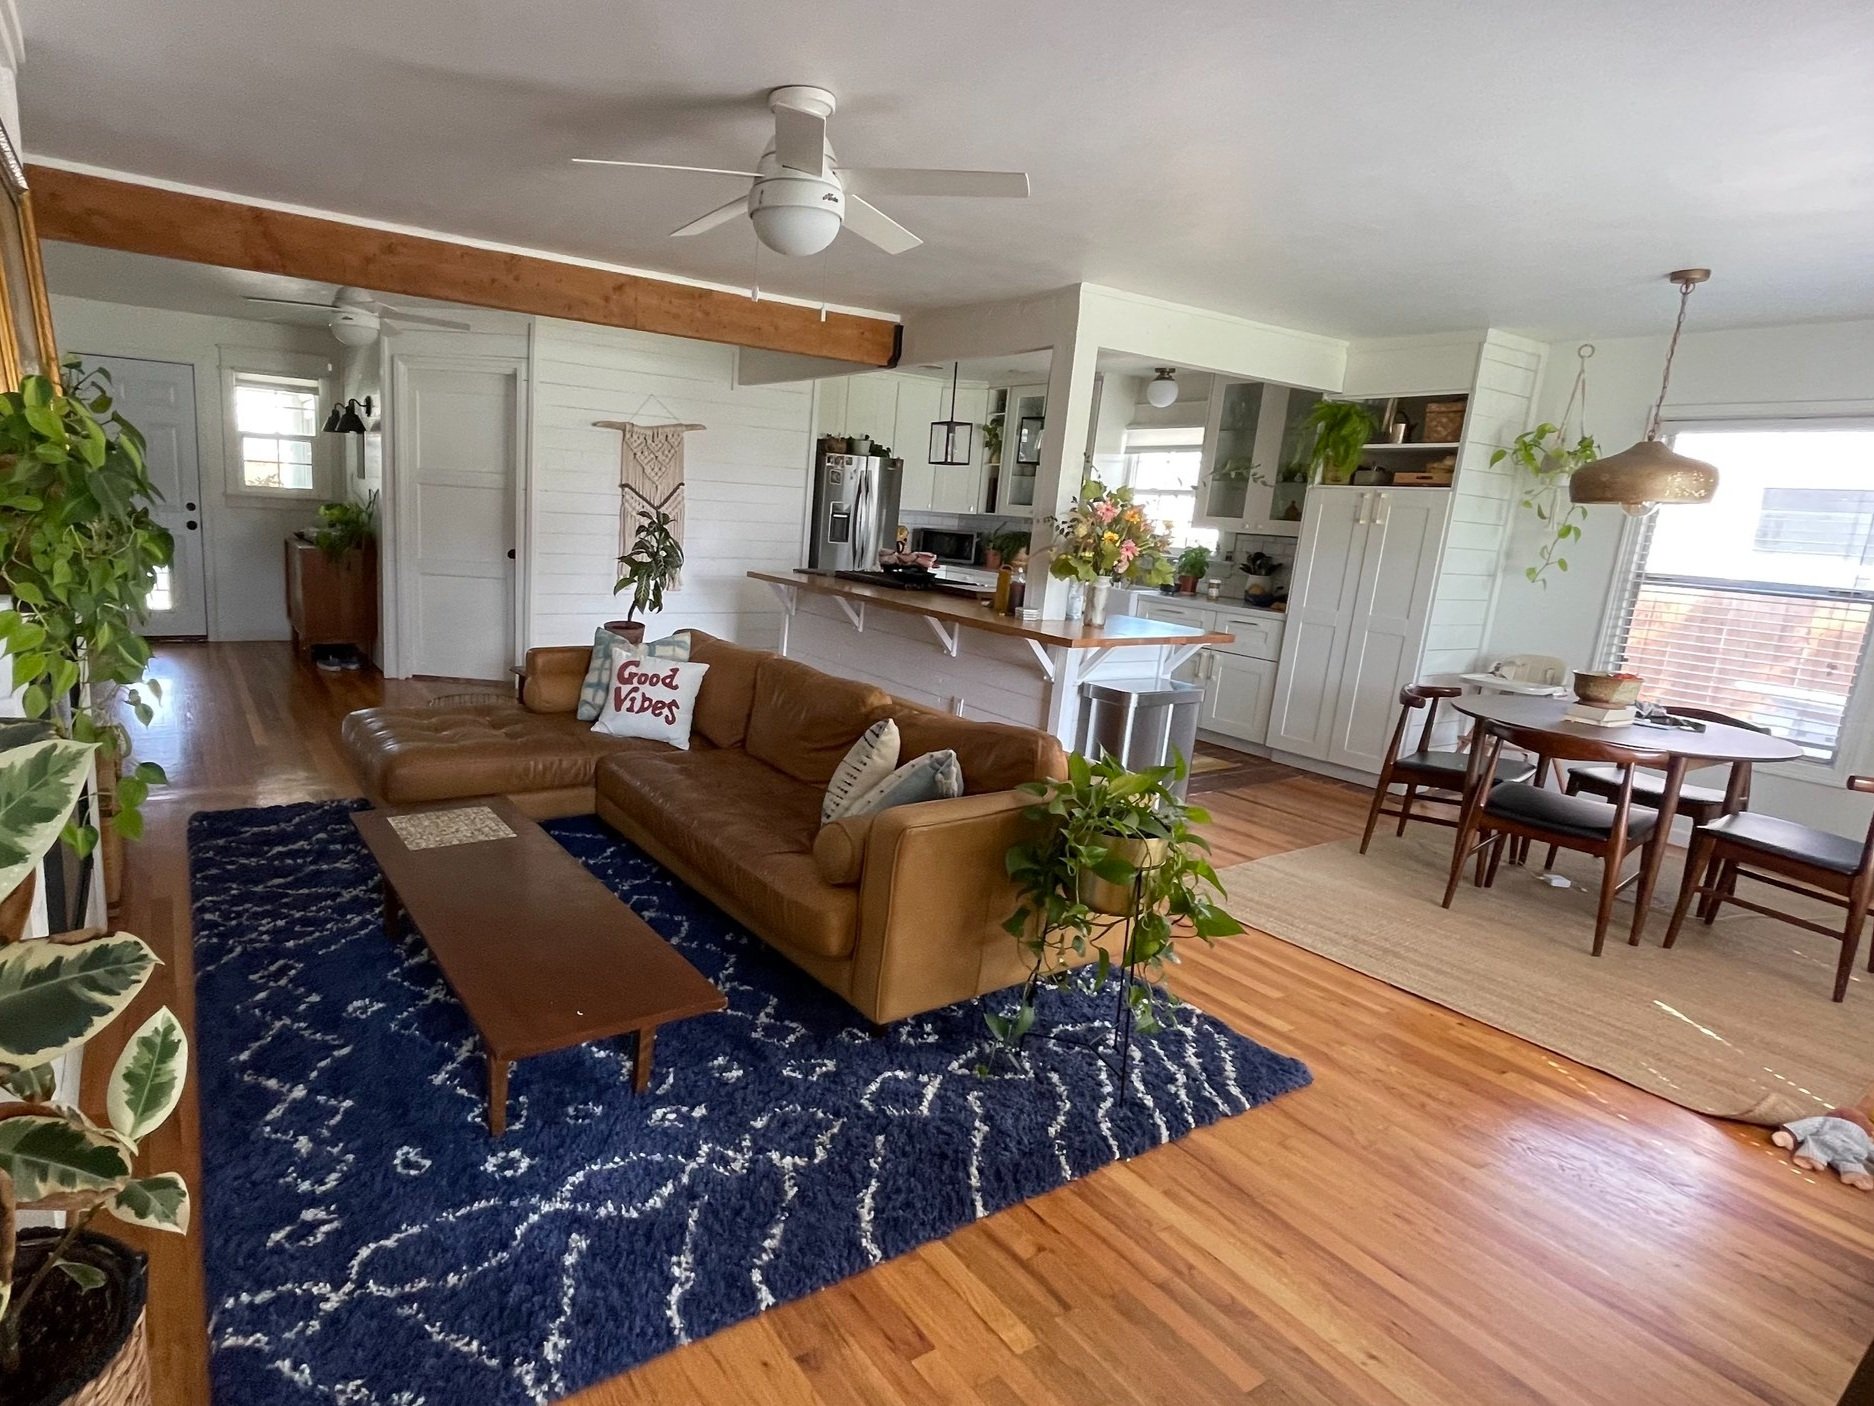
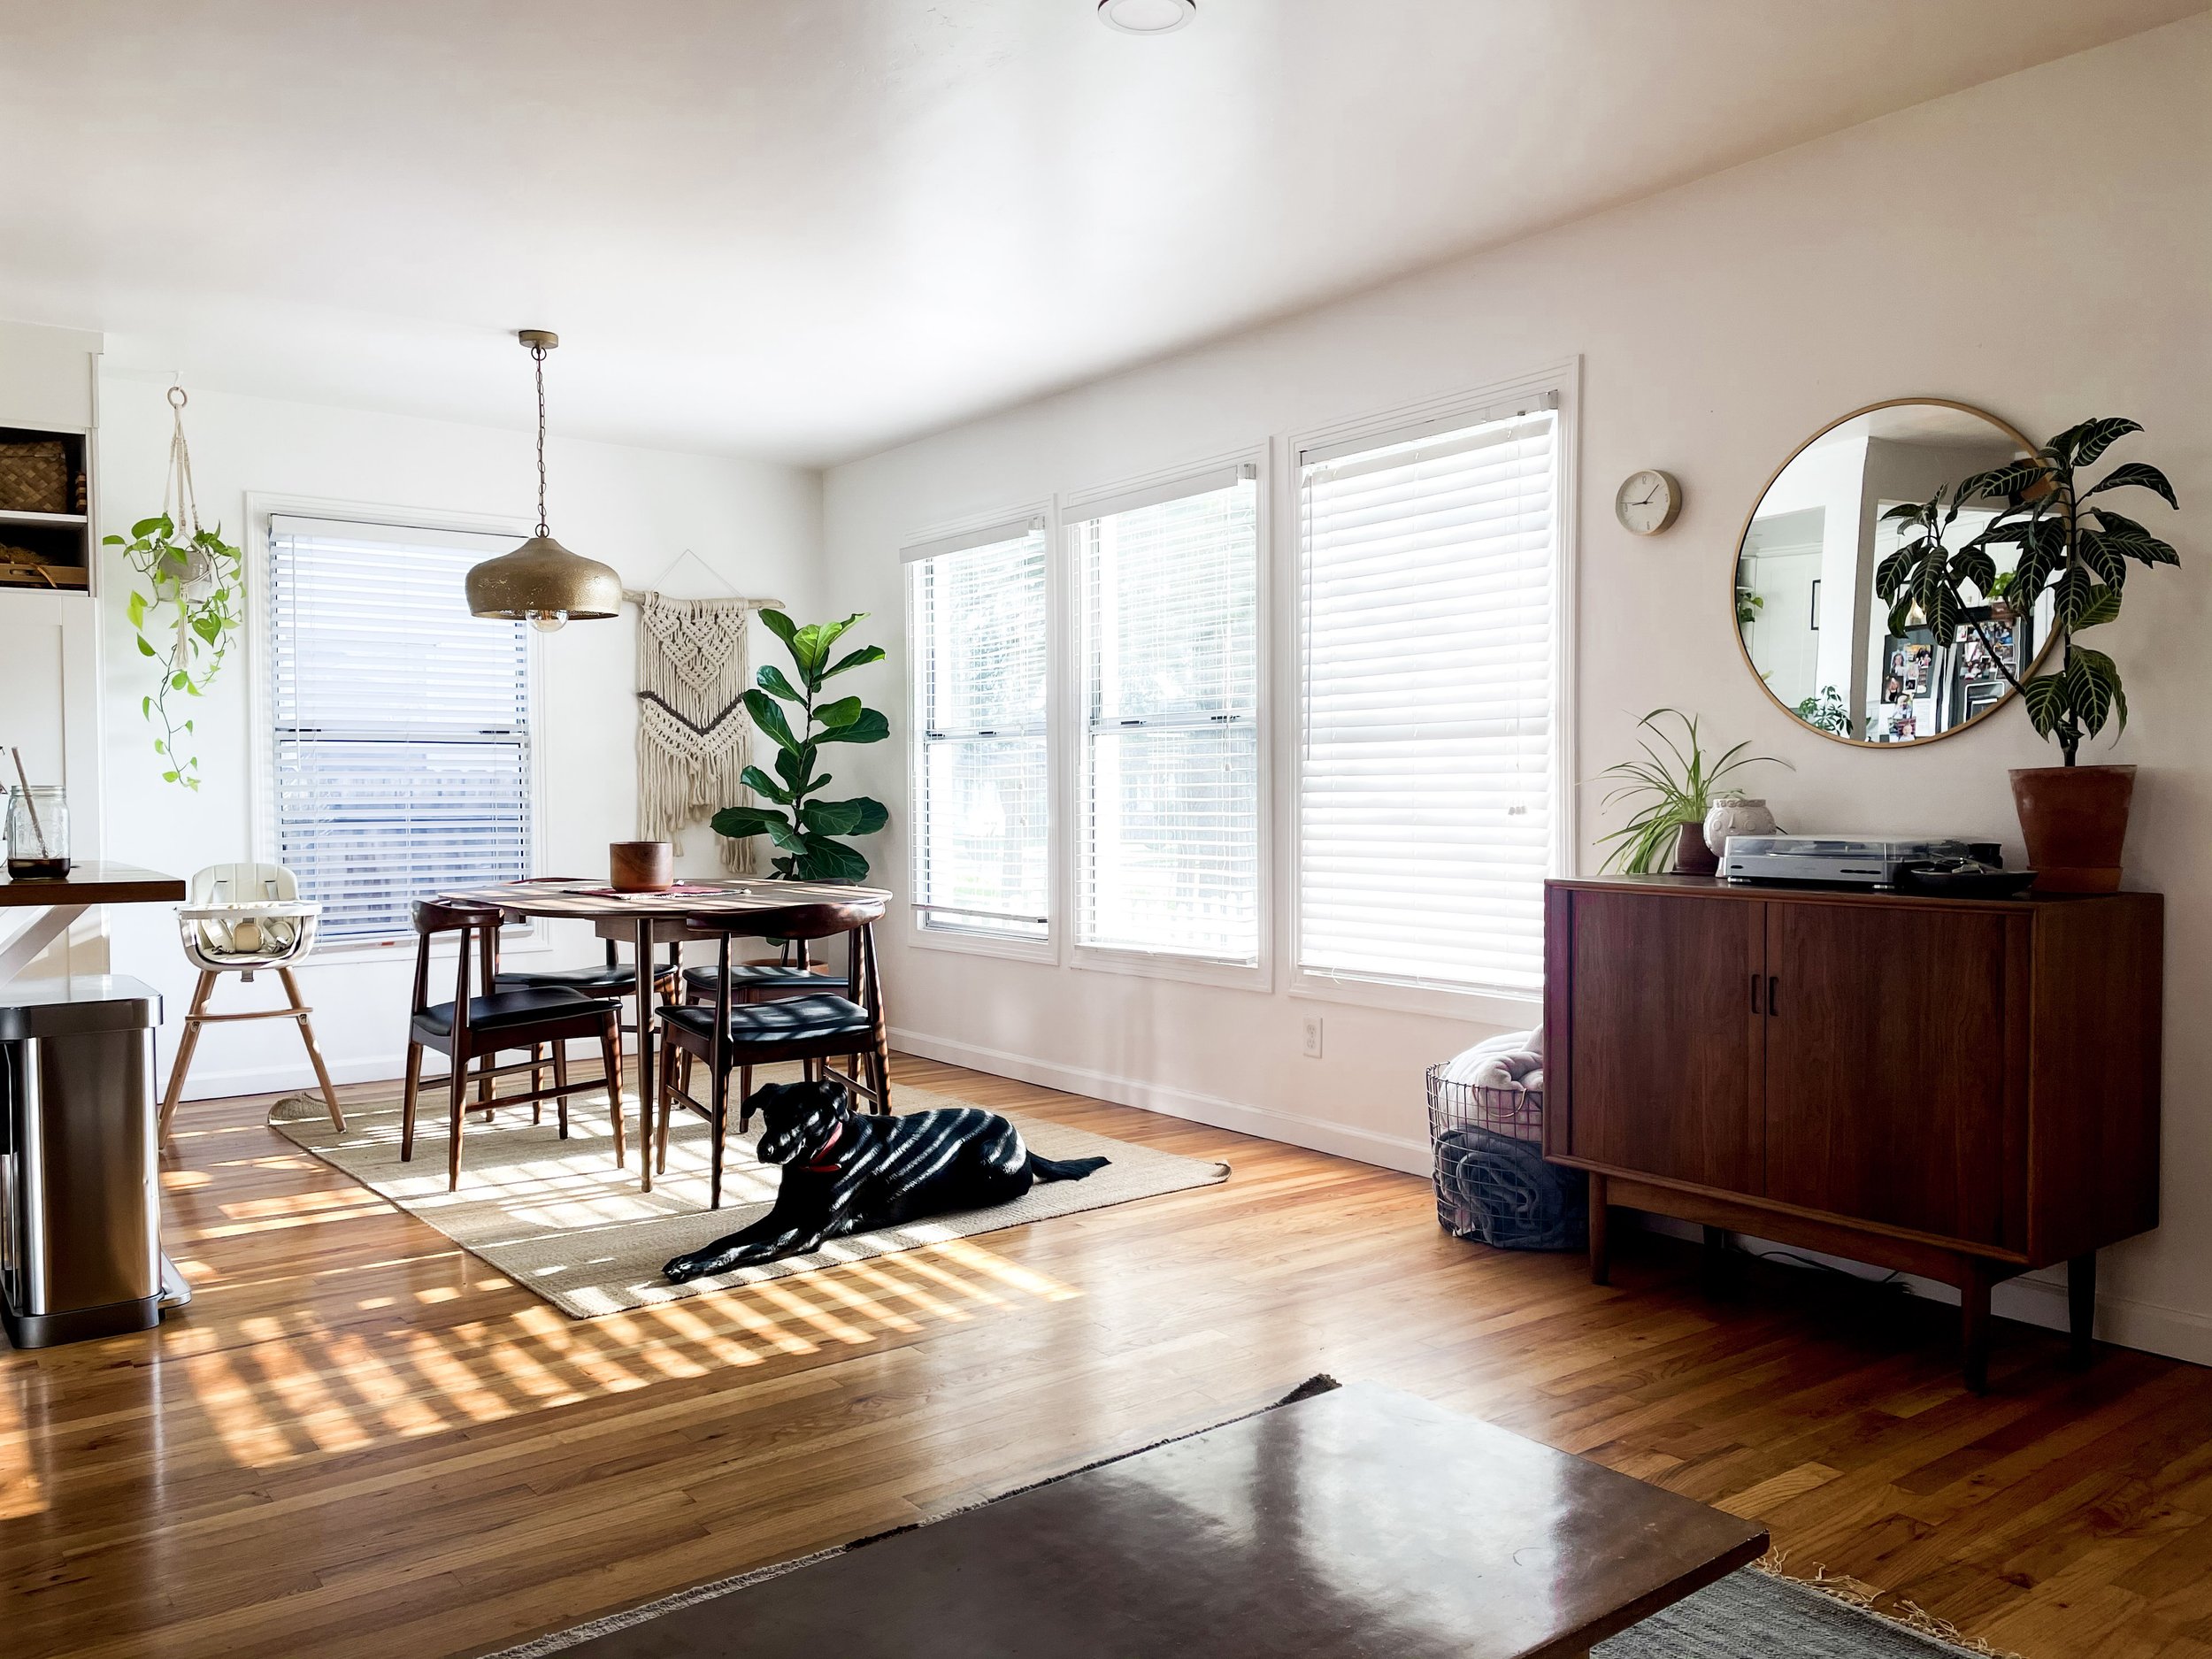
AFTER:
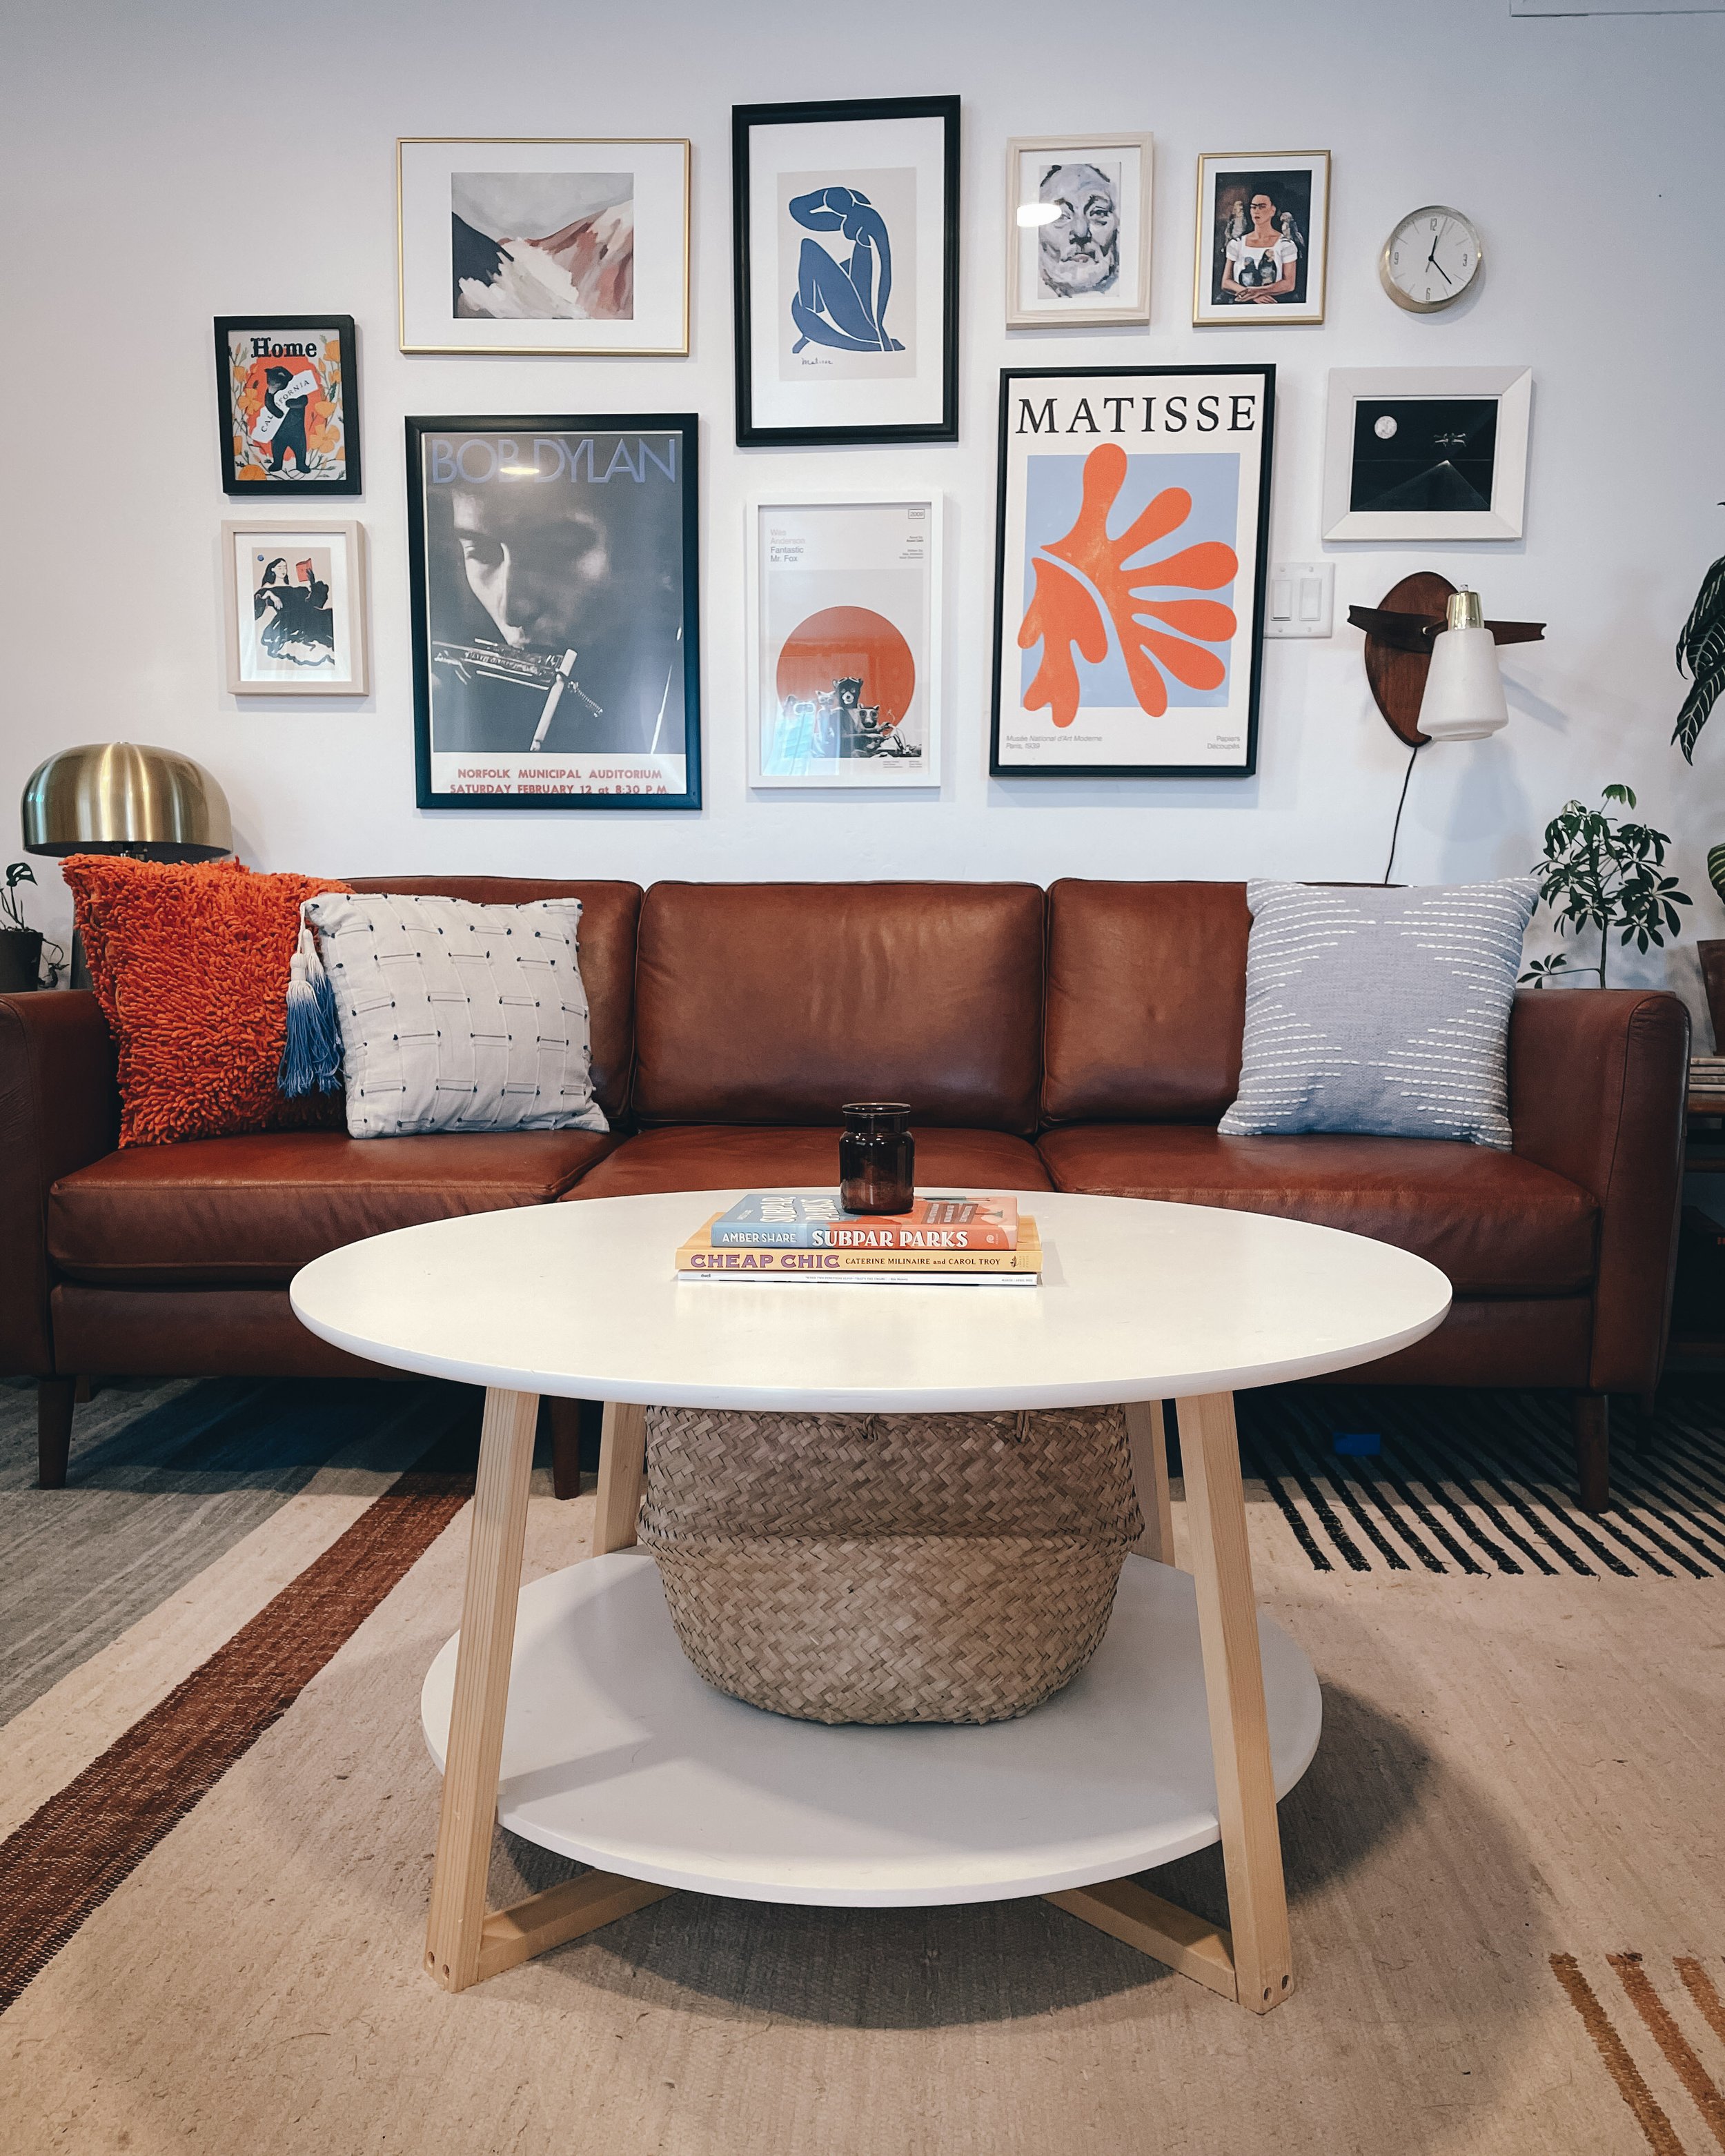
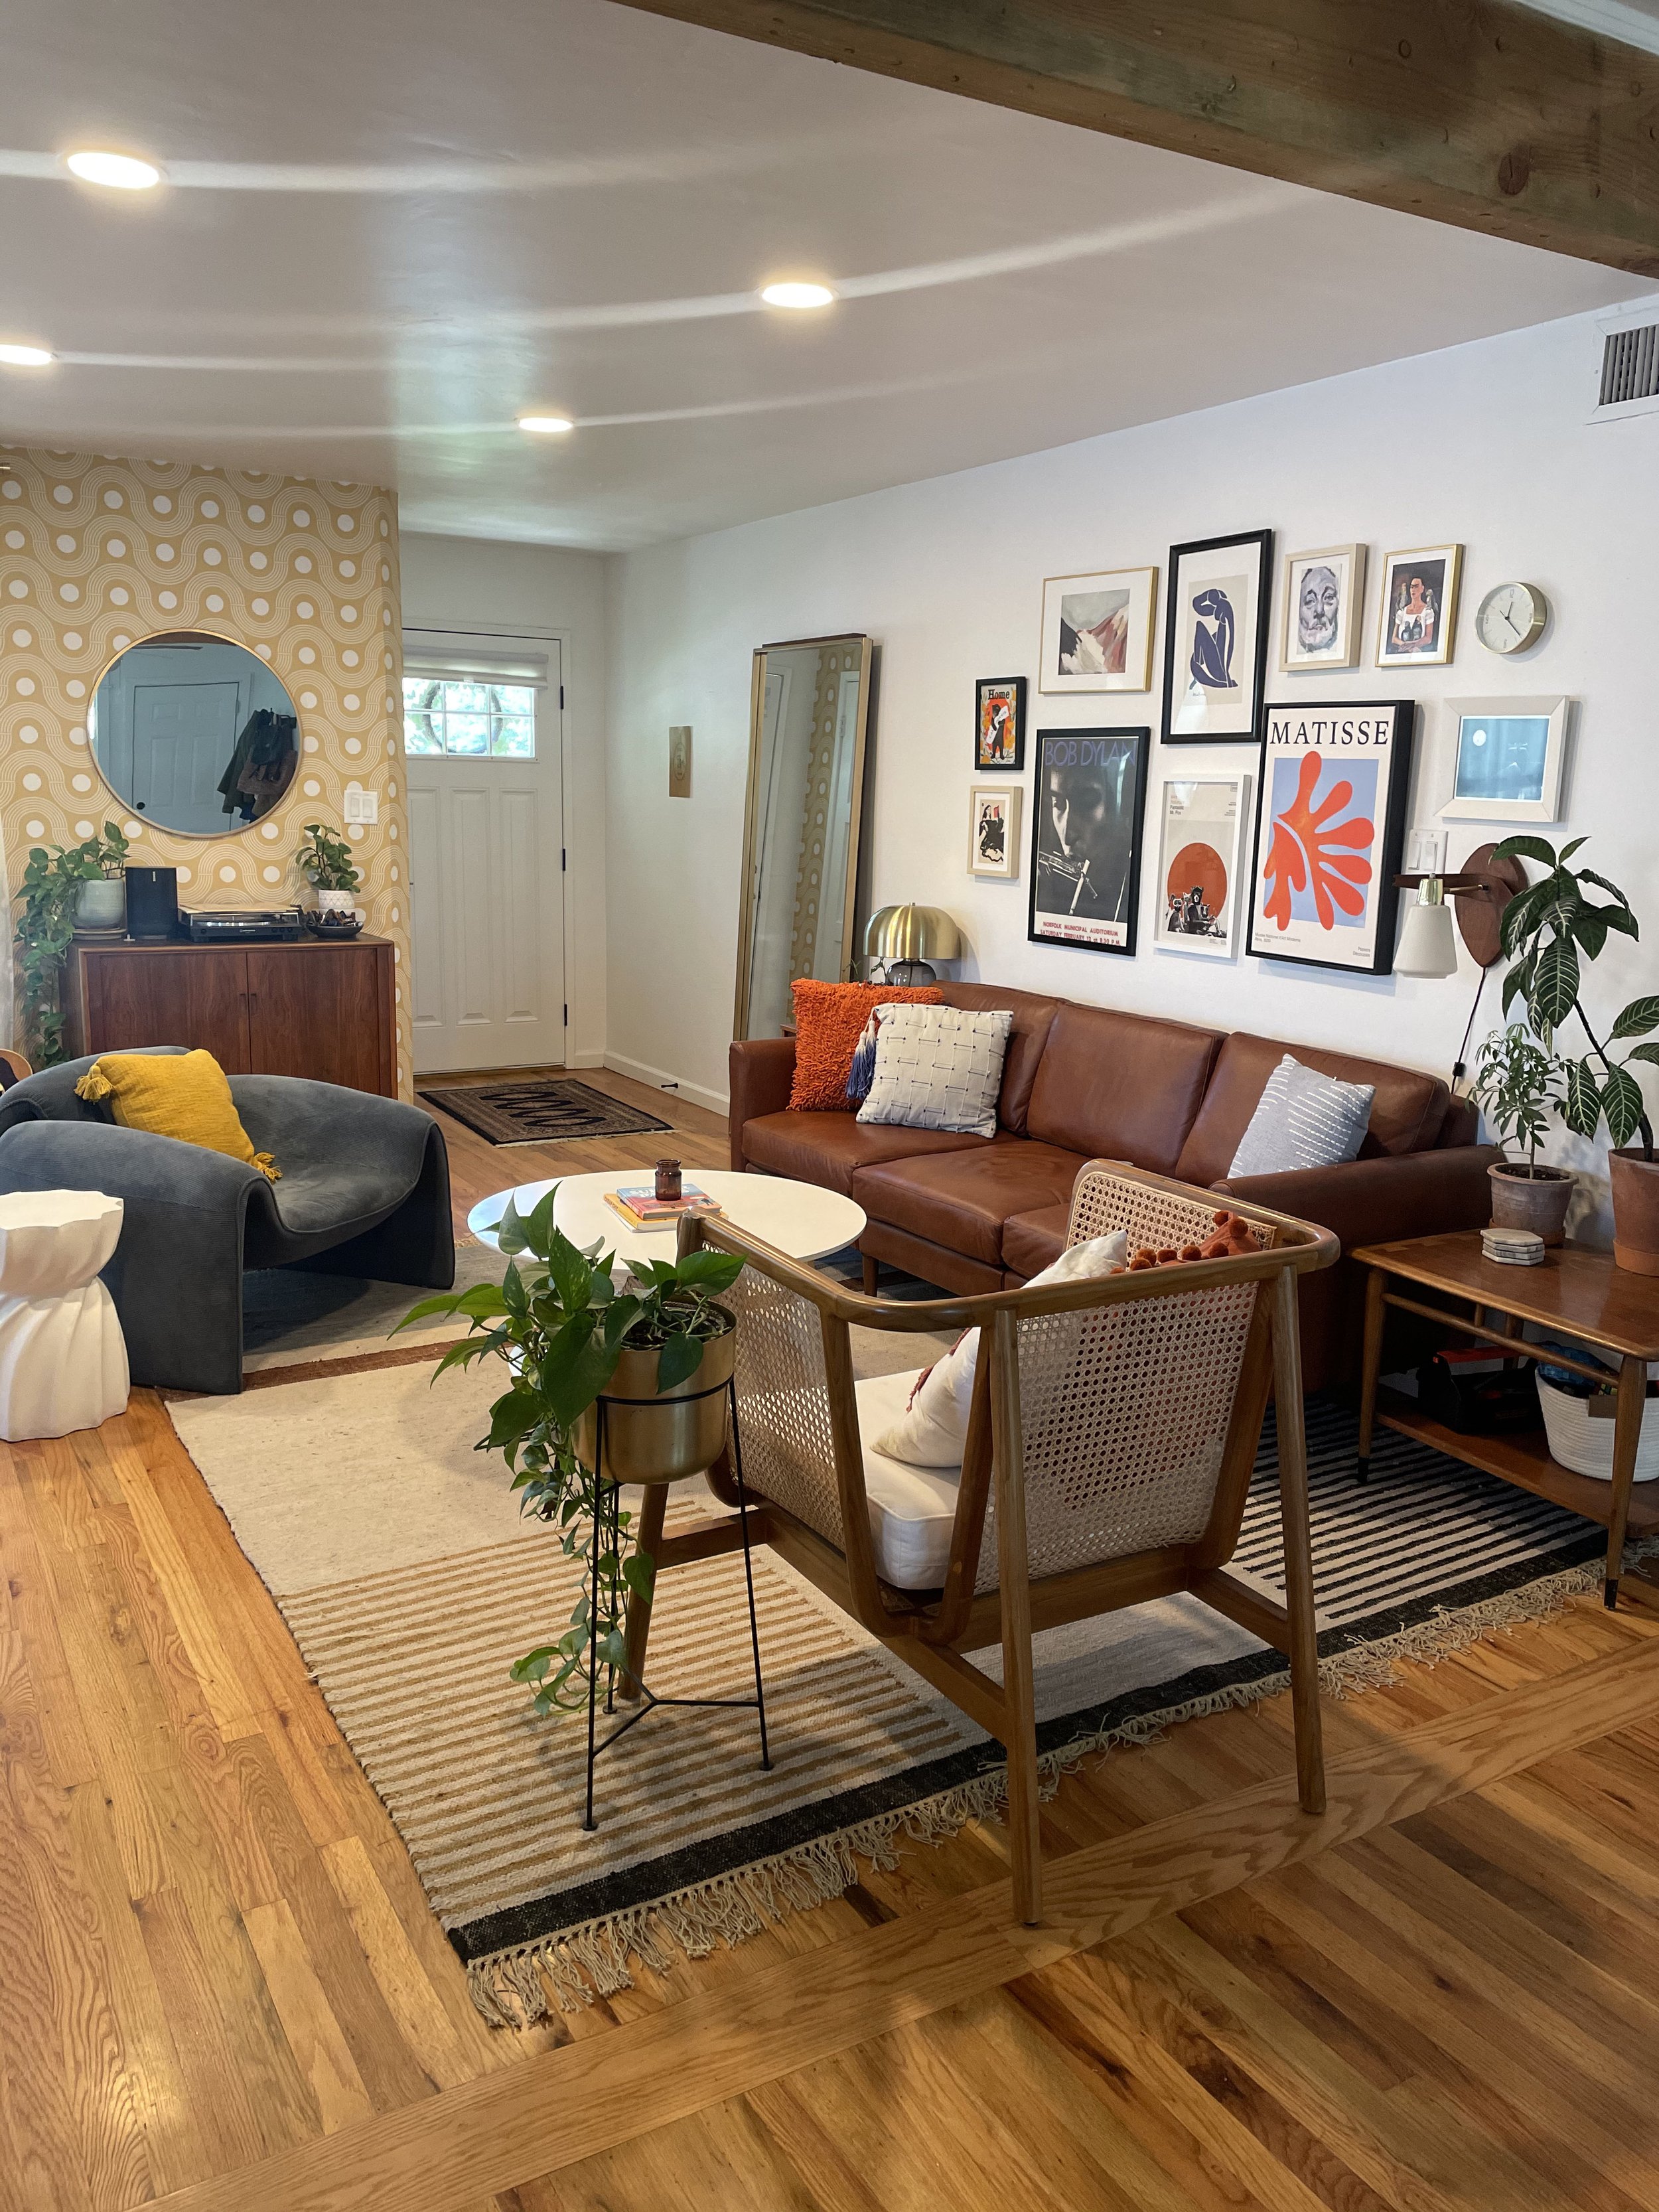
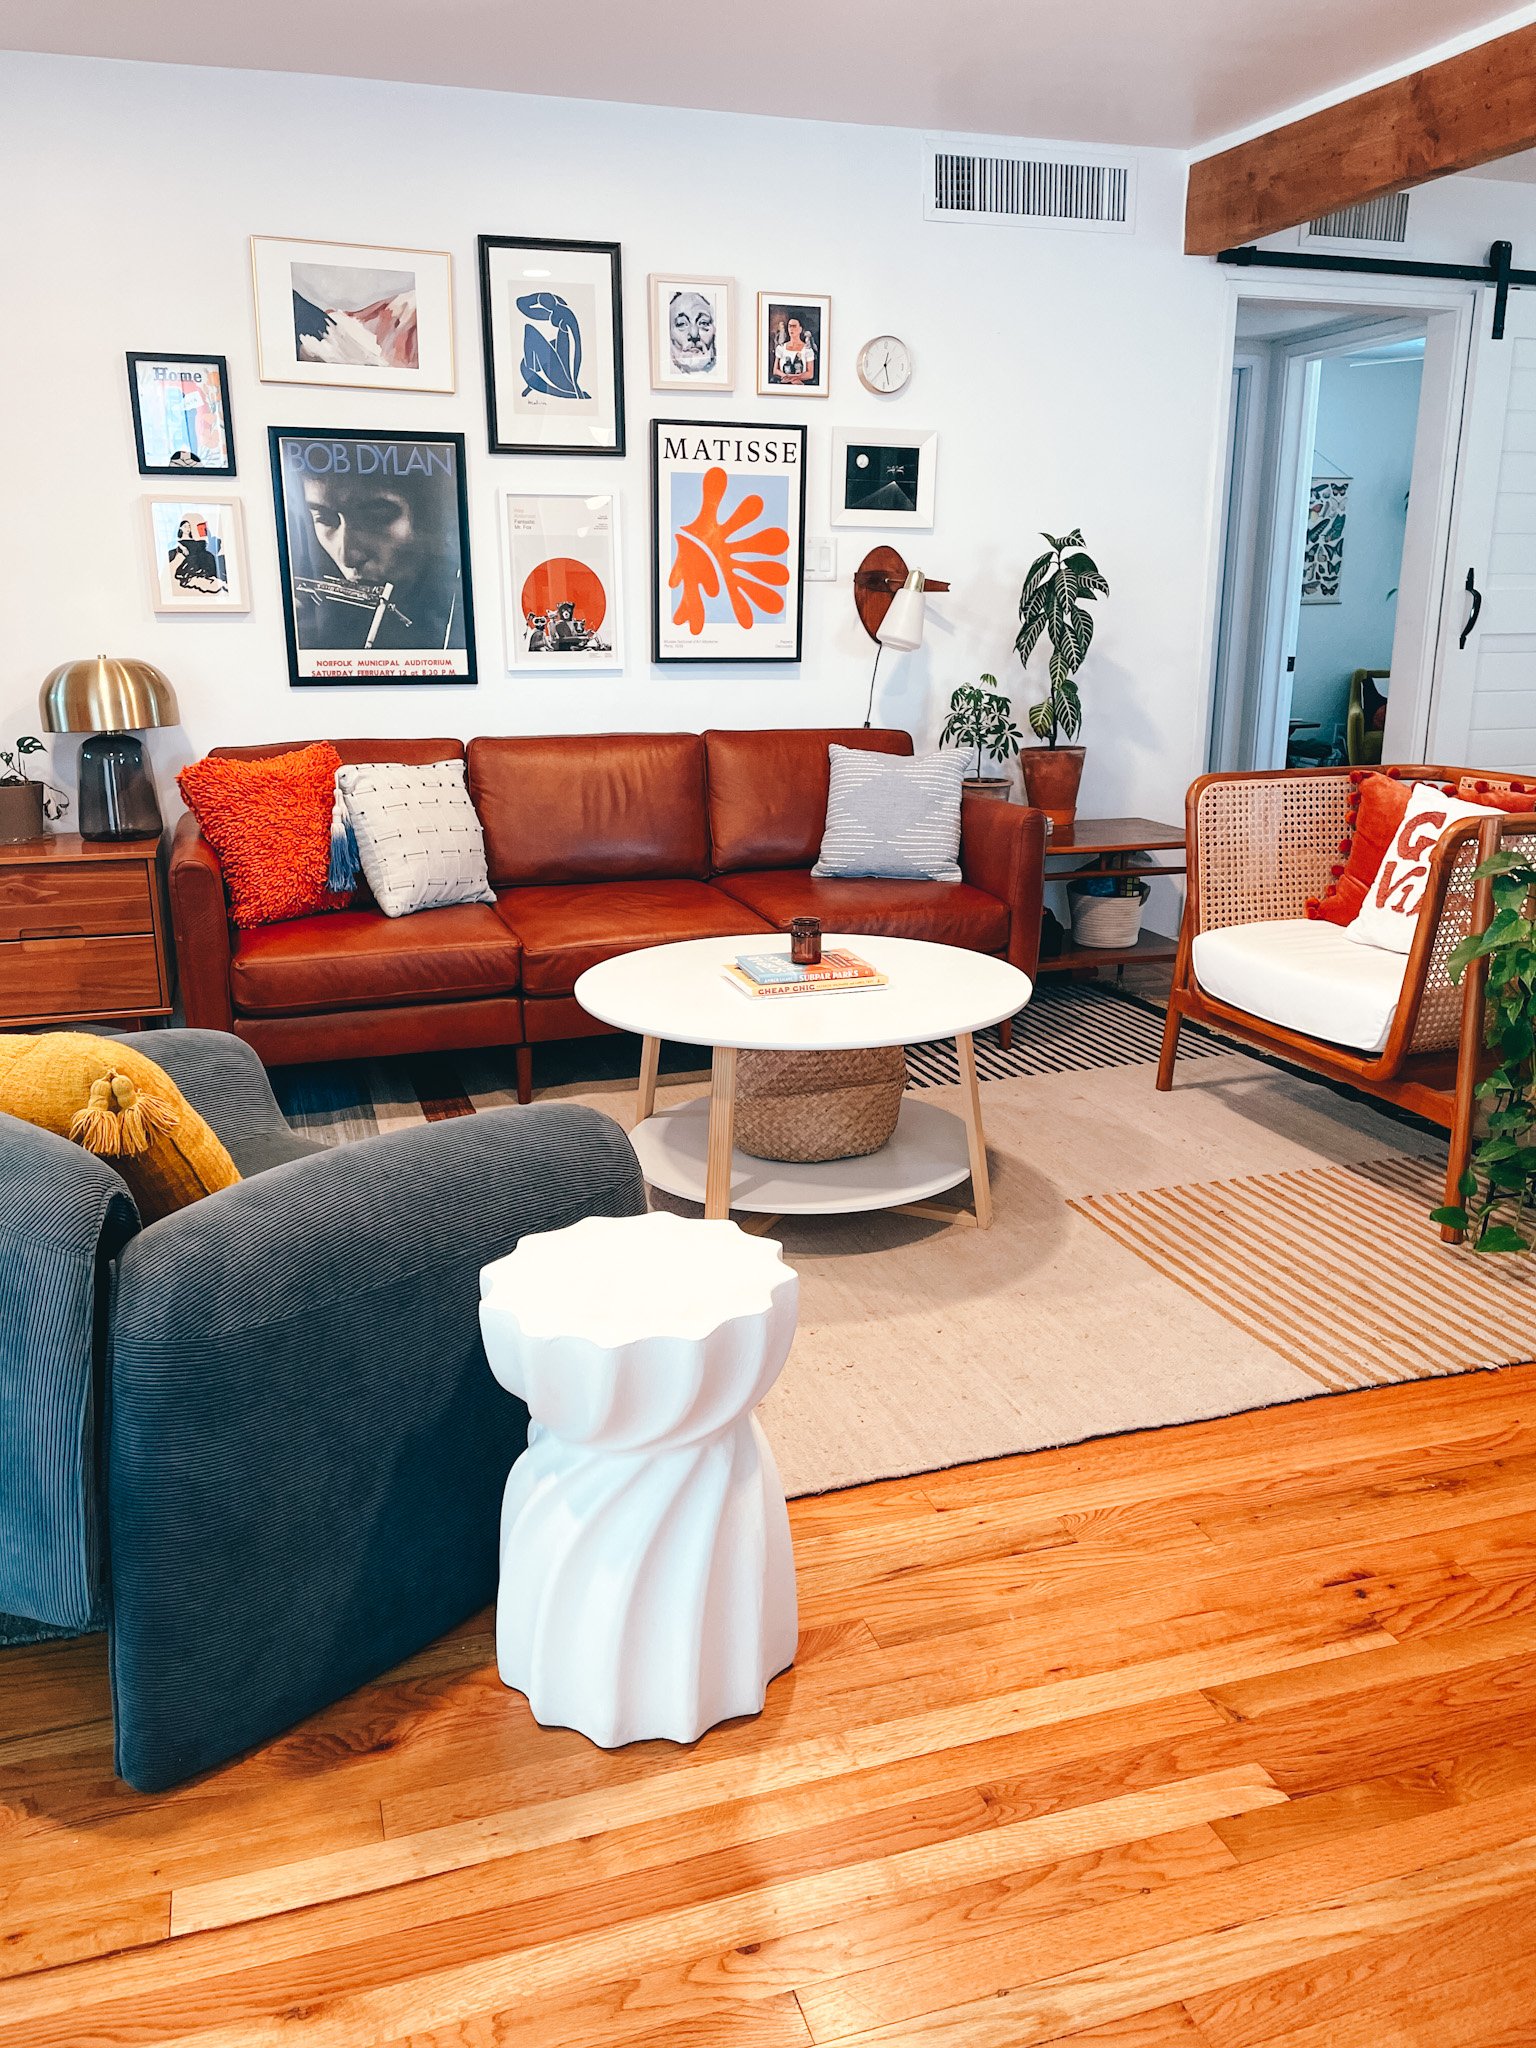
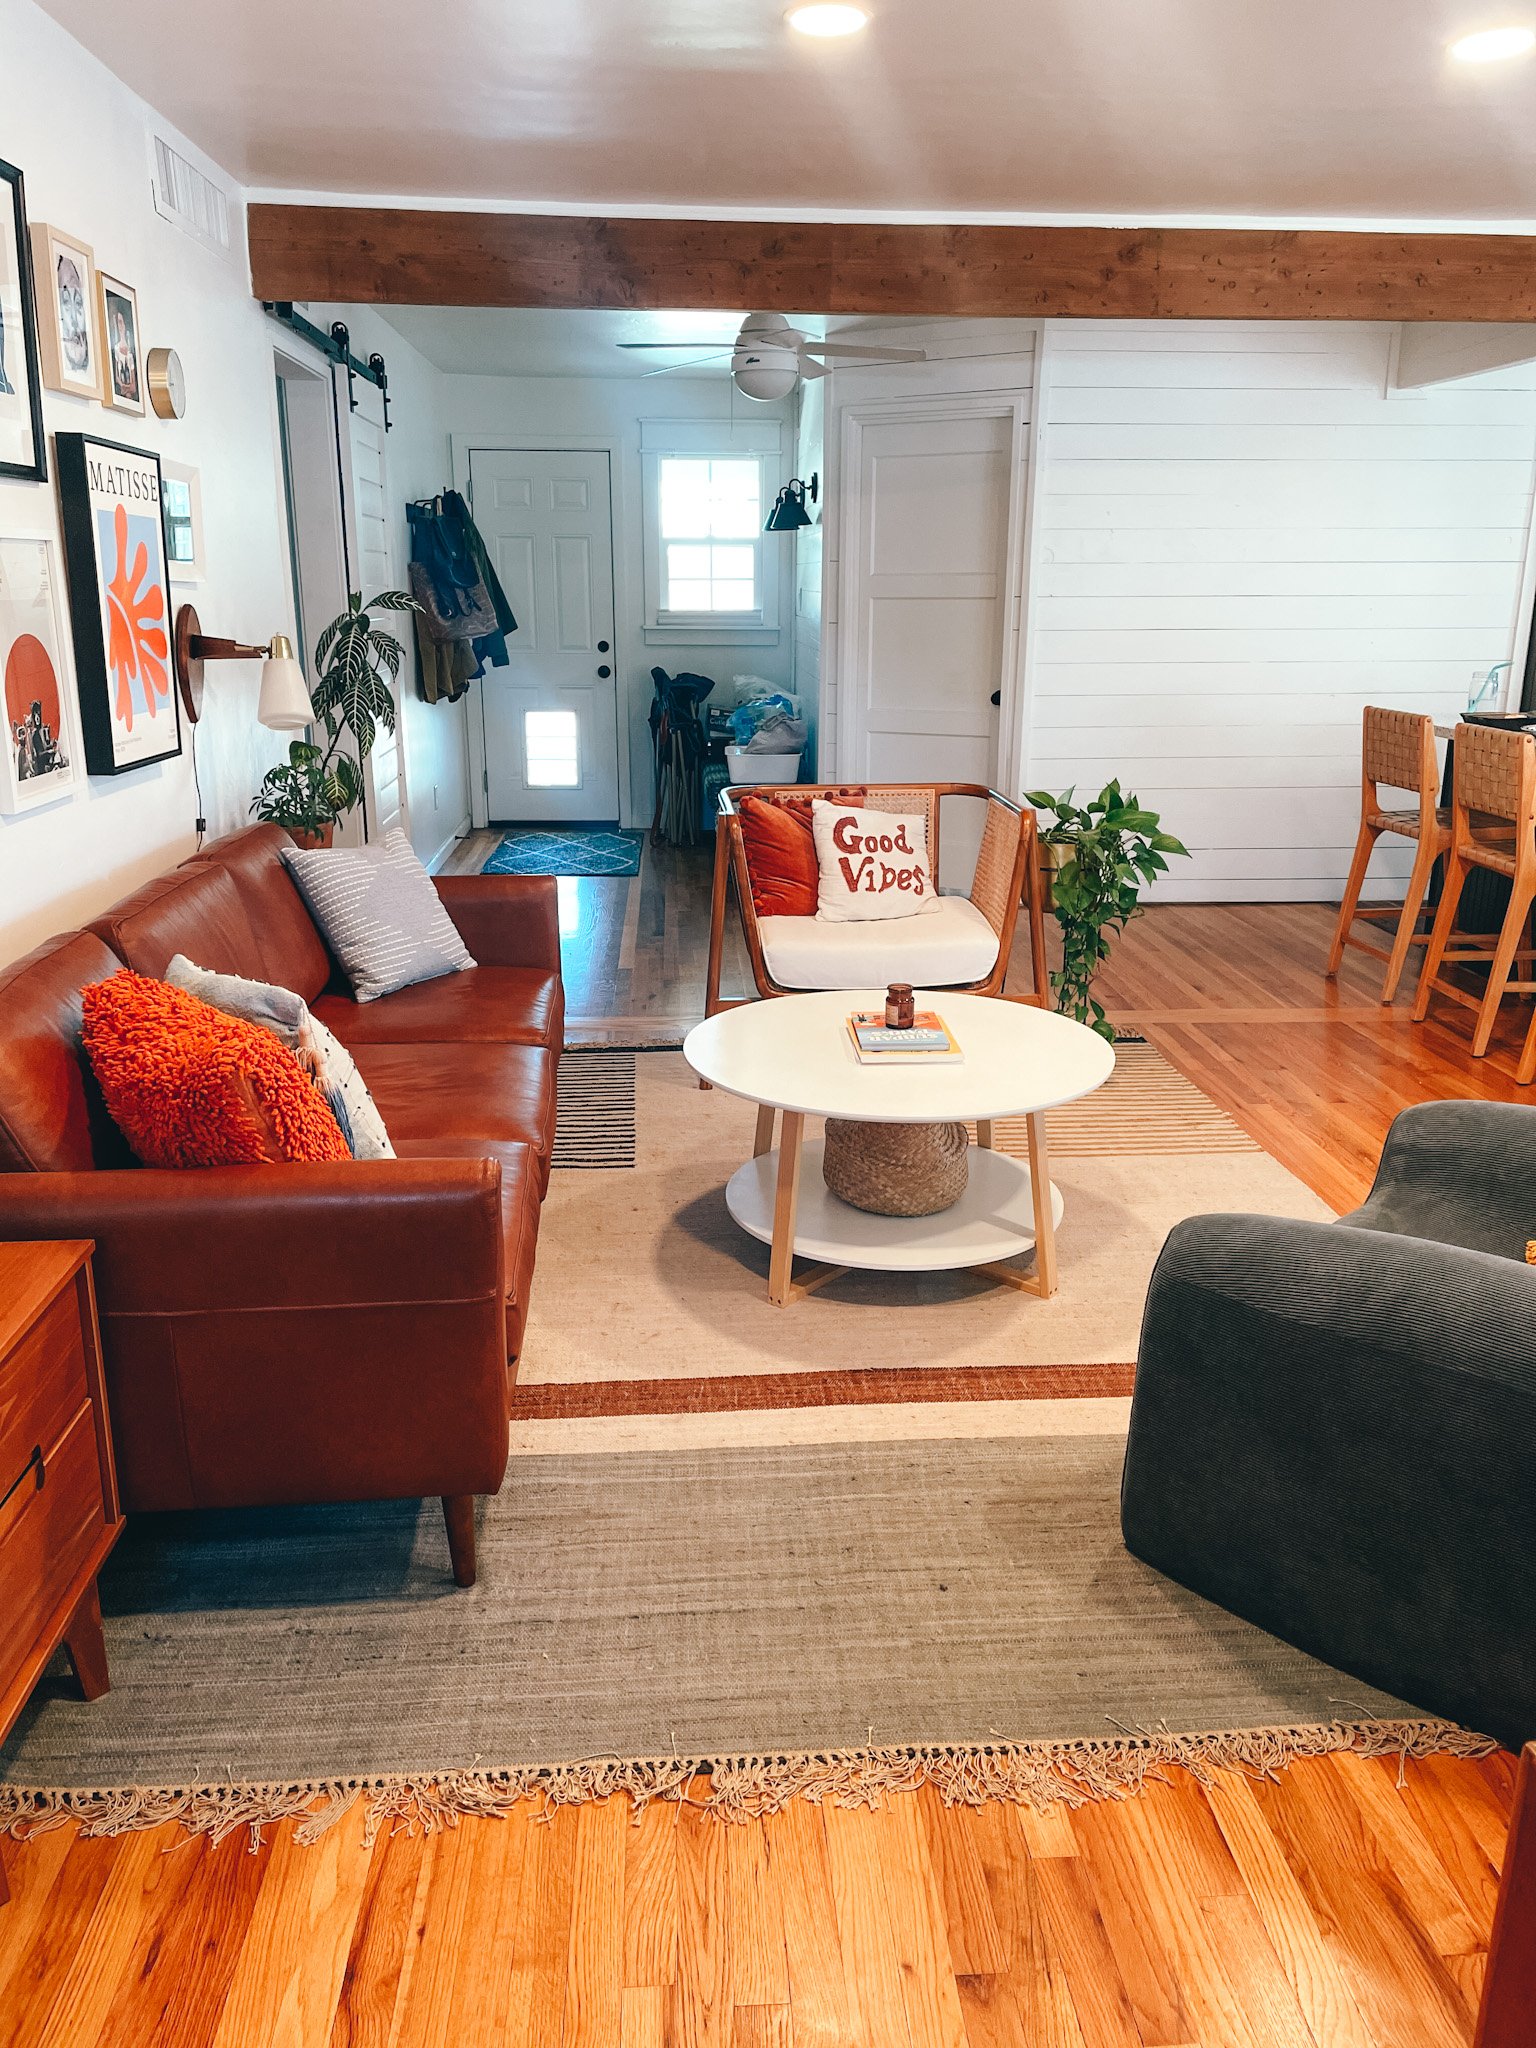
I wanted the space to be a bit more funky and fun, so a gallery wall was a great way to bring in more color and nod to some of the things that we love, like Bob Dylan and Wes Anderson. I created a gallery wall mock up by taking a picture of the empty wall and then adding in screenshots of pictures I was considering buying on a program called Canva. In the end, I used some old pictures we already had, and some new ones from Society 6 so it didn’t turn out exactly like my mock up but I love how the finished product turned out!

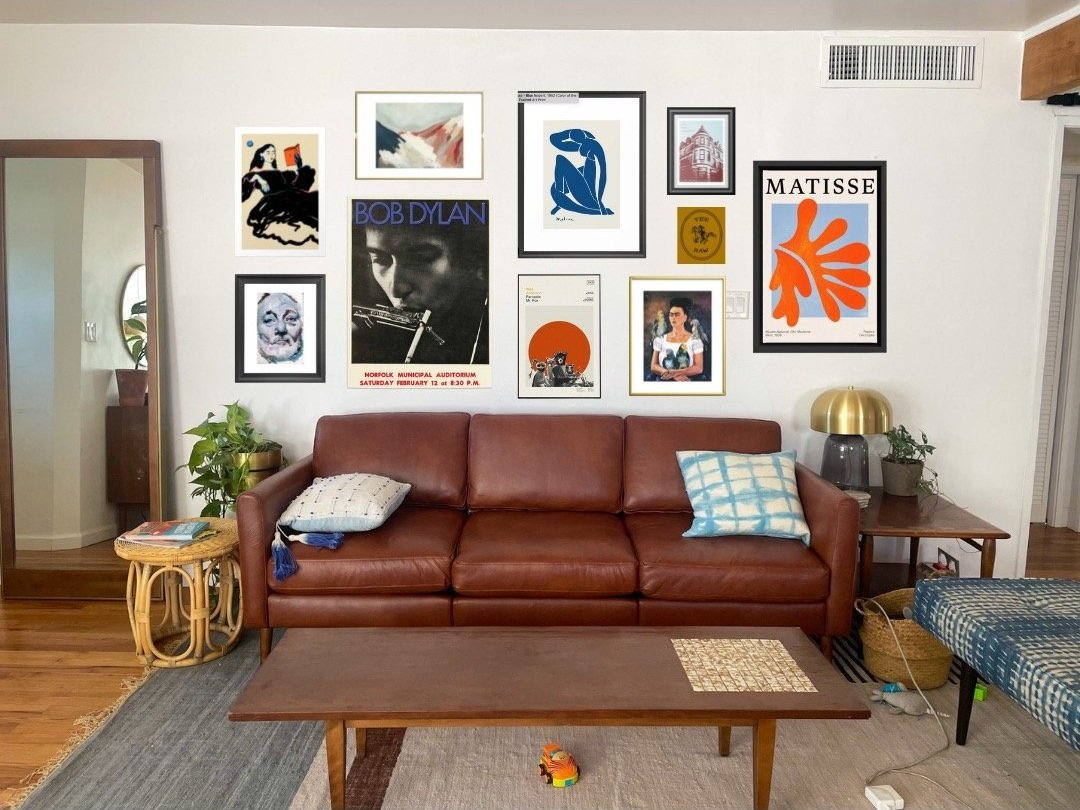
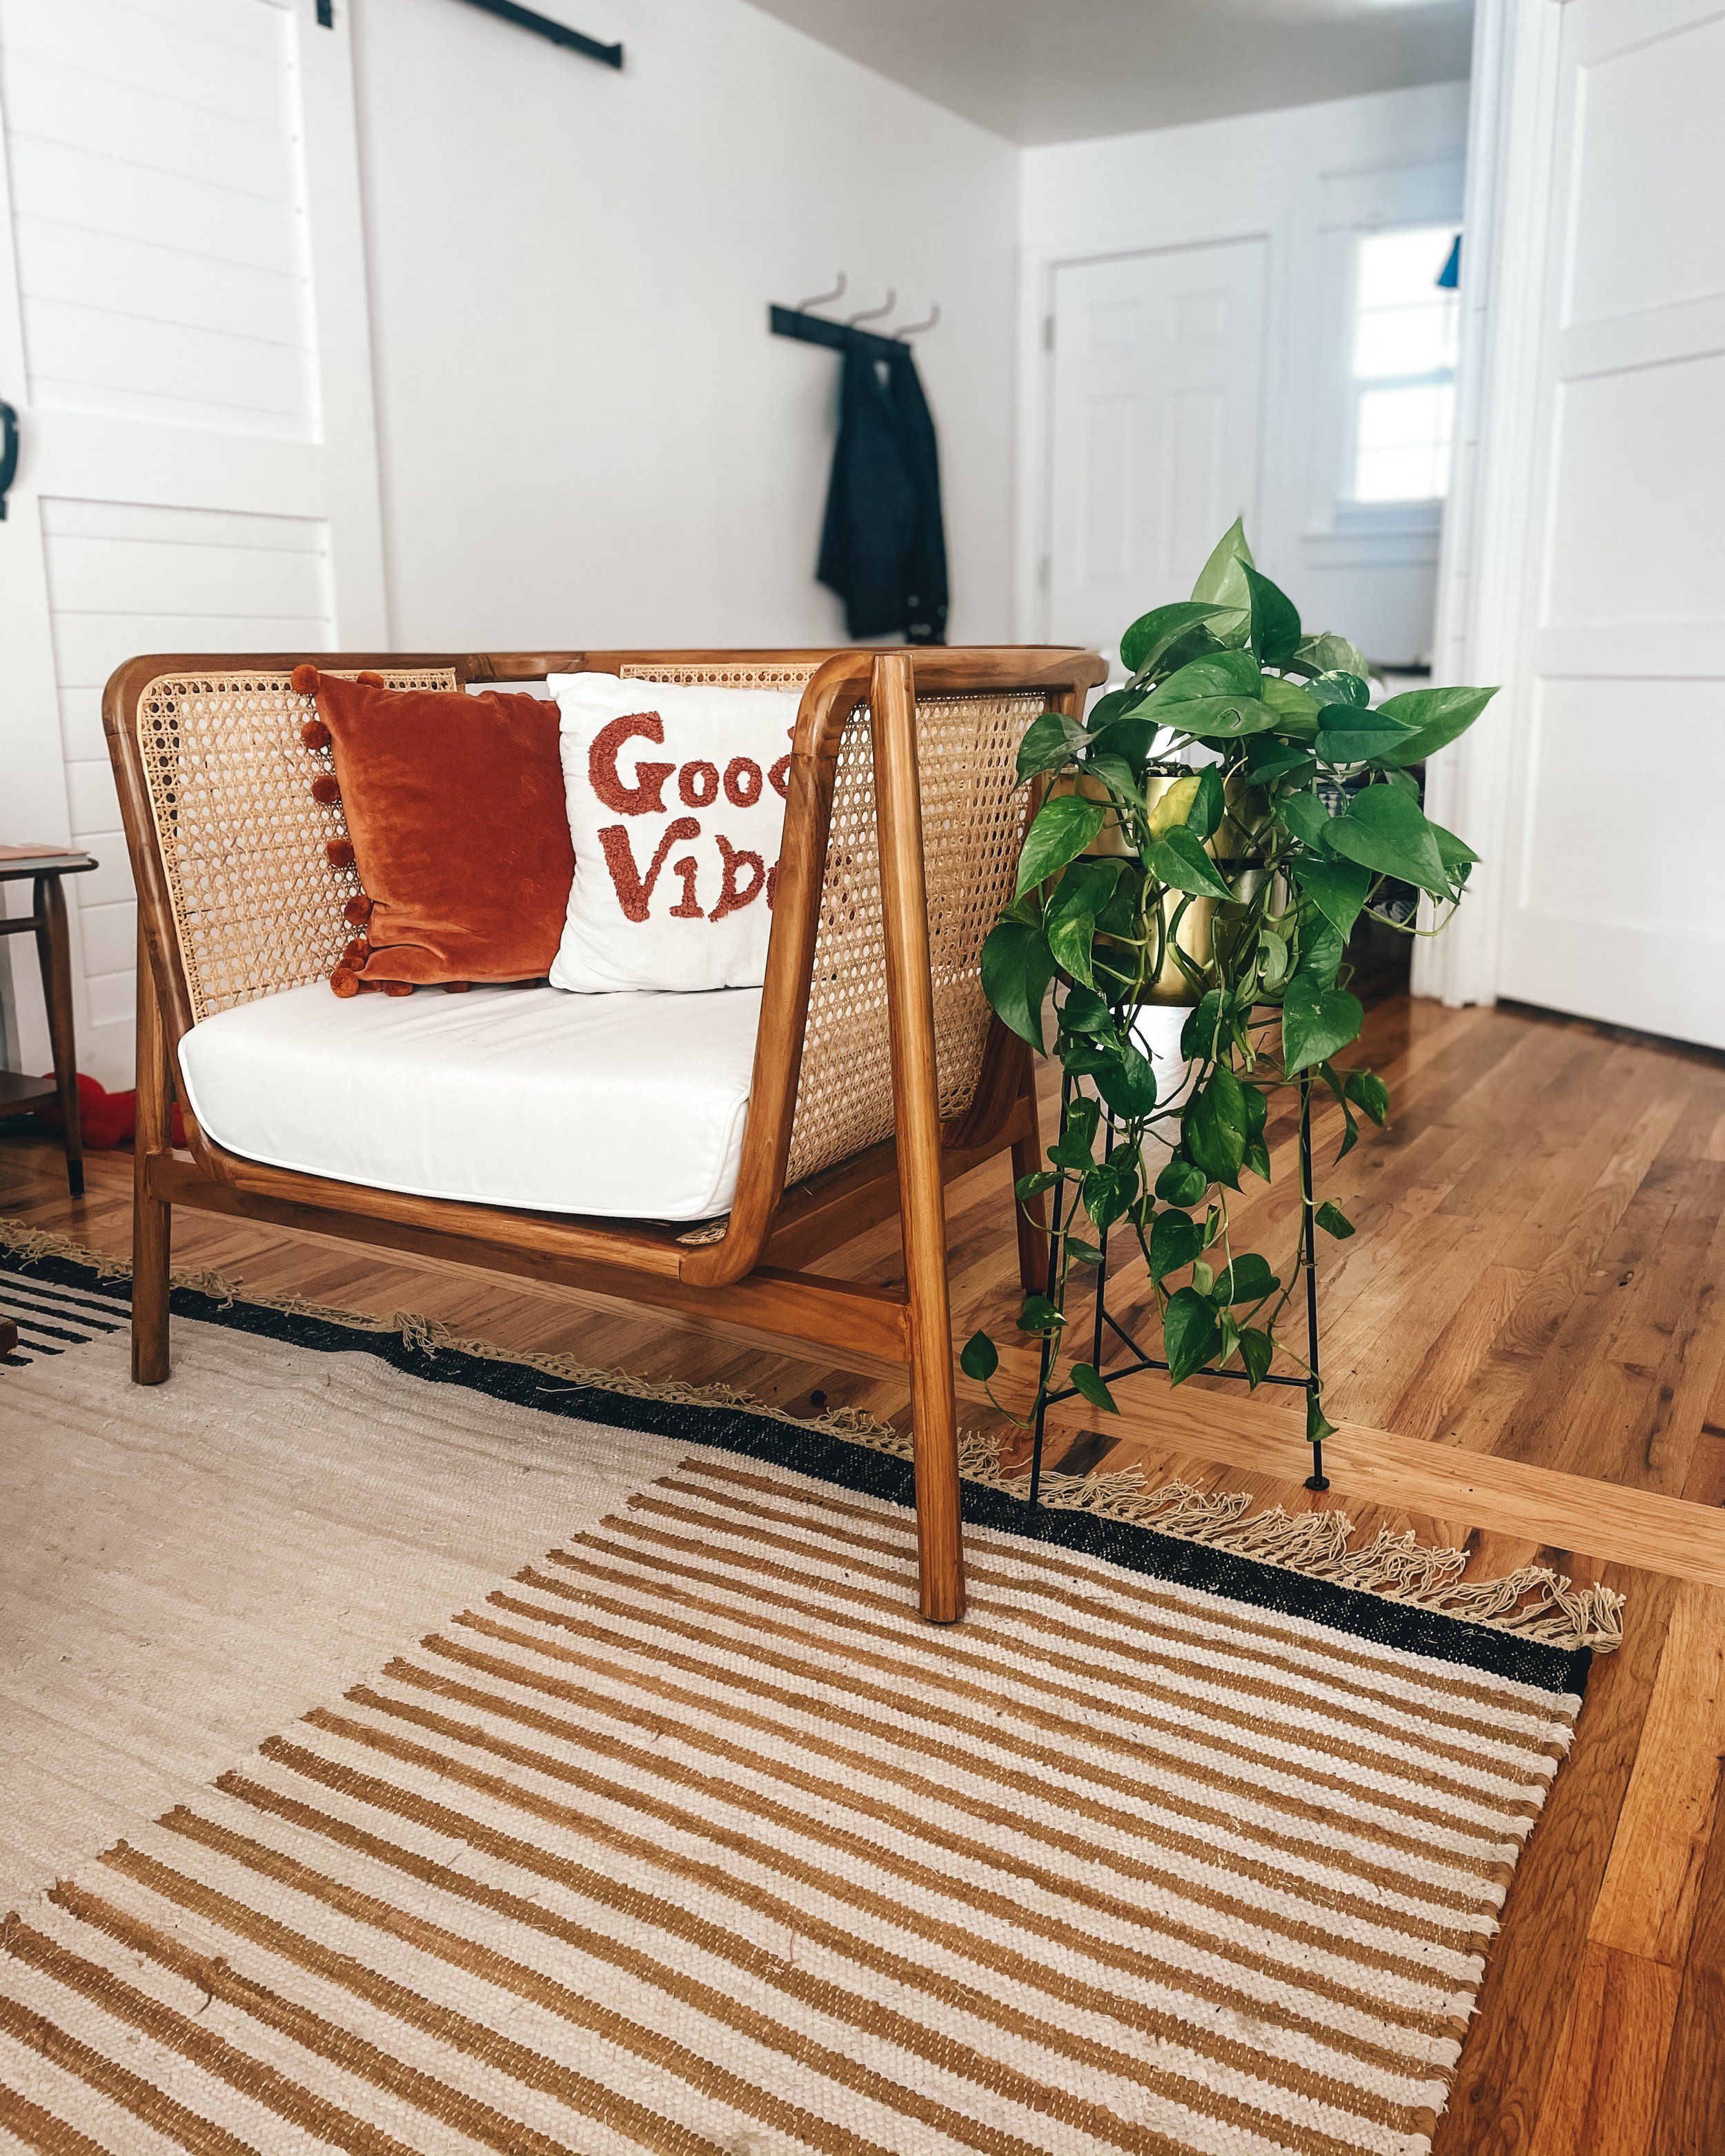
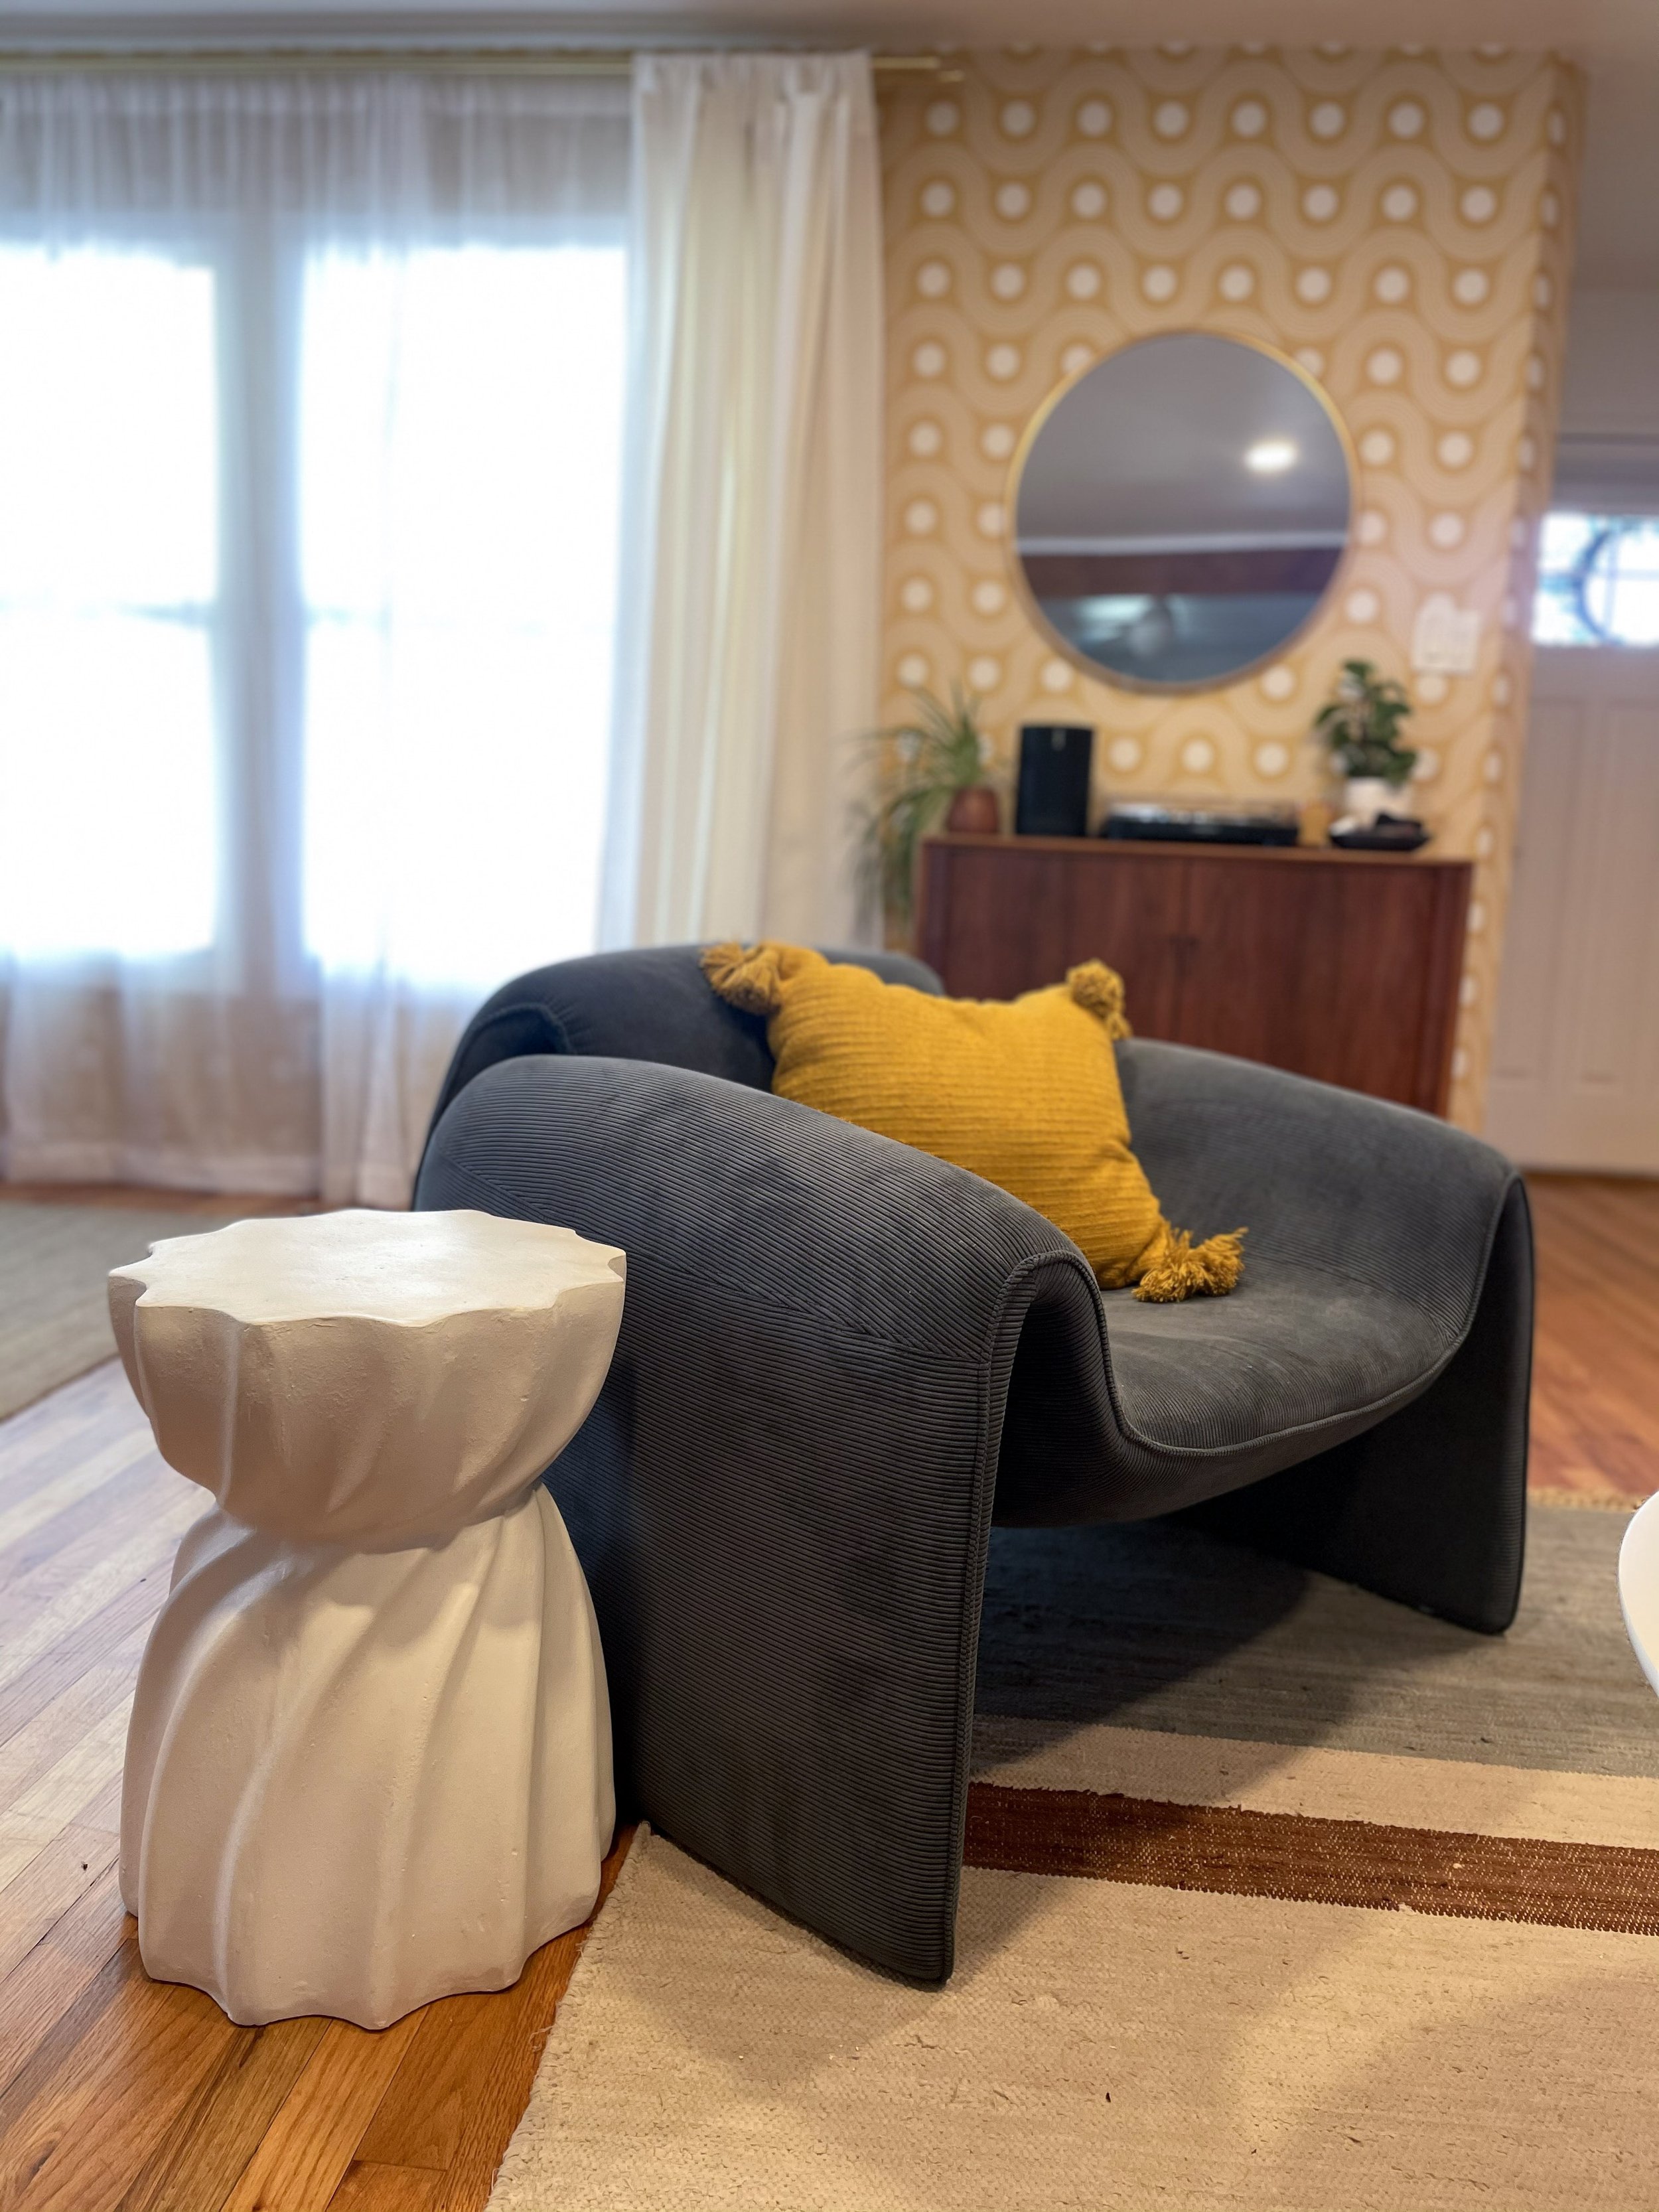
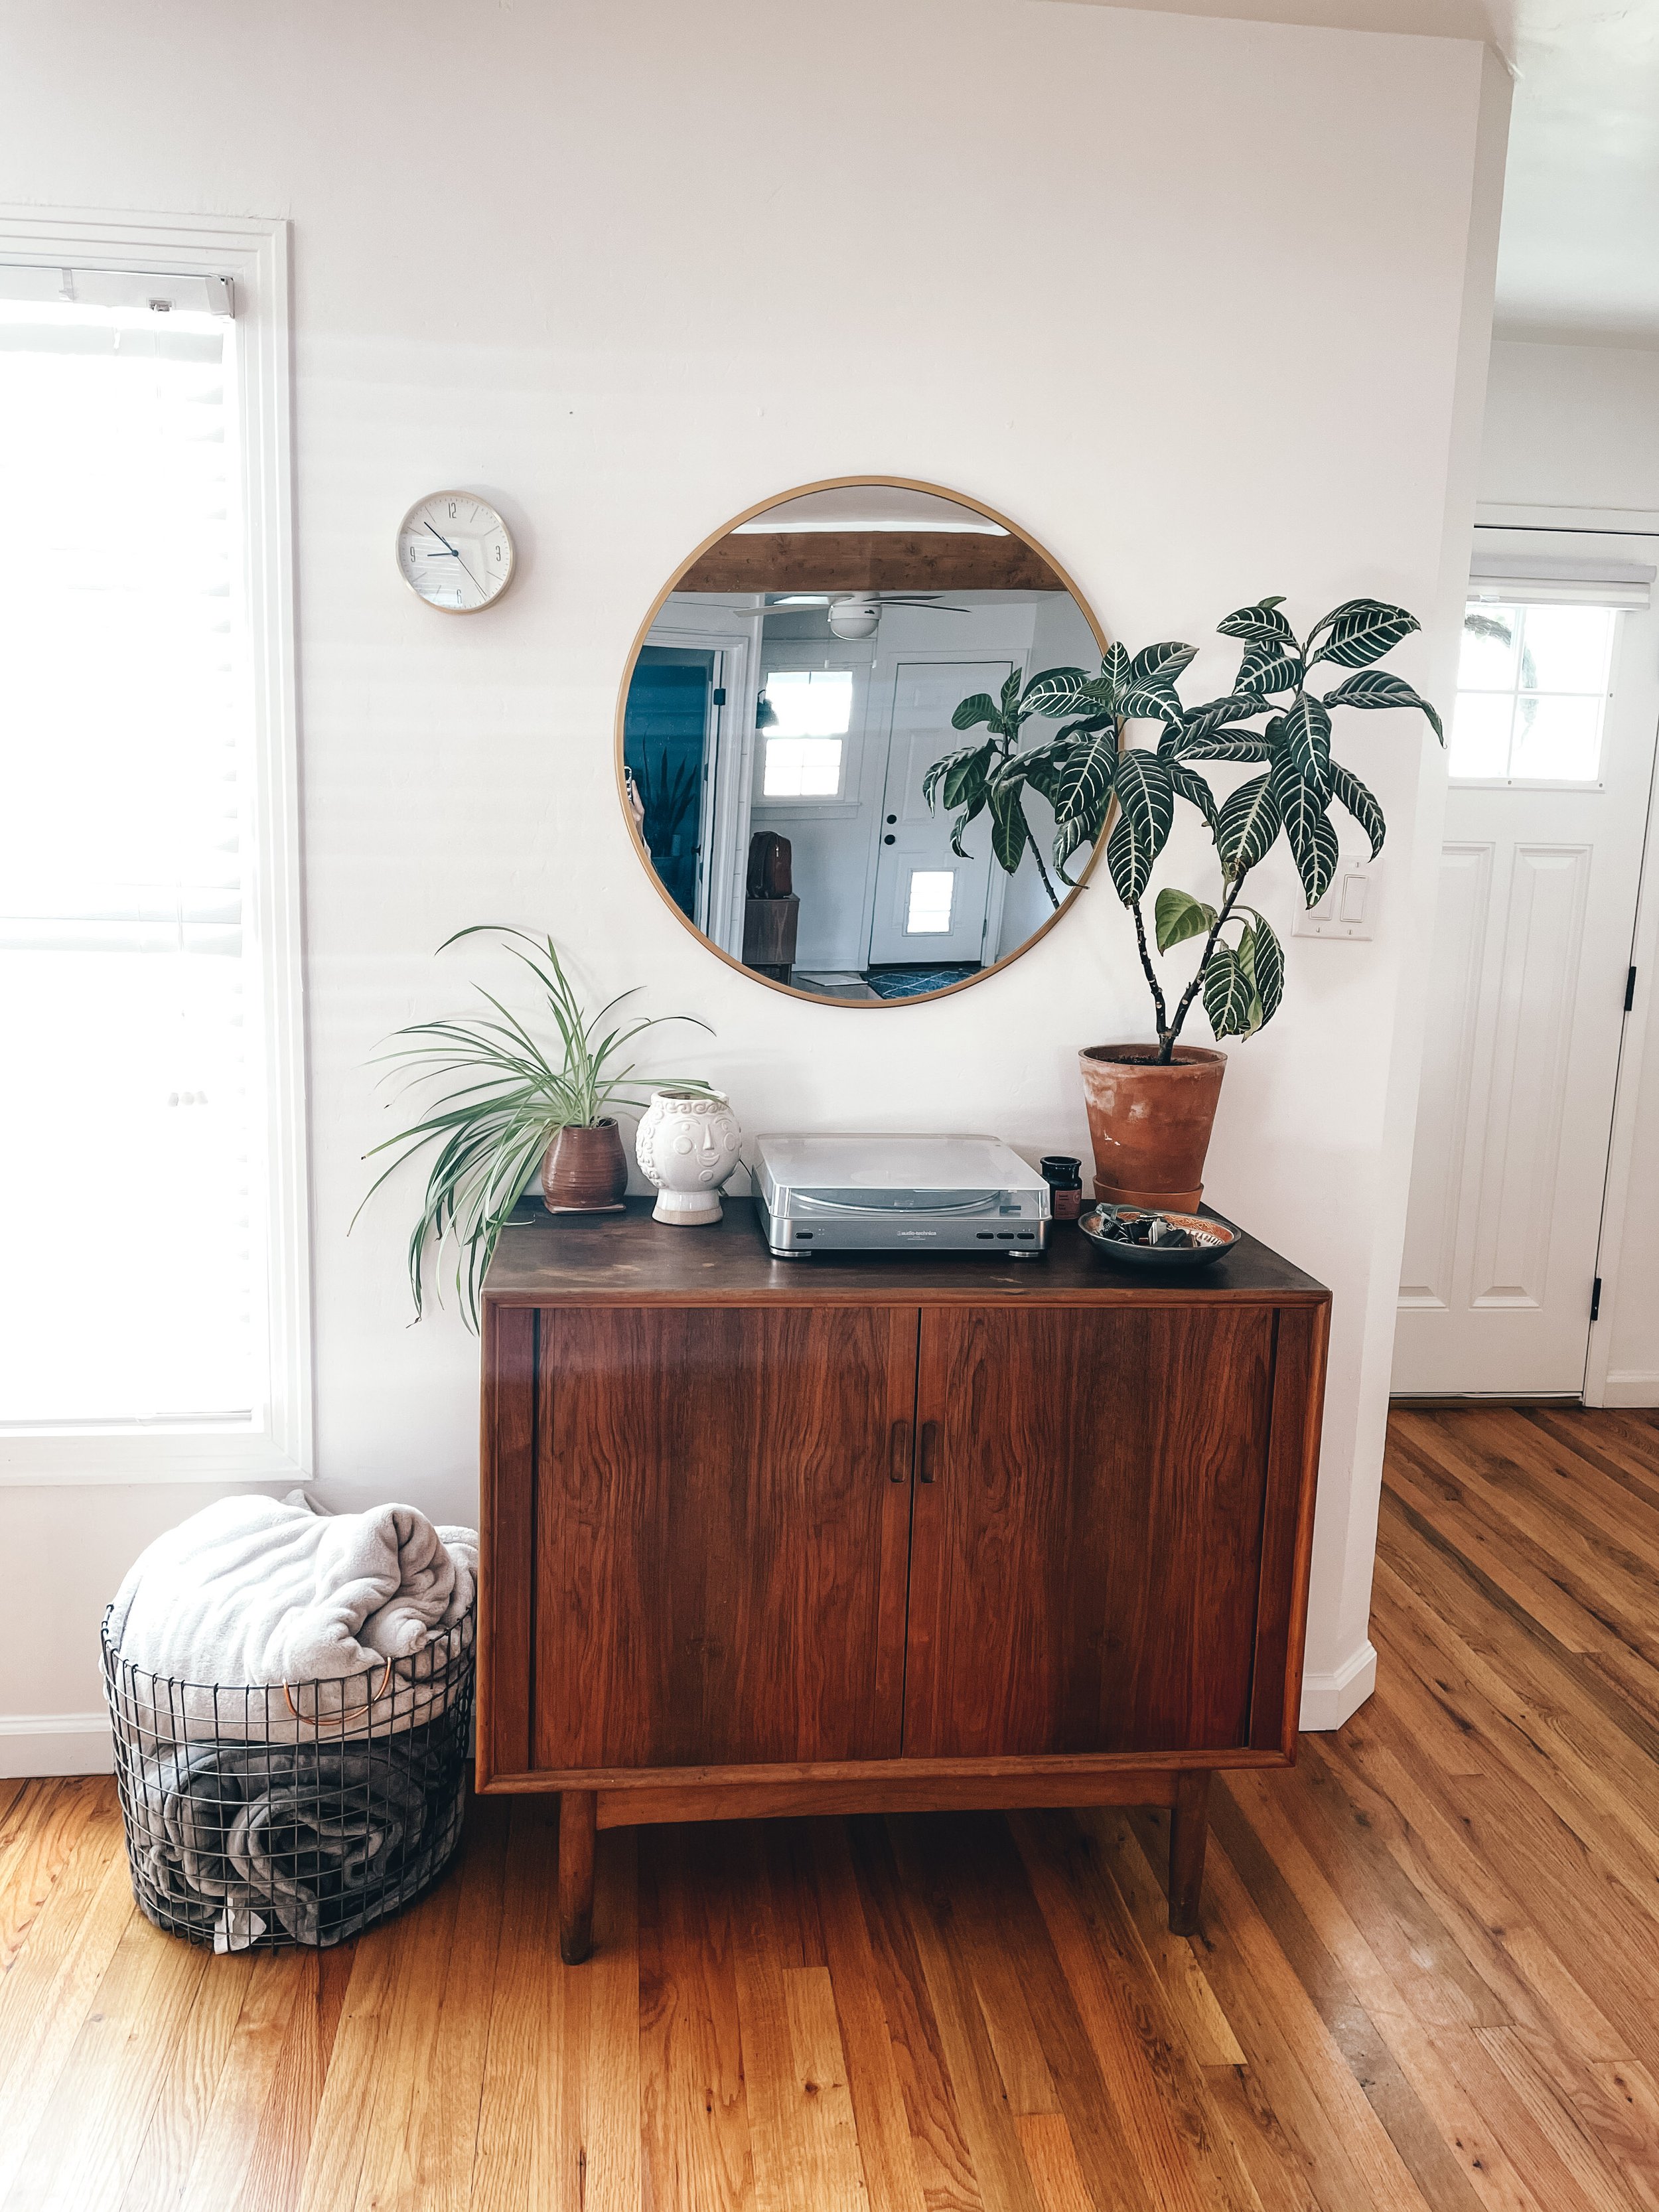
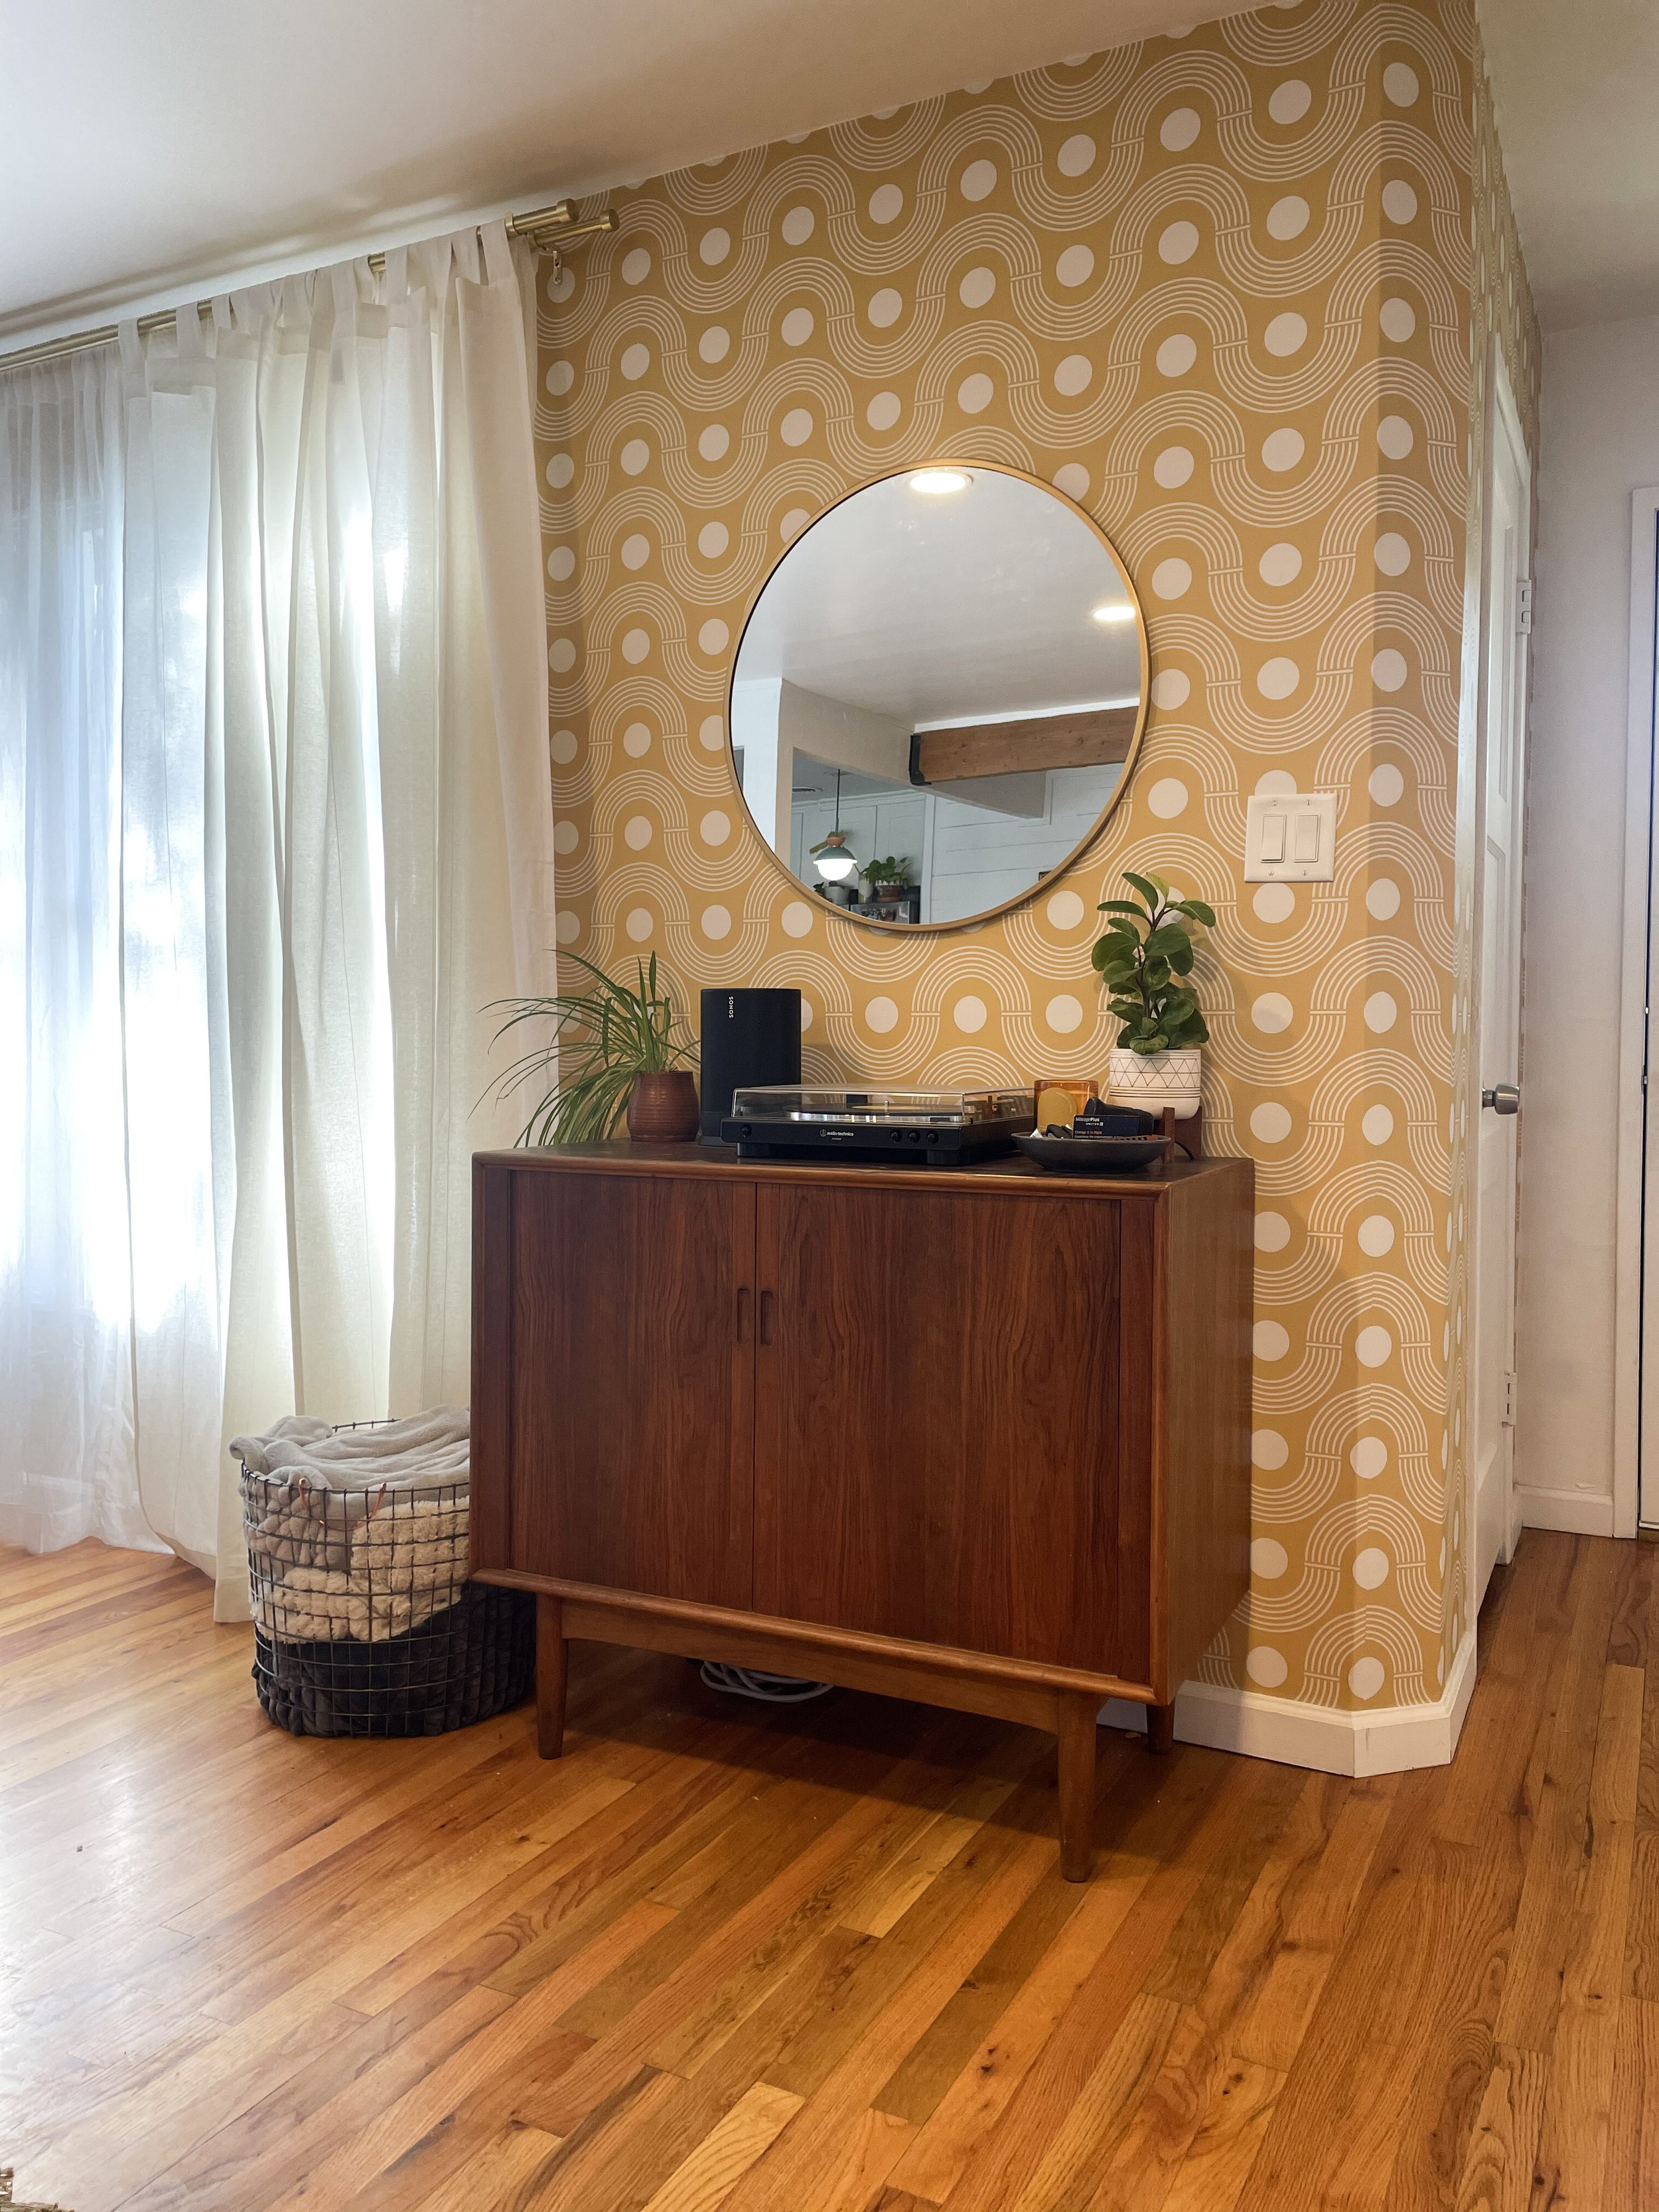
We originally had my Grandpa’s handmade tile inlay coffee table, but had to store it in our garage for these first few years of baby life so it didn’t get ruined. I found this white circular (baby friendly!) coffee table on one of my favorite secondhand apps, Offer Up! We kept our mid century side table, and a few other things like our glass Article lamp and a mid century wall sconce. I bought these comfy funky chairs from Valyou to add some retro flare to the room. Burrow sent us this beautiful leather couch, which is perfect for having pets & kids! We grounded the space with similar colors in this All Modern rug for a bit more texture. To complete the look I DIY’d the side table and added some plants and pillows to cozy it all up!
DINING ROOM:
The living area leads right to our dining space so I wanted some style to flow over, yet still make it it’s own. I was a bit underwhelmed with all the white throughout the room so I thought adding some wallpaper to the dining area would give it an extra bit of interest and also differentiate the space.
BEFORE
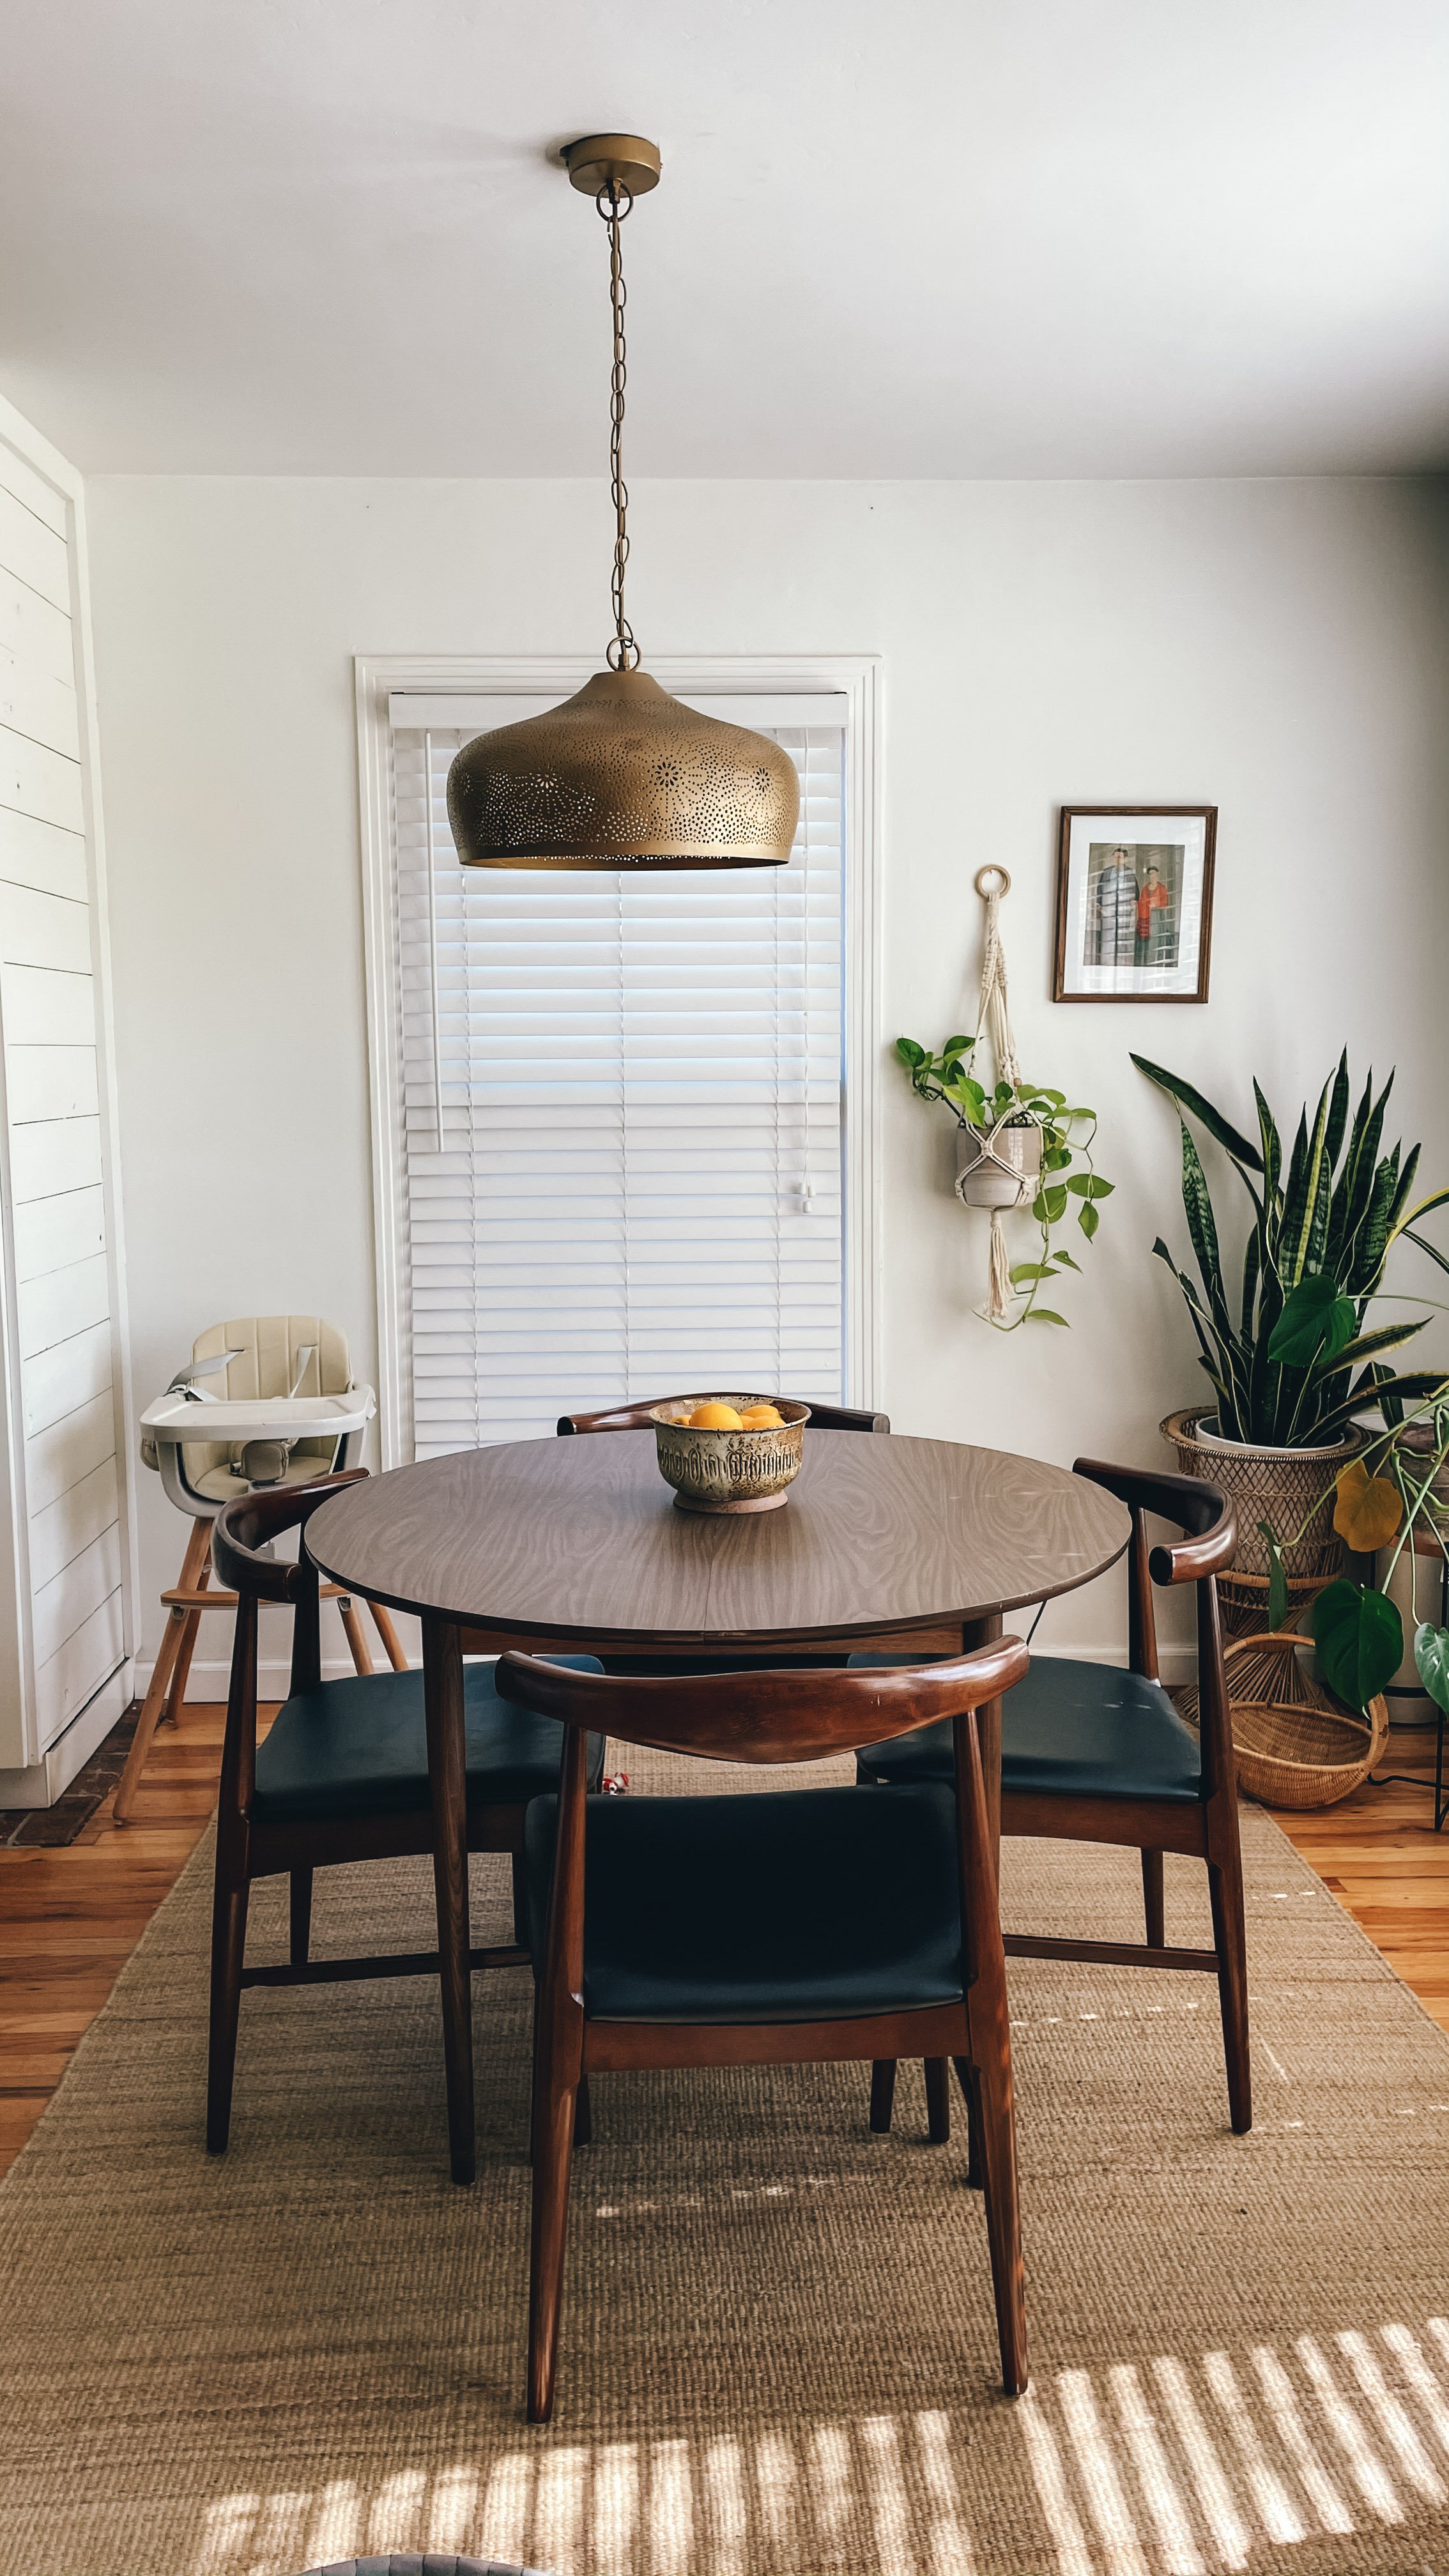
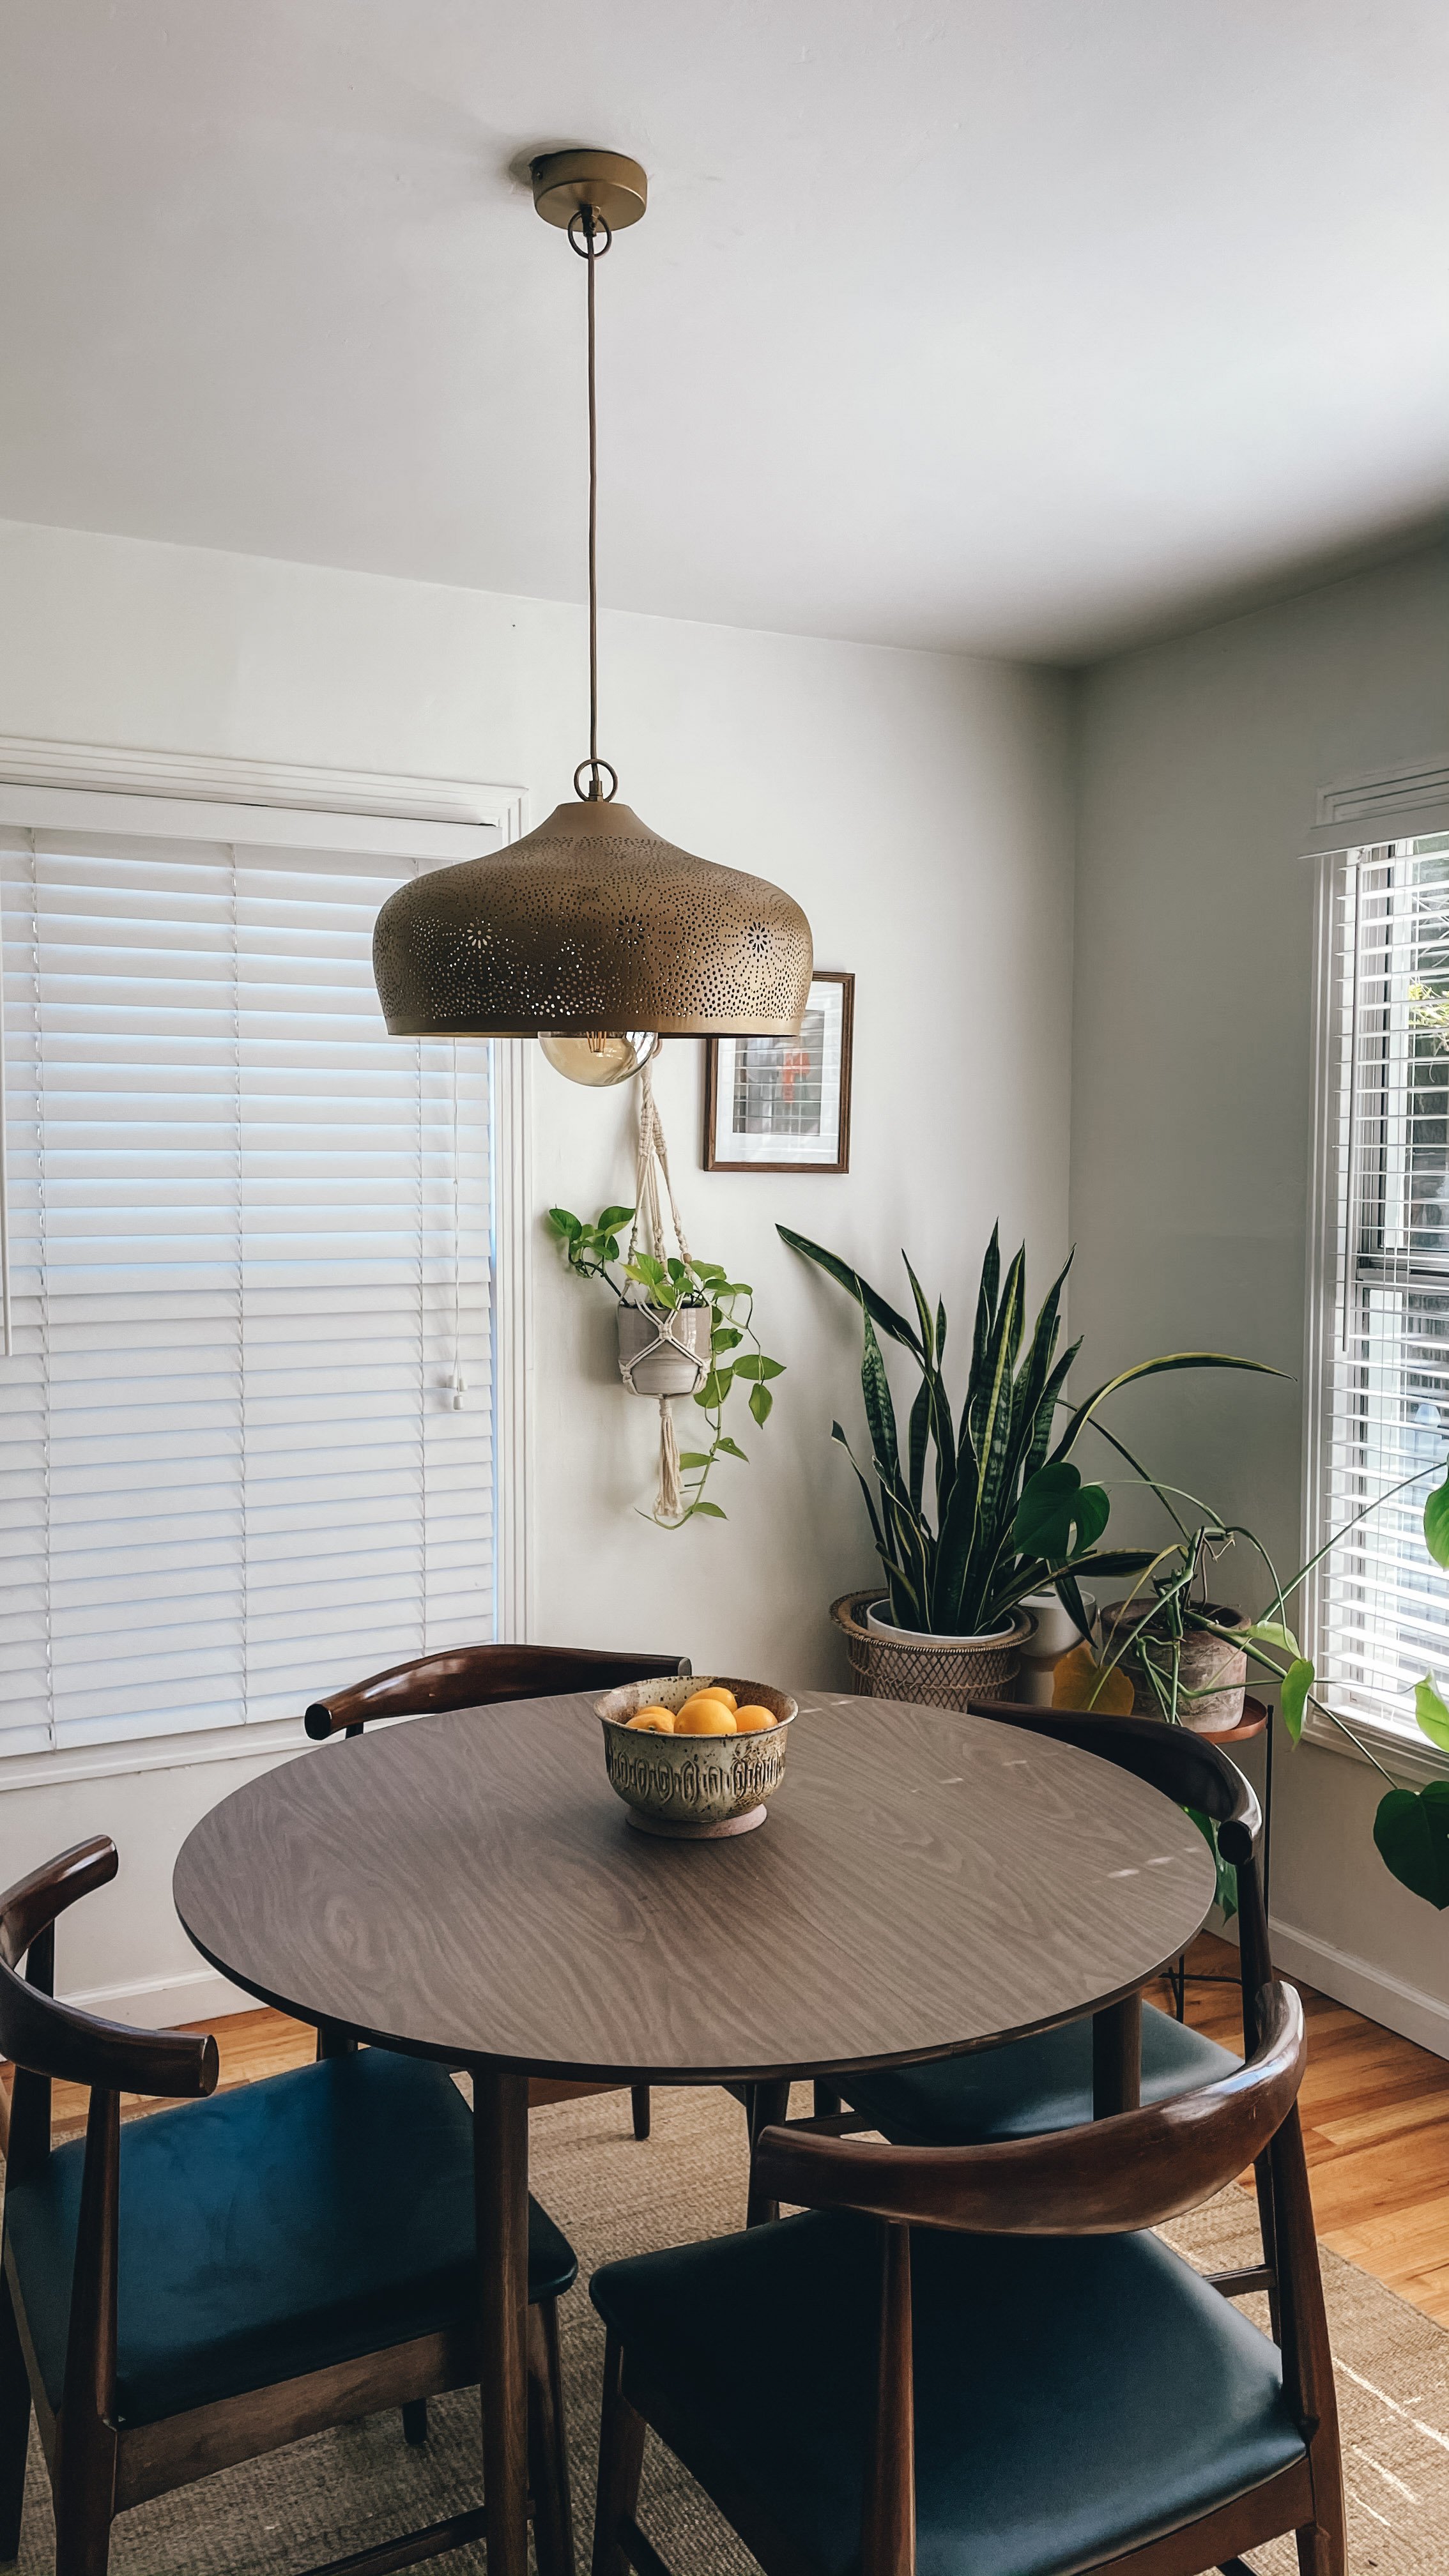
AFTER:
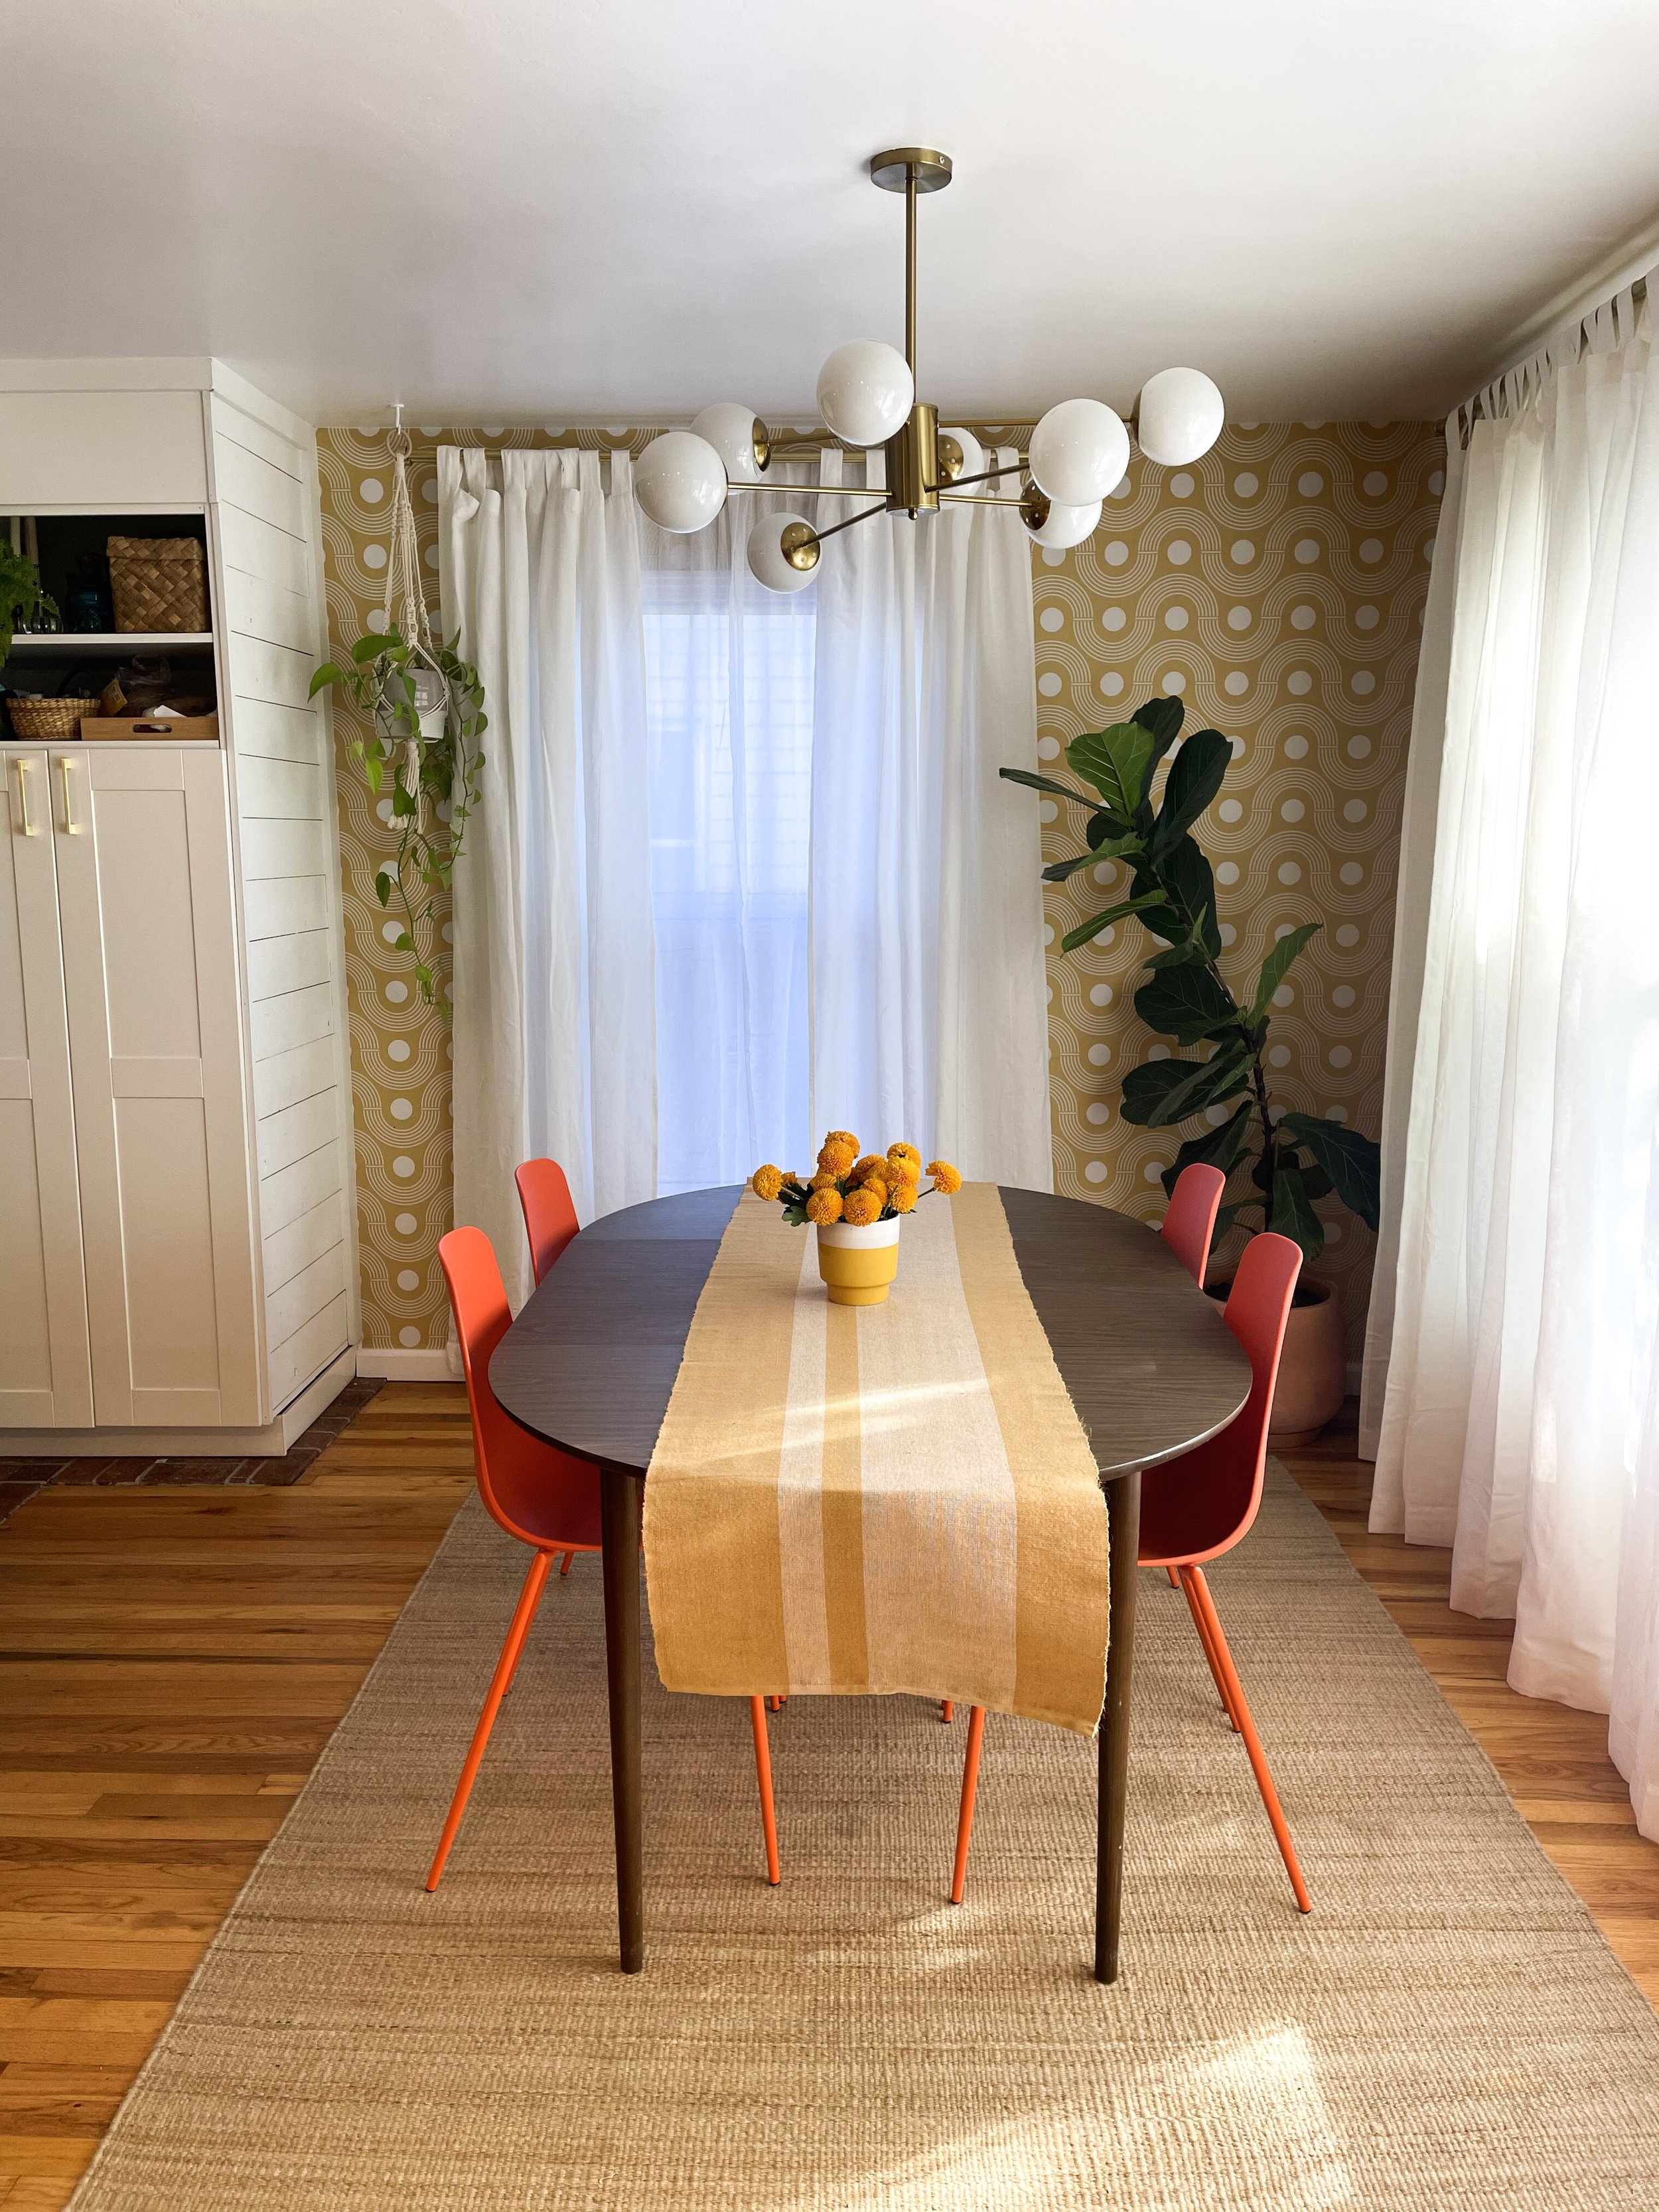
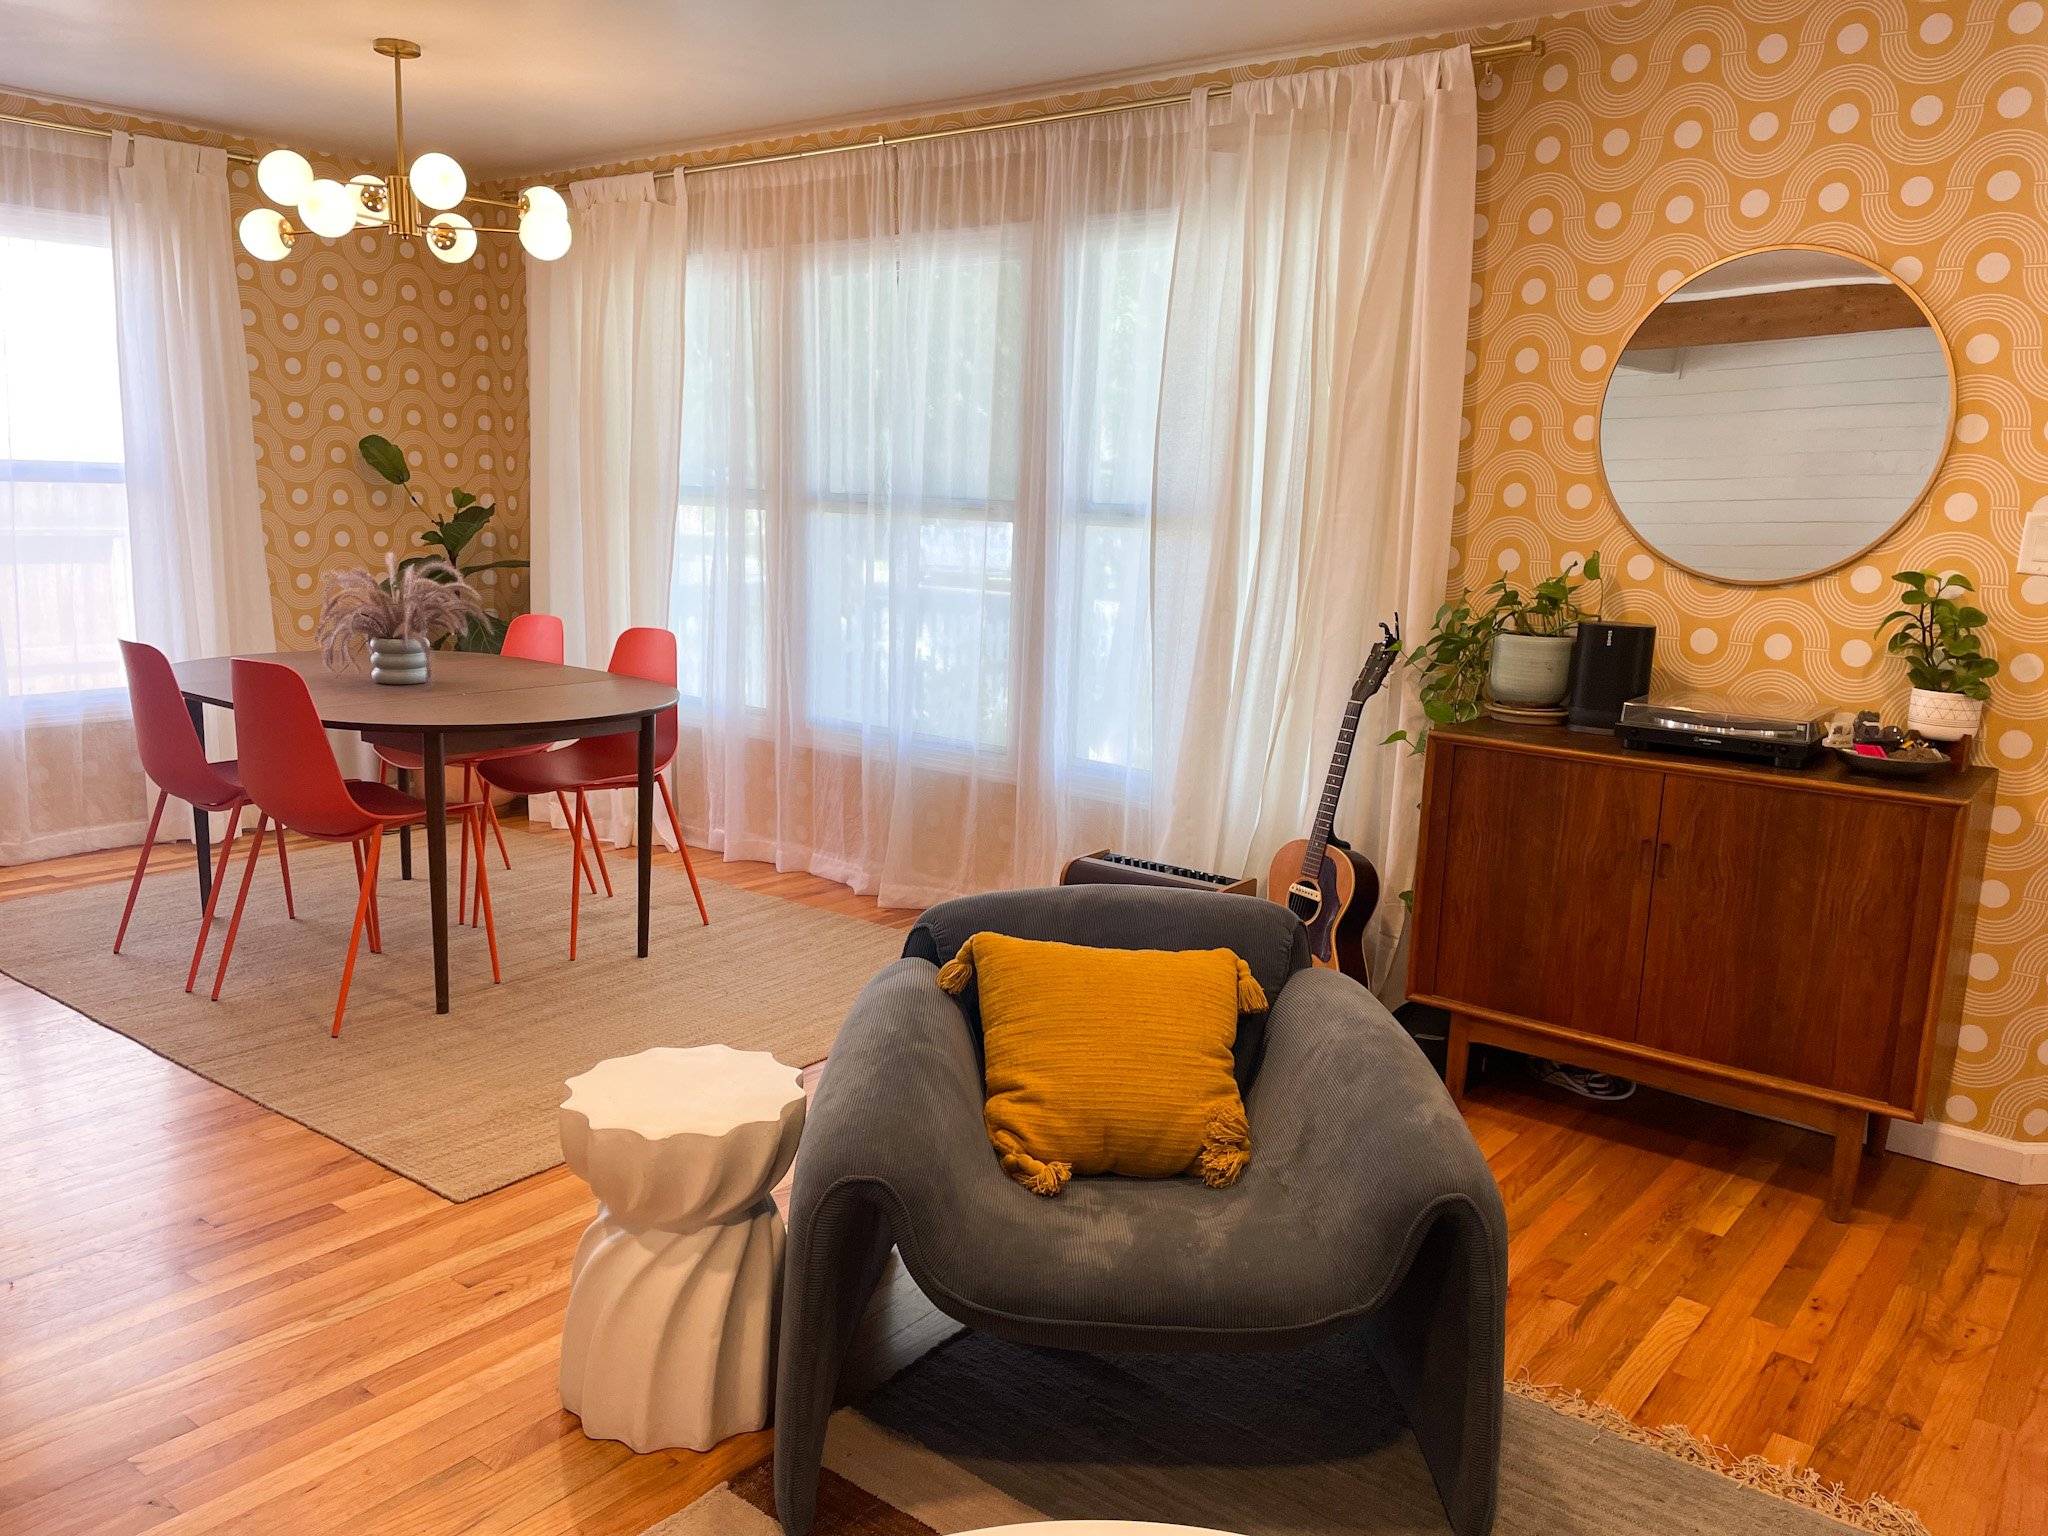

This peel & stick wallpaper from Love vs. Design brought my vision to life. I got to customize the pattern and color, and applied it all ourselves! Watch the space transform in this Dining Room Reveal. With the wall paper up, the room had already taken on a new presence. I wanted to continue this fun & colorful theme by adding bright orange chairs from Article. We kept our vintage dining room table and our neutral jute rug to ground the room and keep some softness. It was time to upgrade the light as well! This retro inspired fixture brings me so much joy! The windows got a facelift with double panel curtains, sheer & linen. Finally, plants and fresh blooms completed the space!
KITCHEN:
The kitchen is placed in the center of the living spaces, so it’s an immediate attention grabber. The previous owners were rocking major farmhouse vibes, so the Island, and the majority of the walls, were covered in white shiplap, complete with a butcher block island counter. We know that eventually we will want to replace the kitchen floor, paint the cabinets, remove some uppers and do open shelving, and redo the countertops. But we aren’t quite ready to bite the bullet on some big purchases, like new terrazzo counters, so in the meantime, me and my friend did some major DIY-ing!
BEFORE:

AFTER:

I ordered some terrazzo contact paper, and picked up some bead board from Home Depot. One of my favorite paint colors that I’ve used for years is Little Black Dress by Behr. It was perfect to make this island a statement, and blend it all at once! I then added new pendant lights with a fun and colorful shape to make this space feel completely new! Lastly, I picked up these Target barstool seats for a steal of $75 for all 3 on Offer Up! Watch the process happen here!
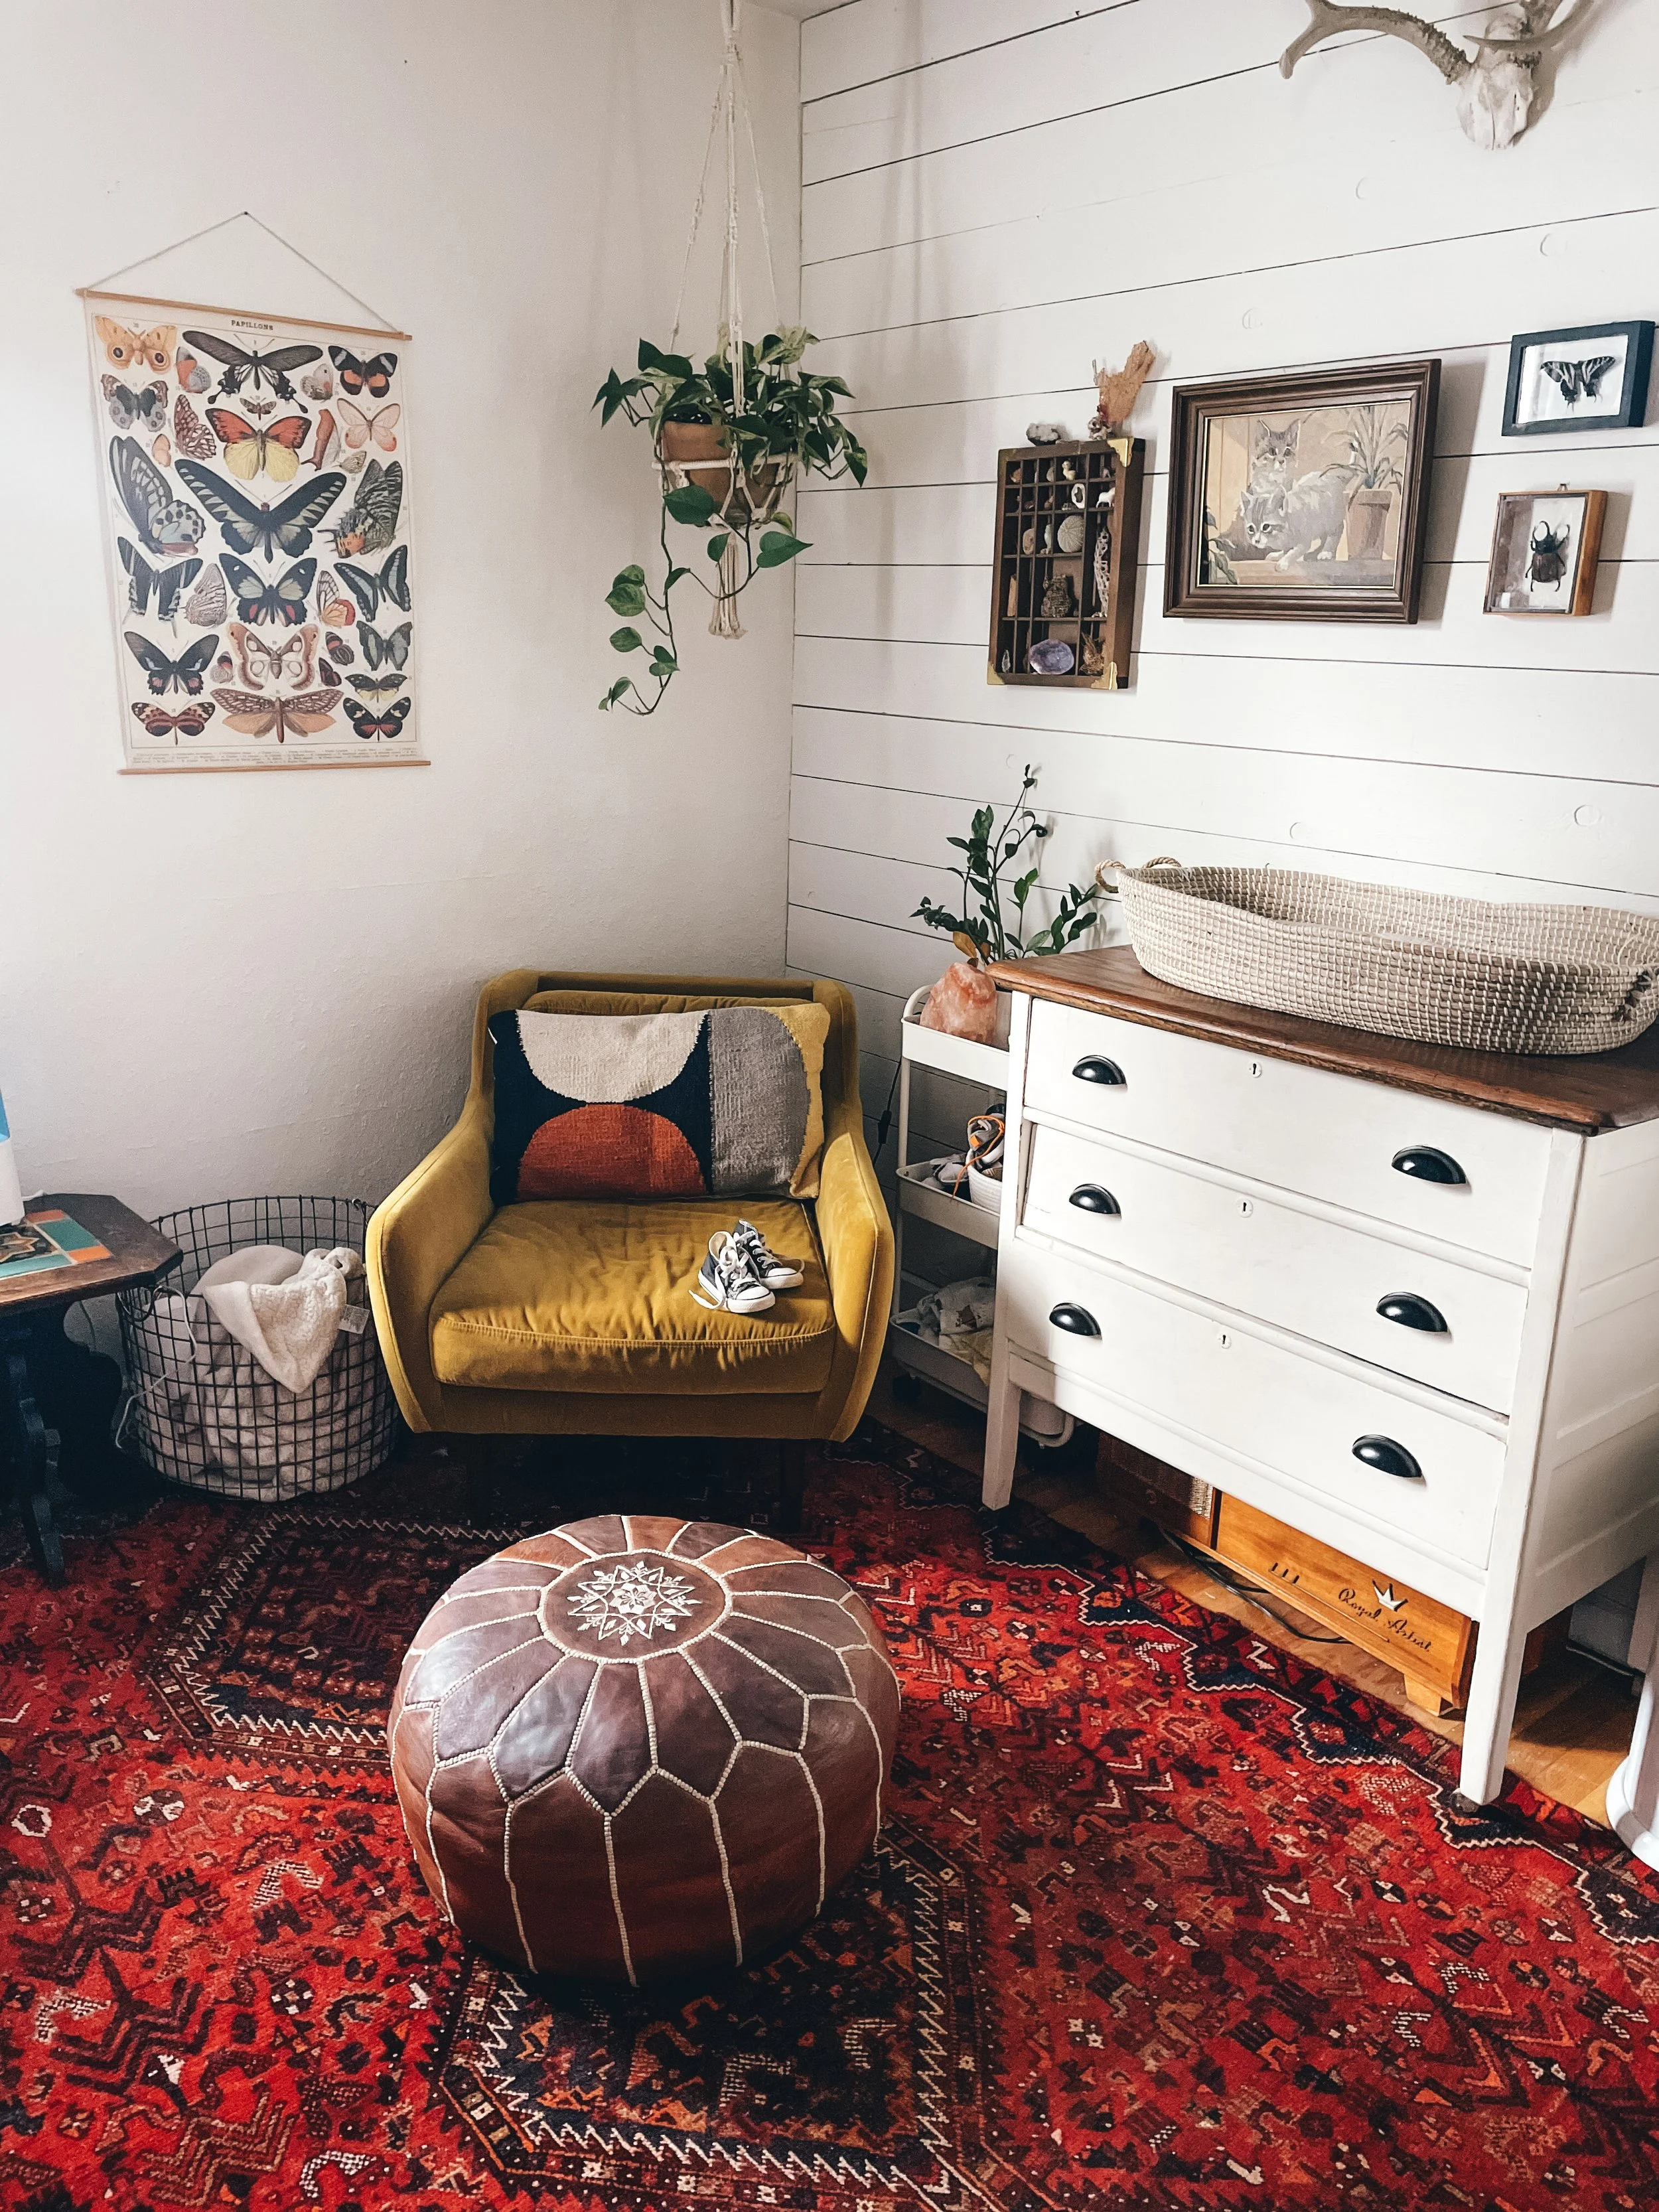
MONTY’S ROOM:
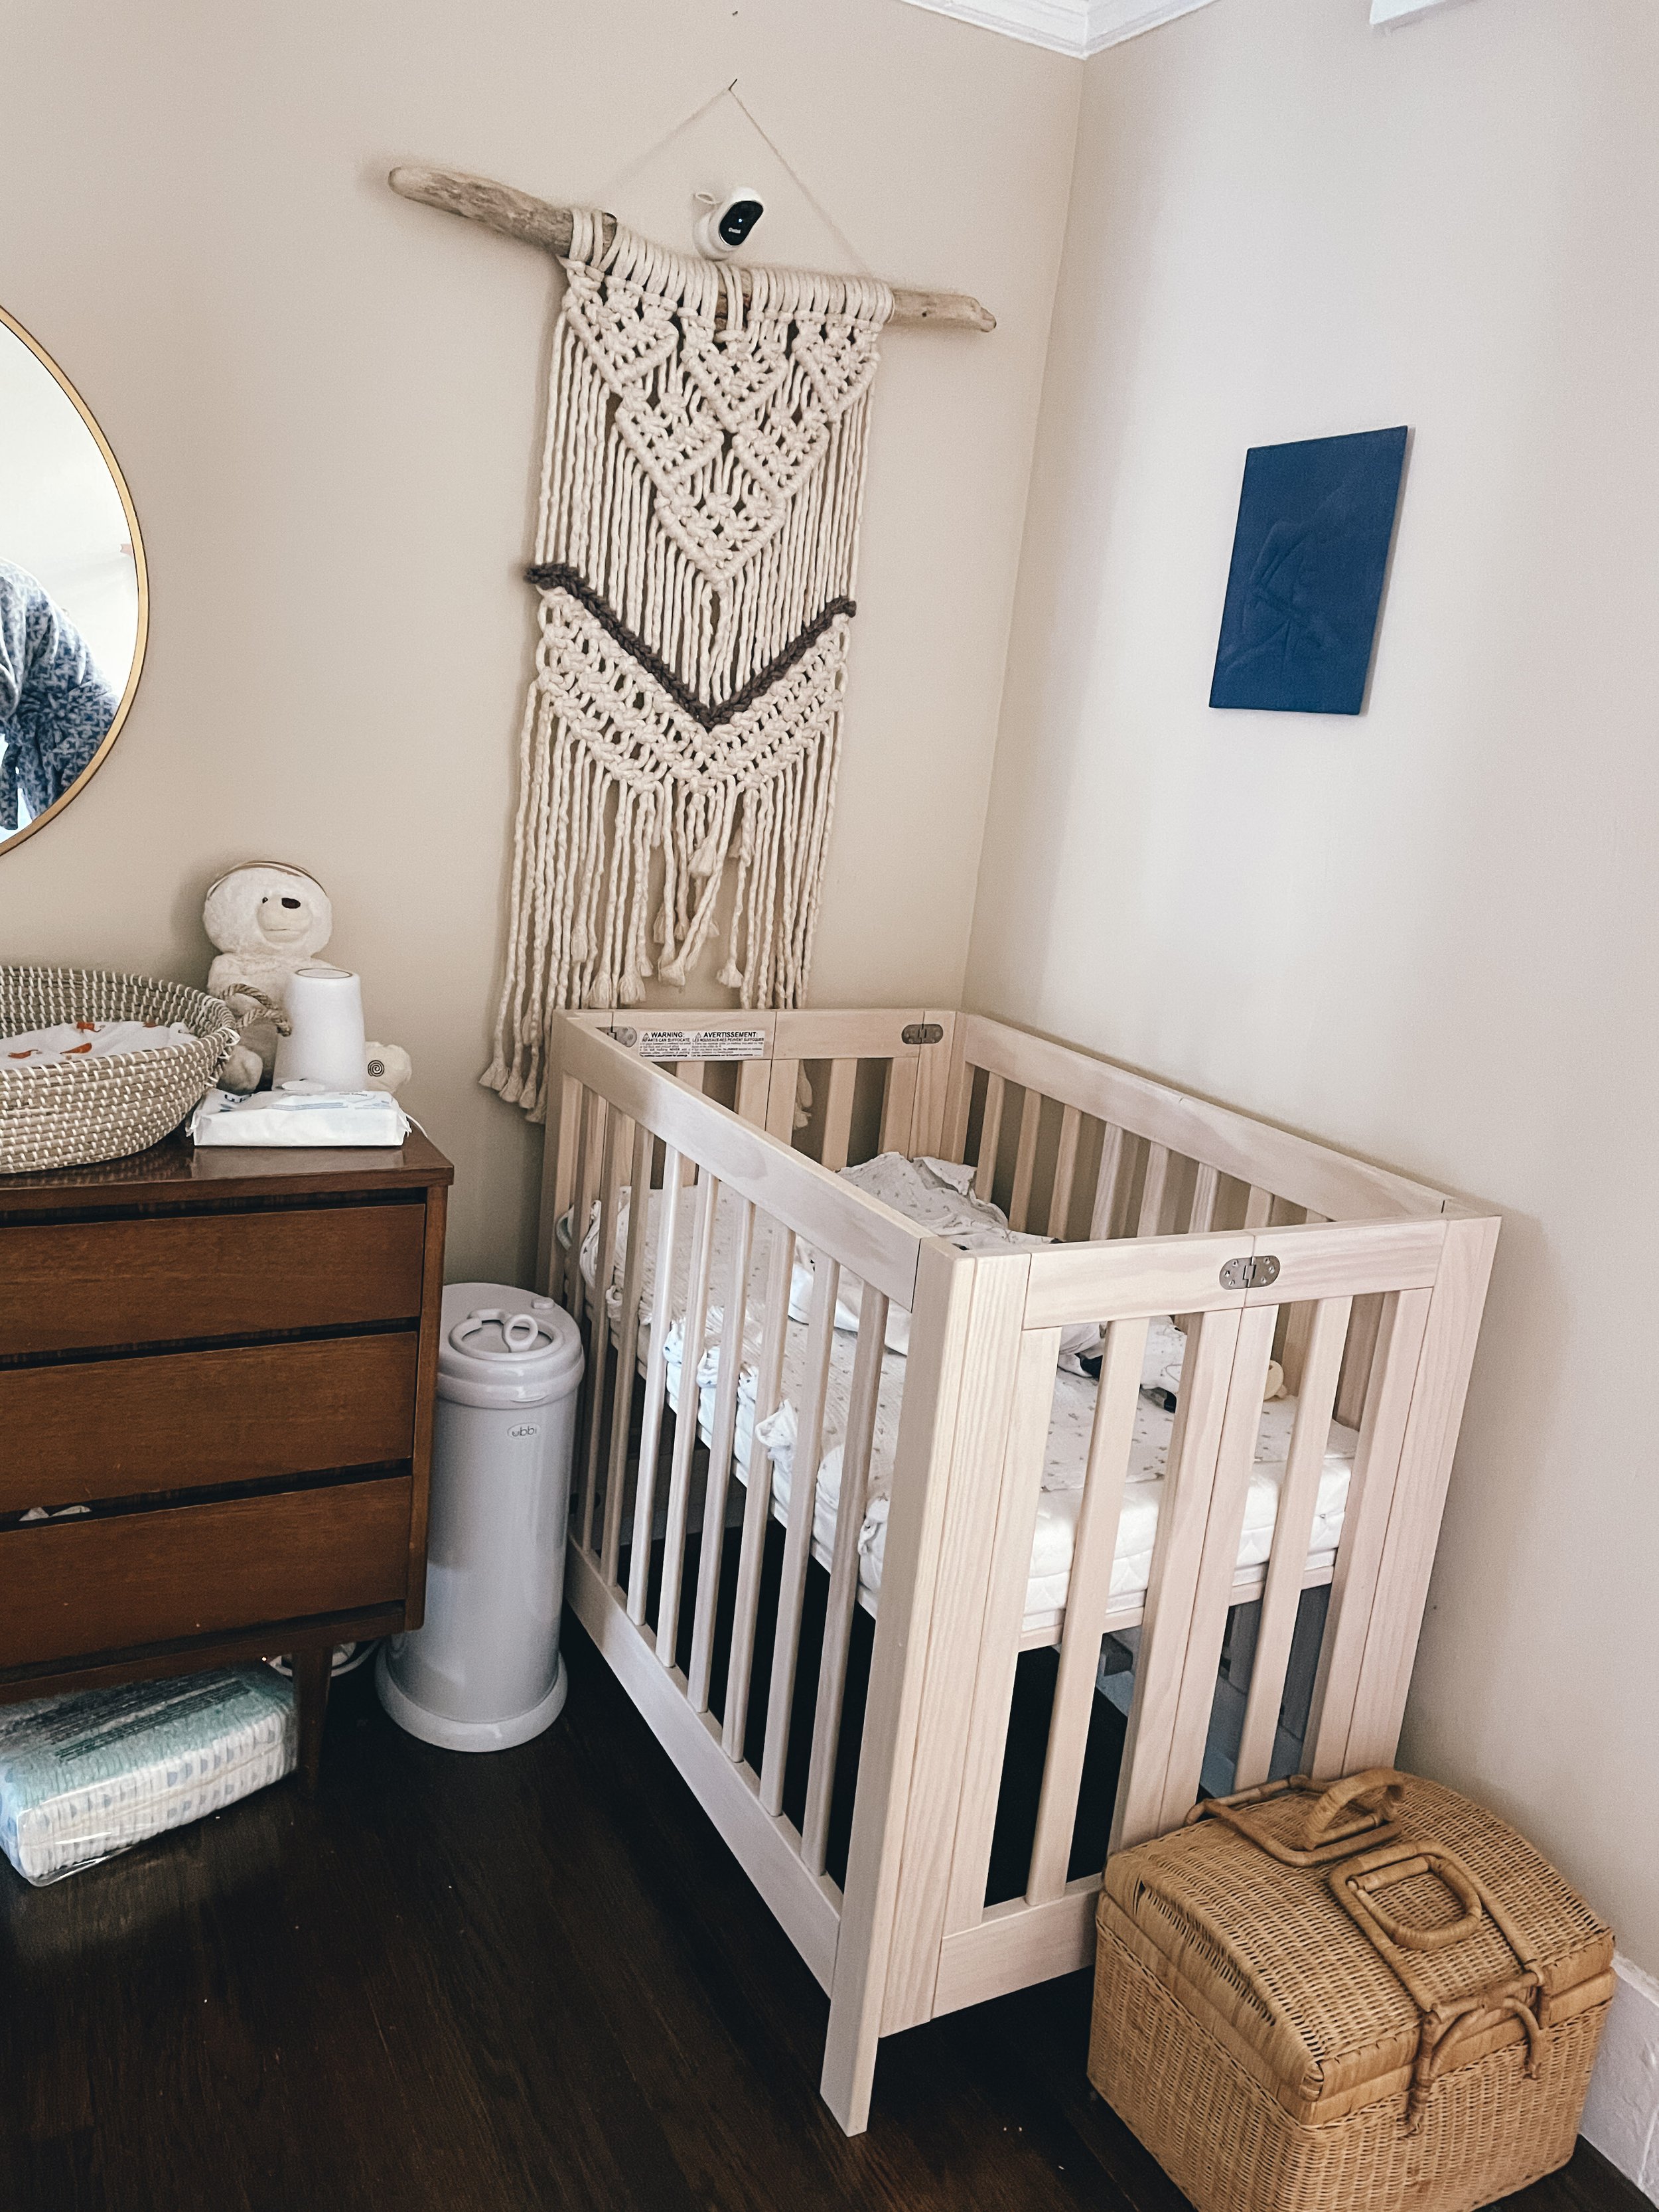
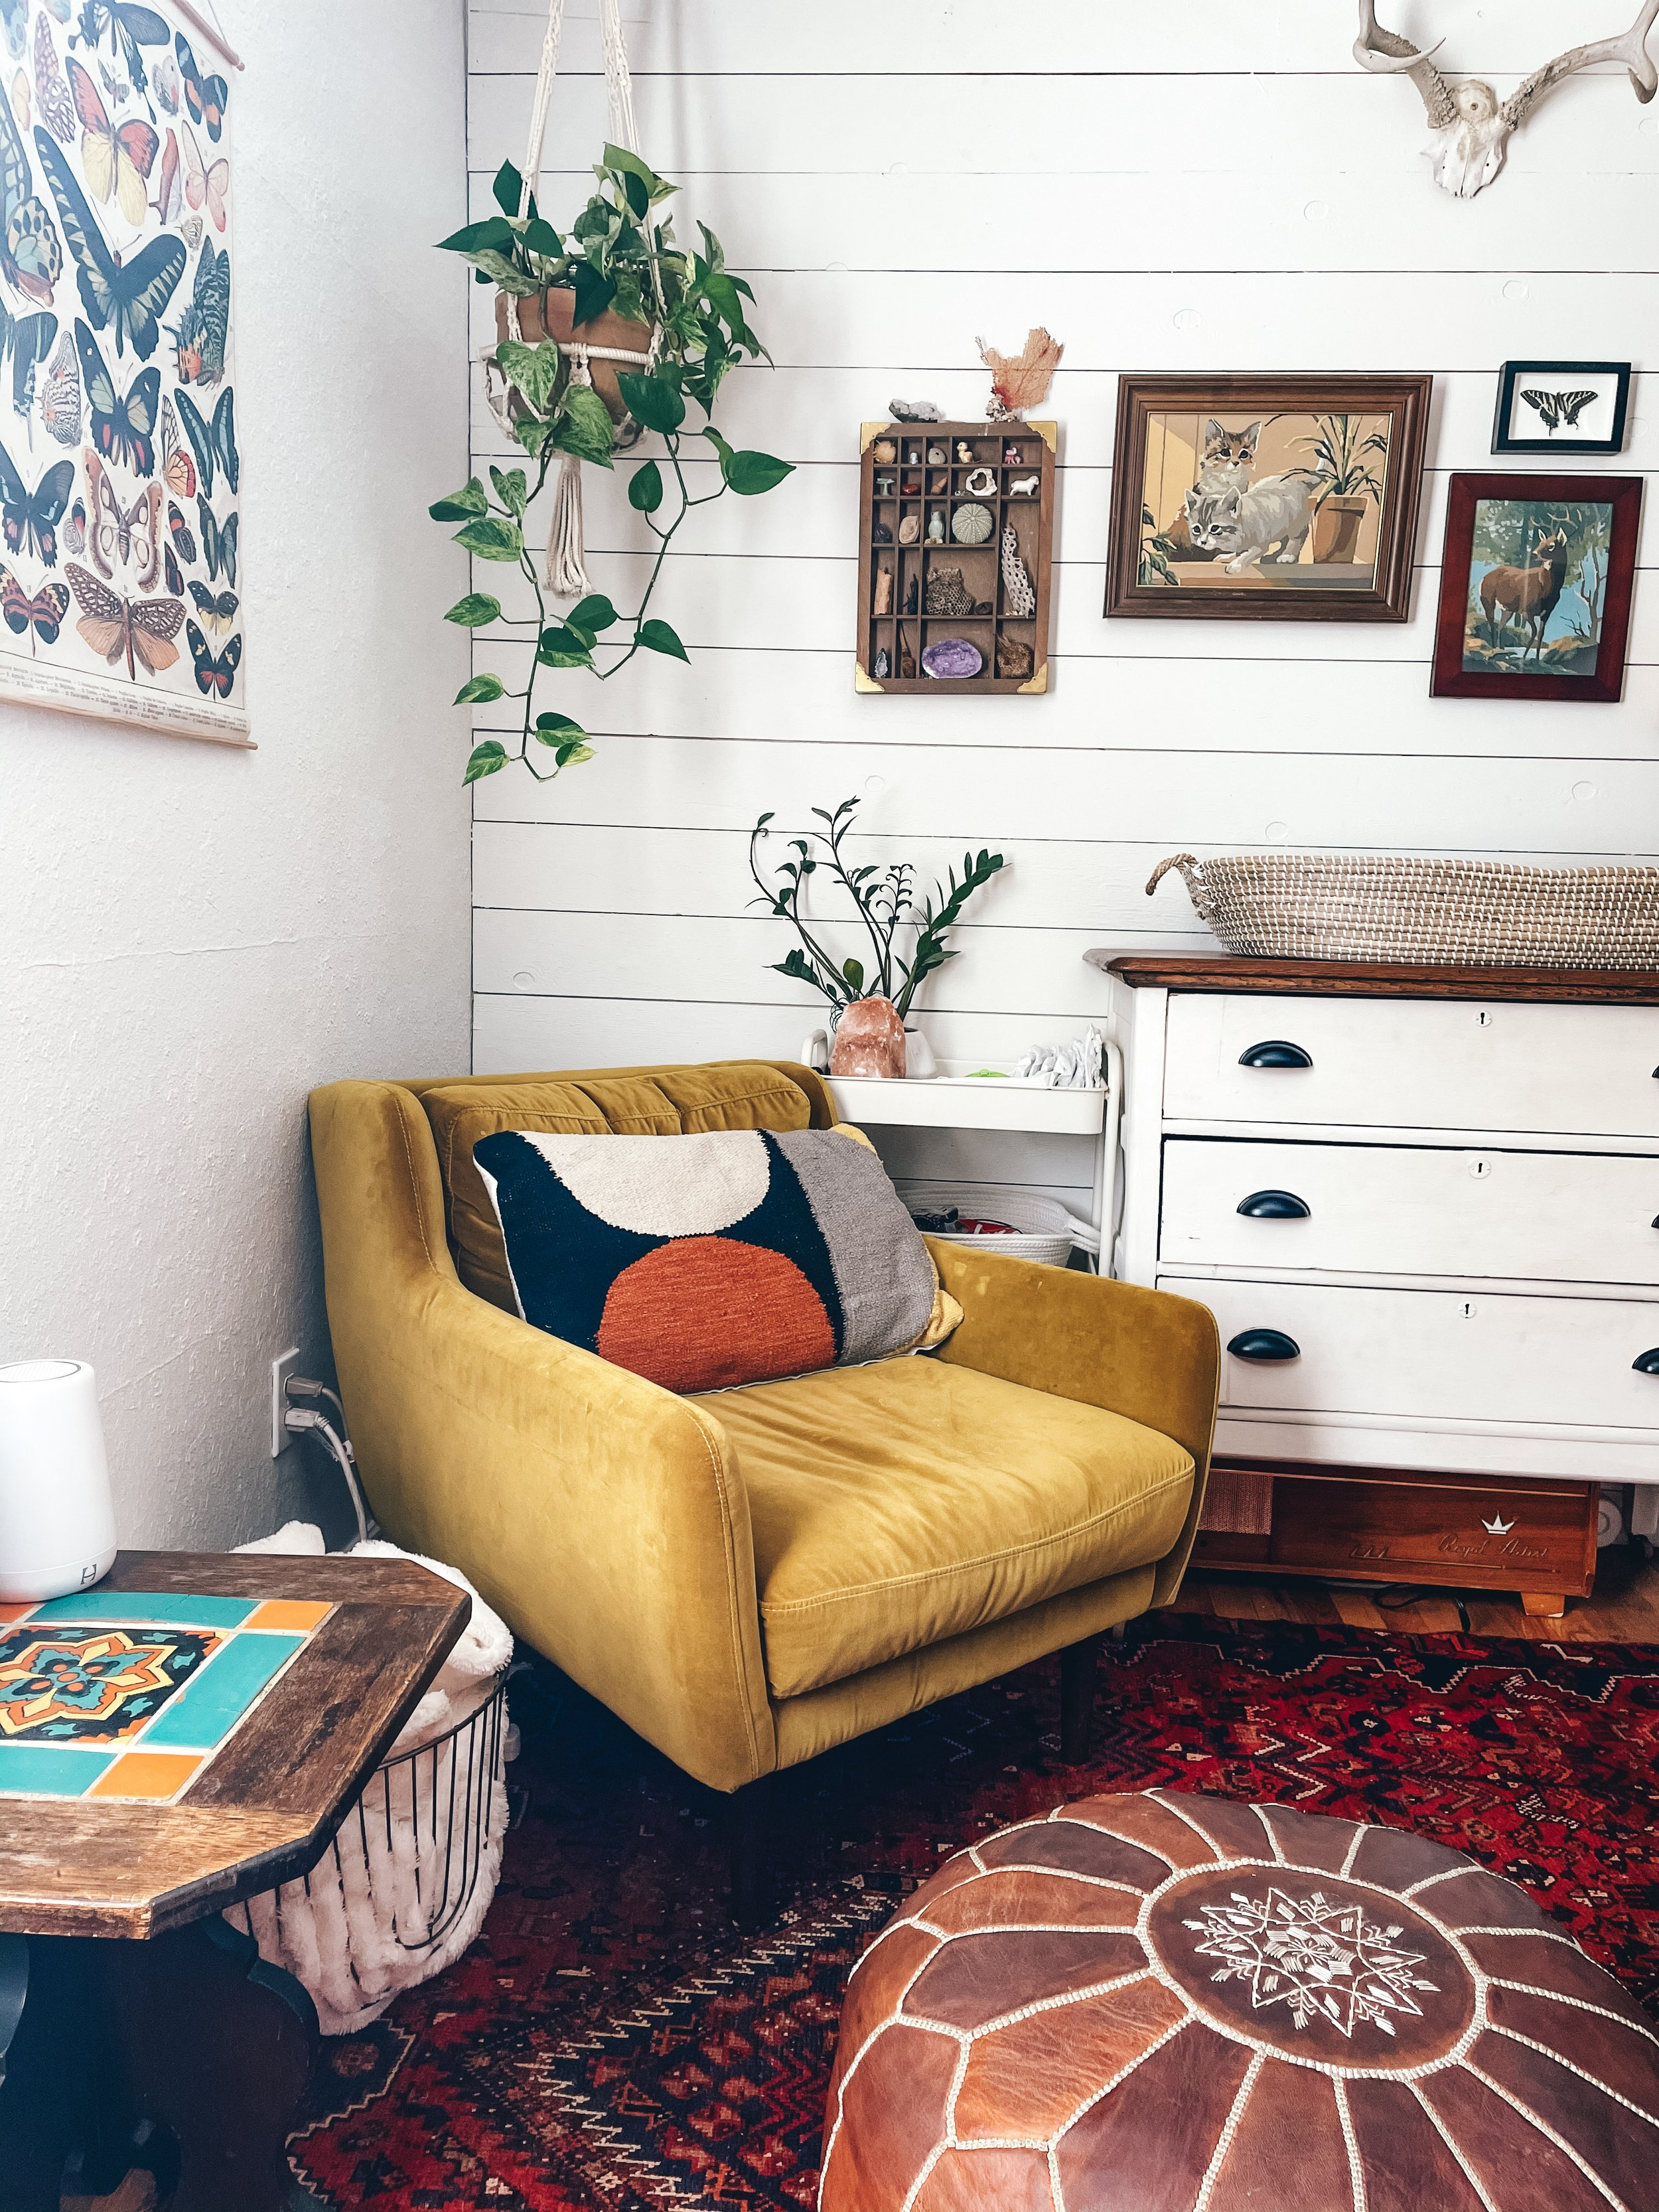
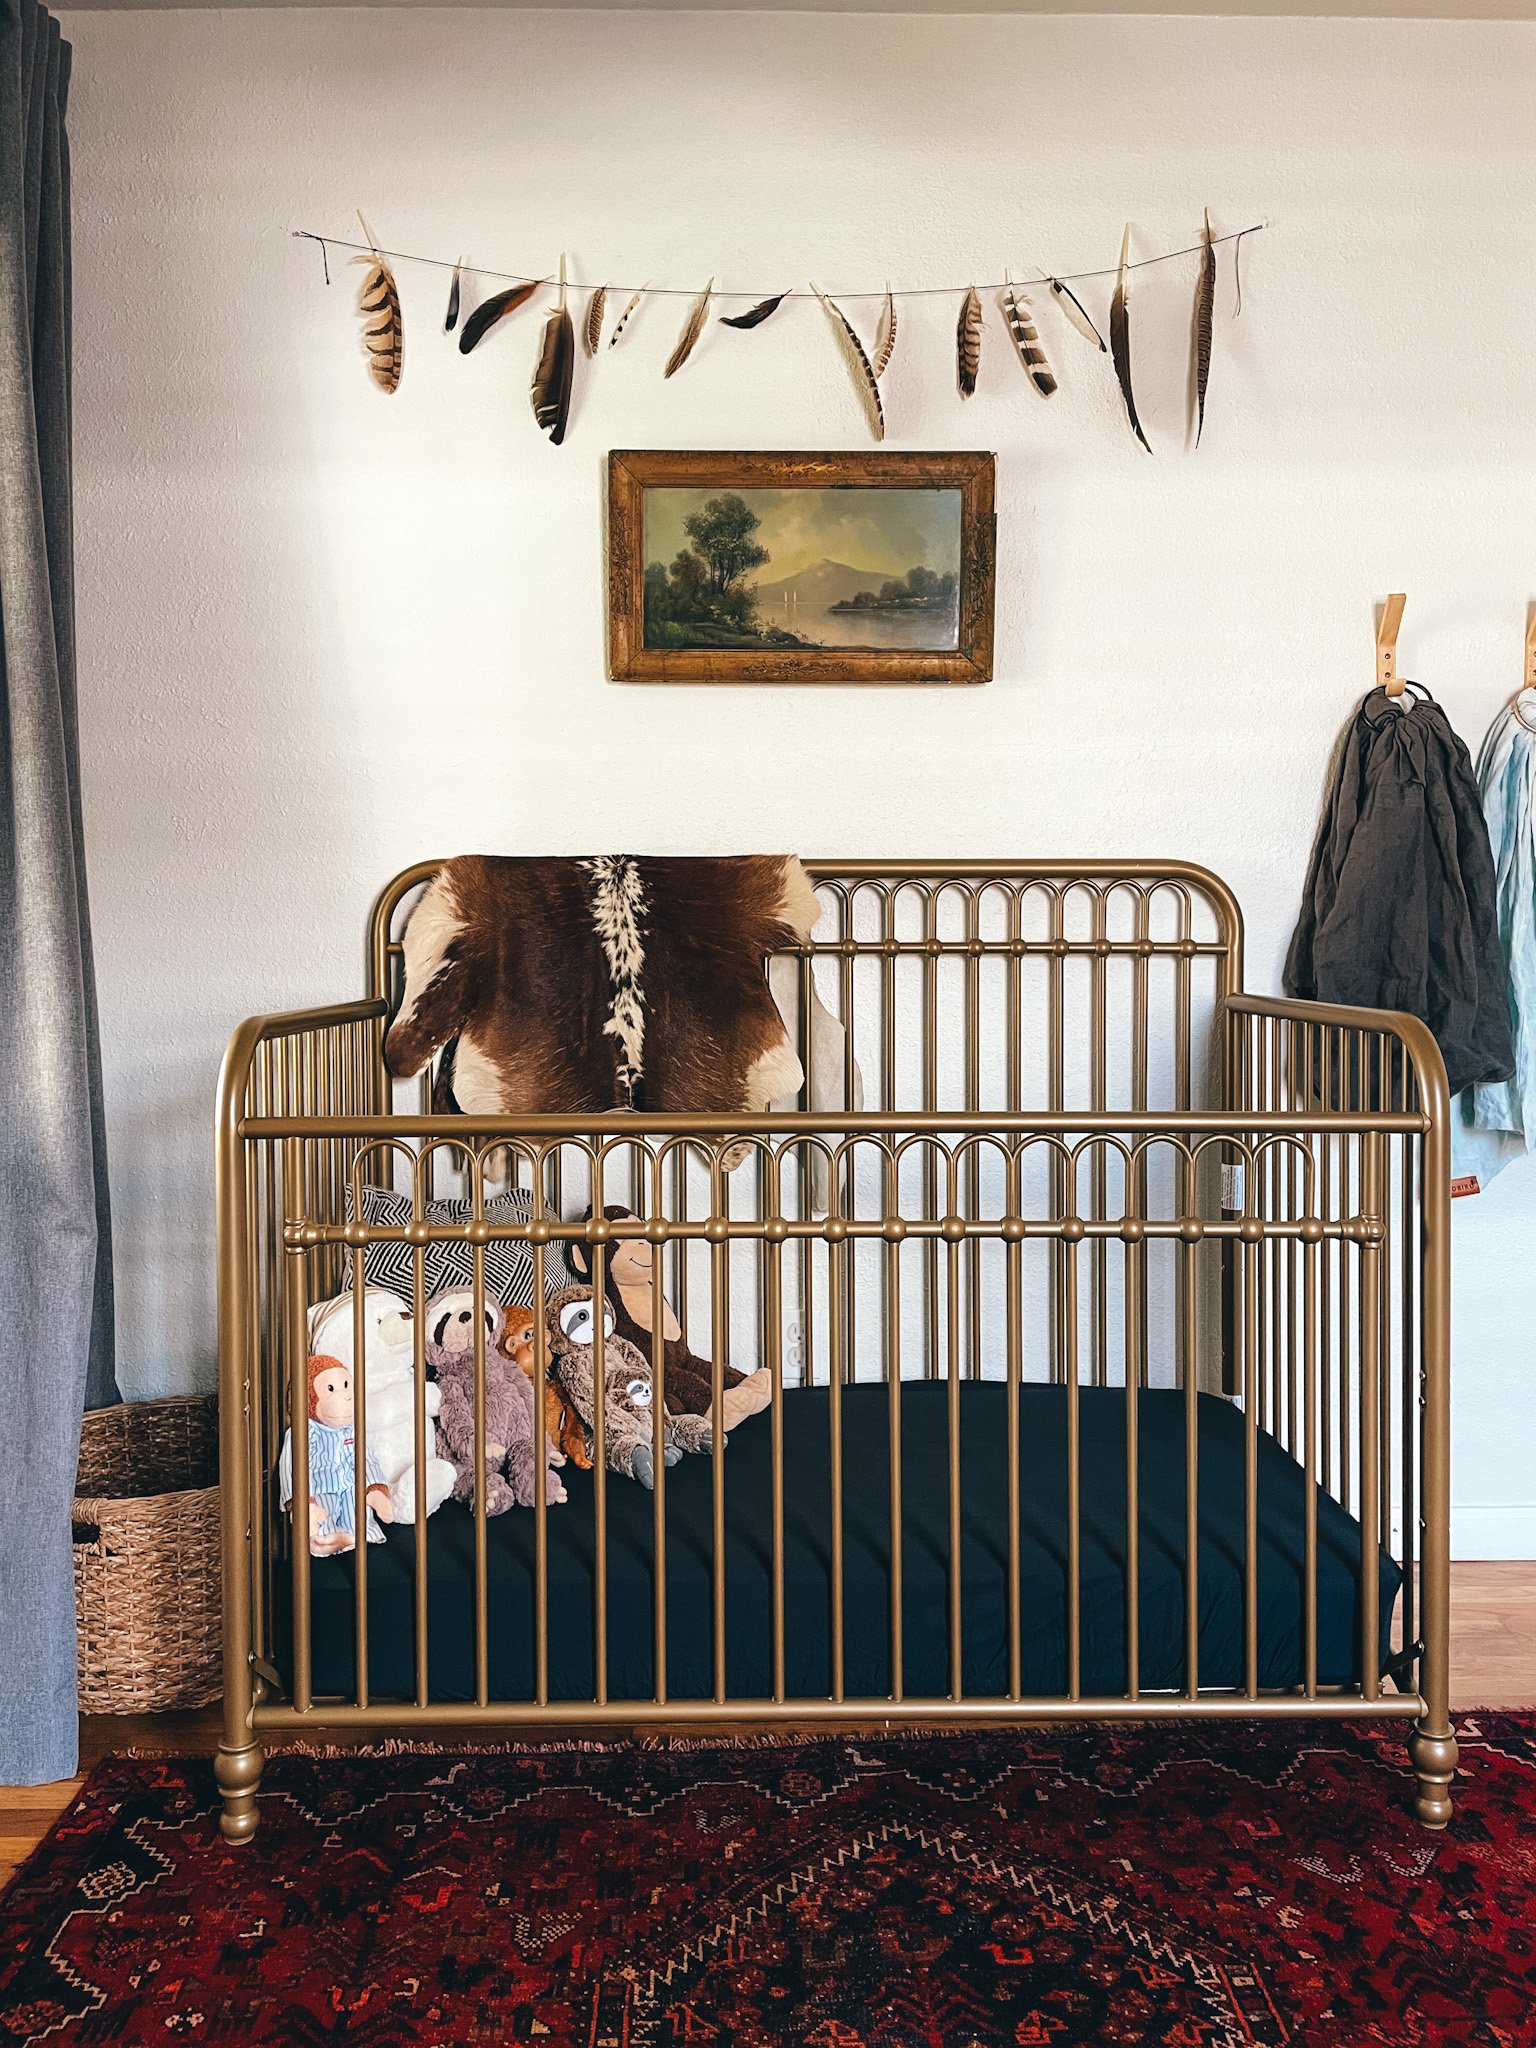
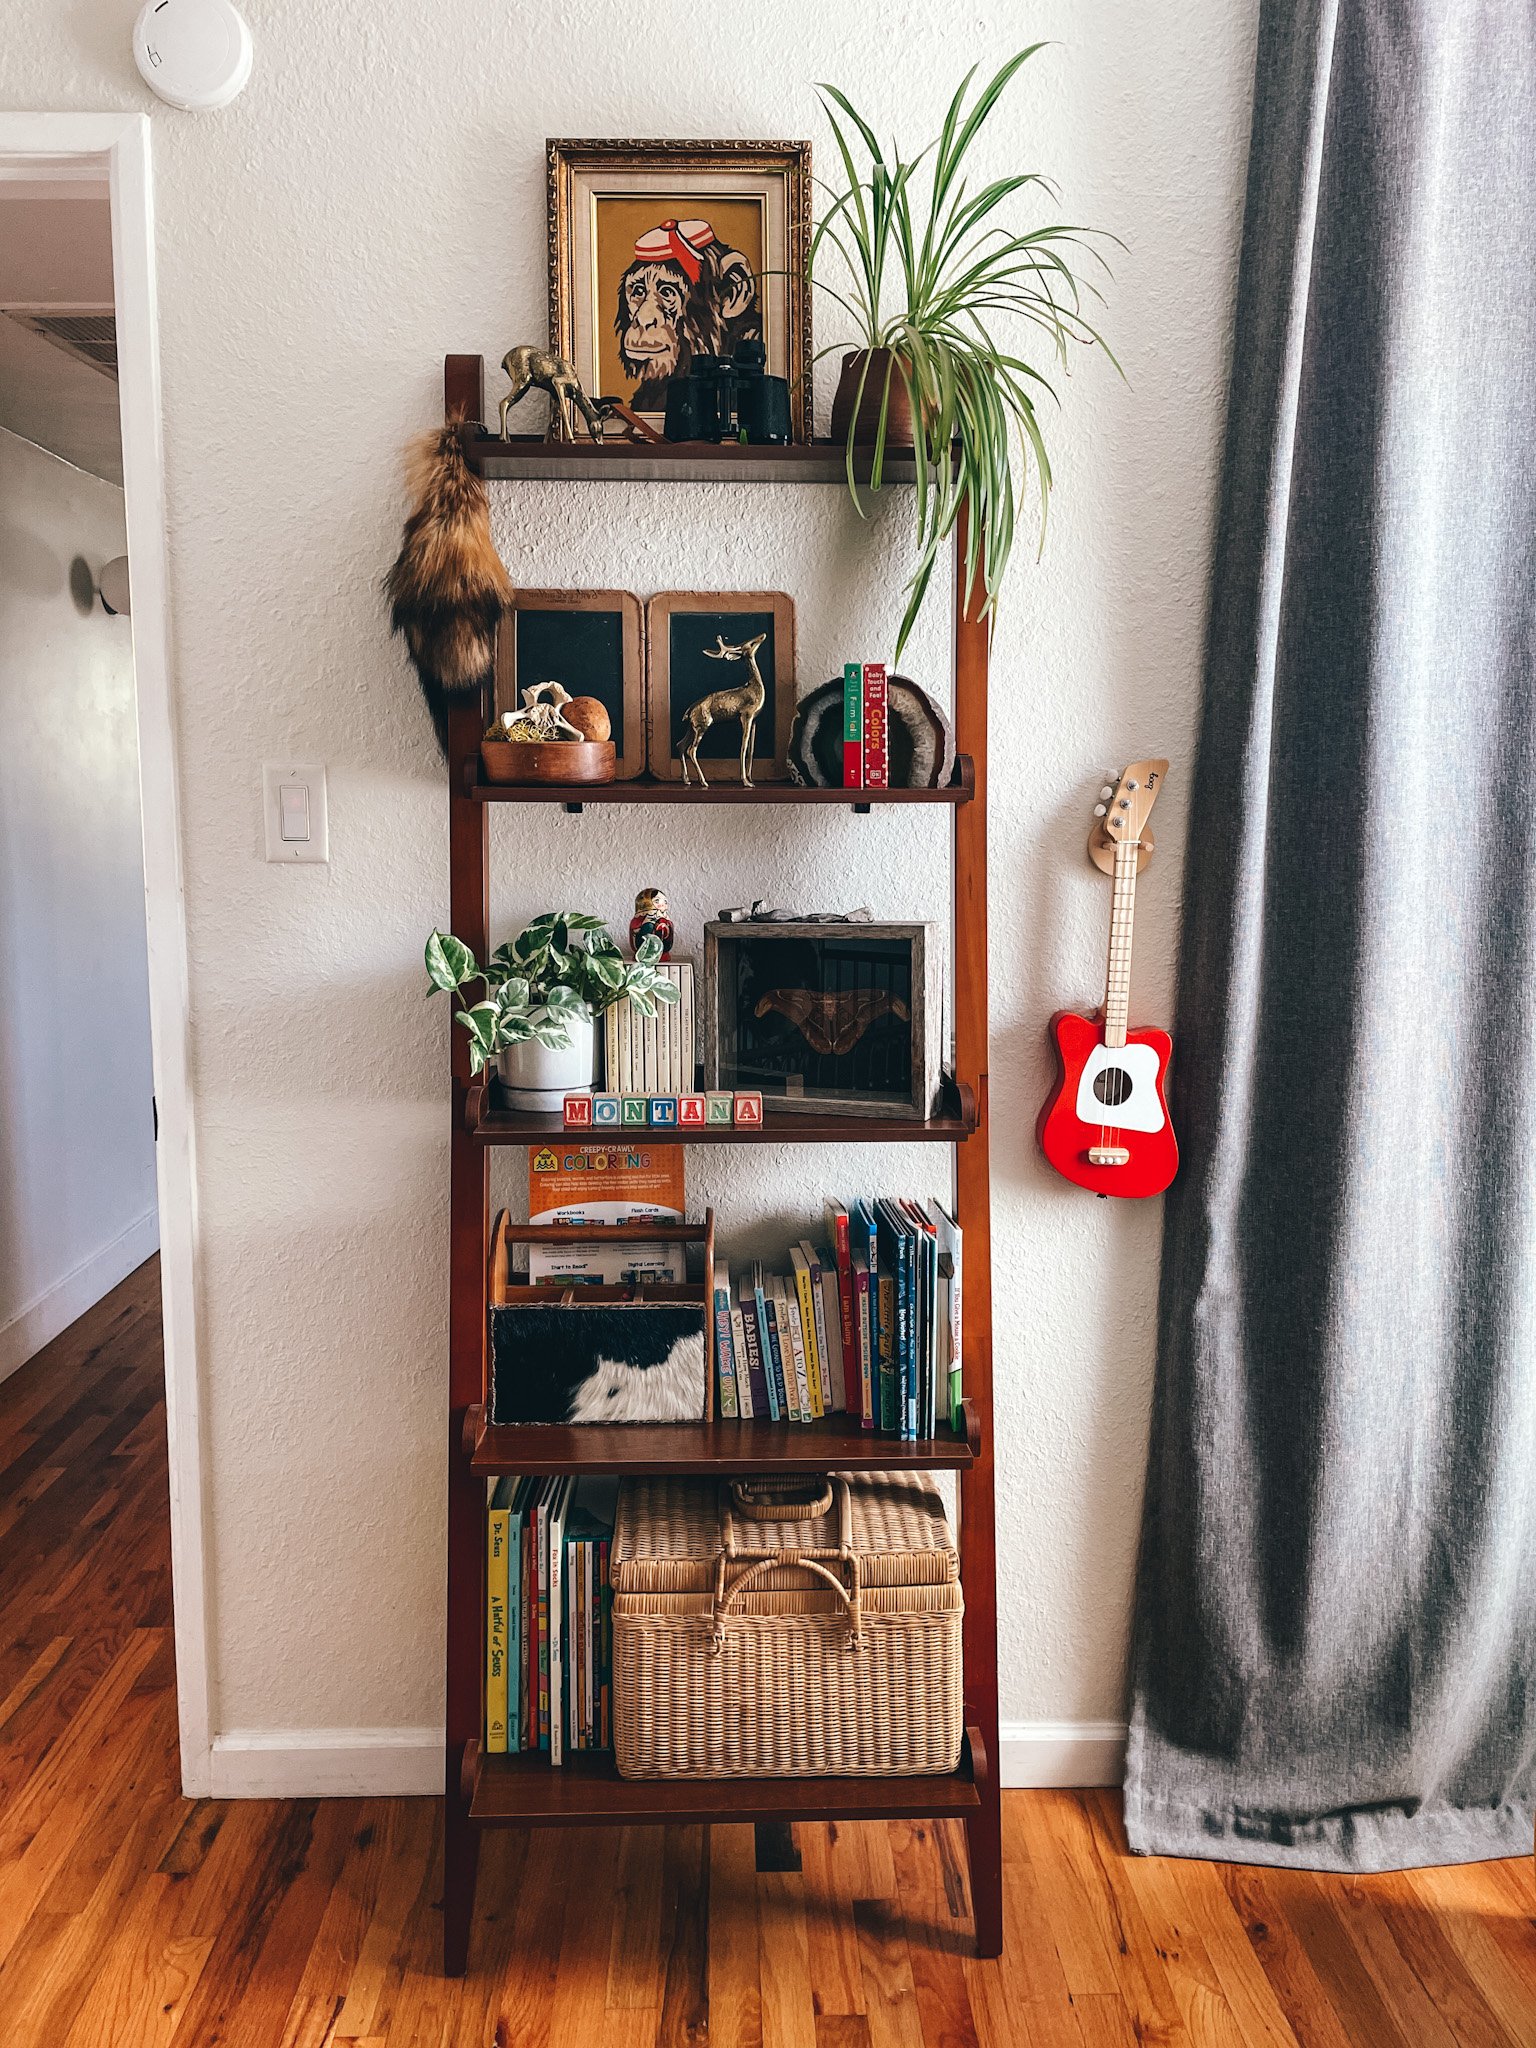
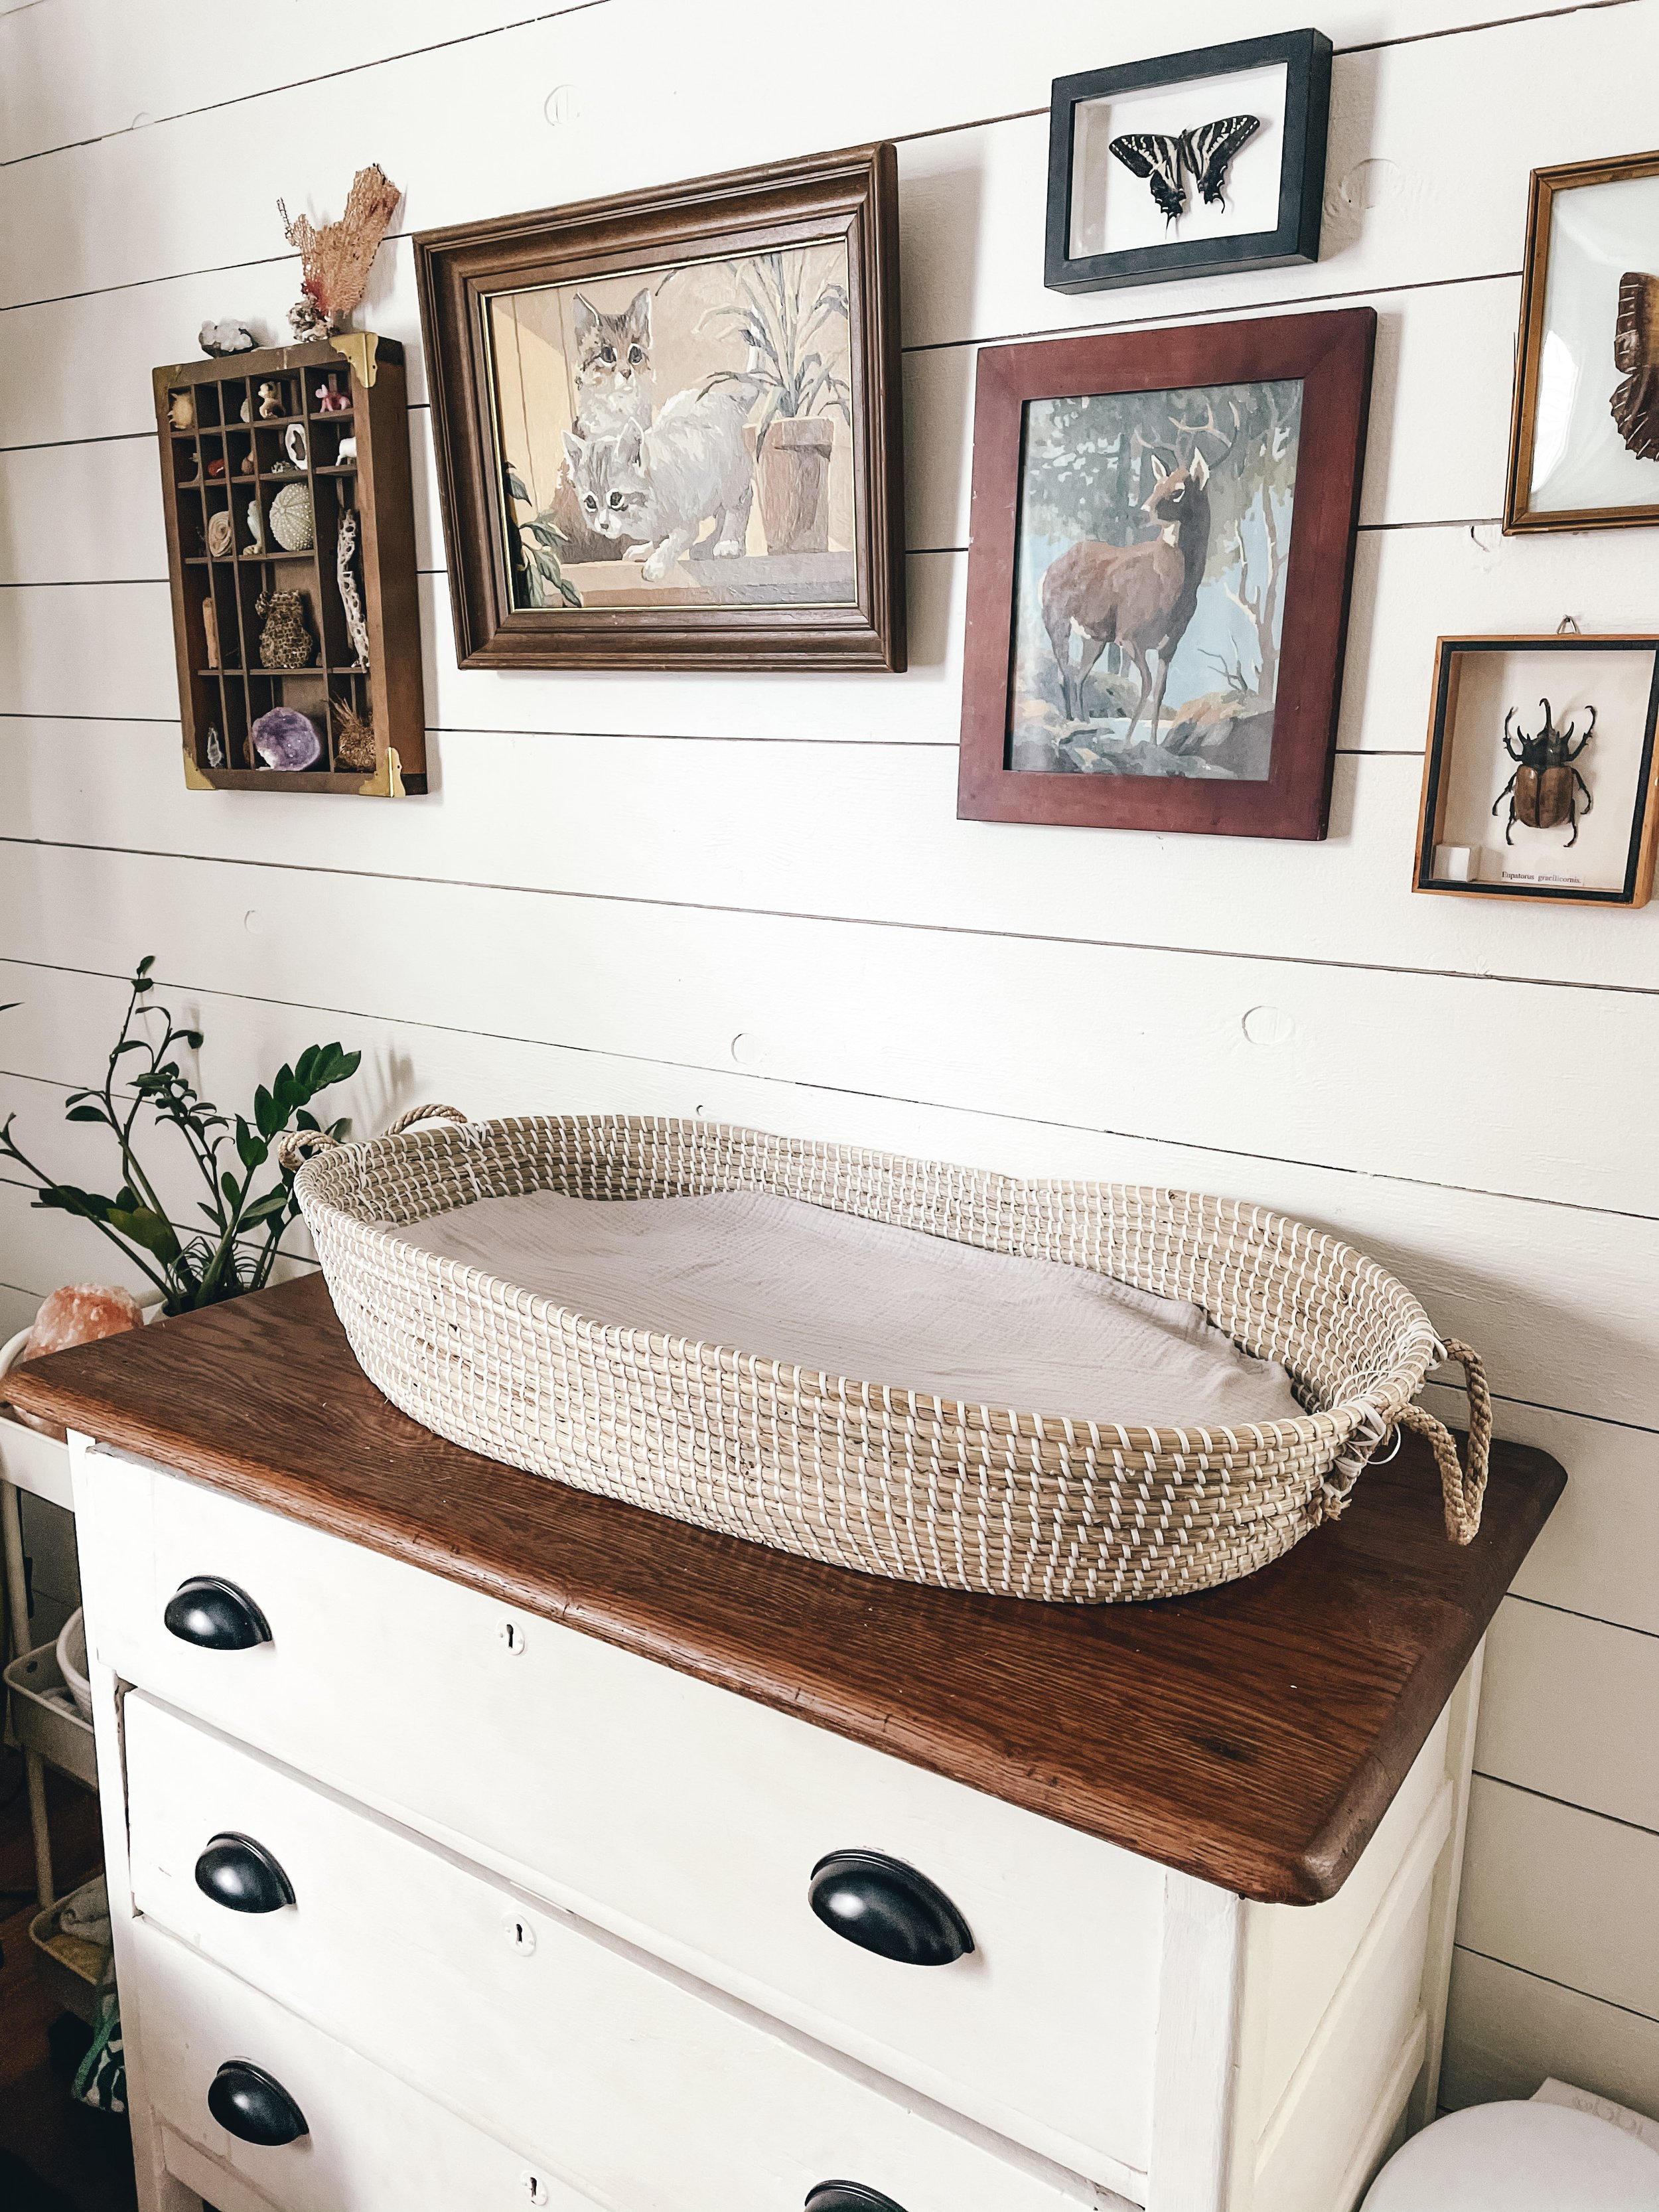
When I thought about Monty’s room I wanted it to have childhood character without looking like a baby nursery. My theme was “nature”. I pulled so many antique pieces from all around the house to decorate his room, like a shadow box full of treasures that I’ve found in nature, my Grandma’s paint by number paintings, and my Granny’s calf skin. Many of these pieces were in our living room in our old place, like the antique red Afghan rug and the gold Article chair. I hunted for a dresser that would double as a changing table and I found this antique one from a local vendor. I got his bookshelf on Offer Up and purchased his crib new from Little Seeds. Watch the full room reveal here!
BEFORE:
This is Monty’s set up in our old place :)

AFTER:

Here’s our old living room in San Francisco - you can see so much of Monty’s new room in here!
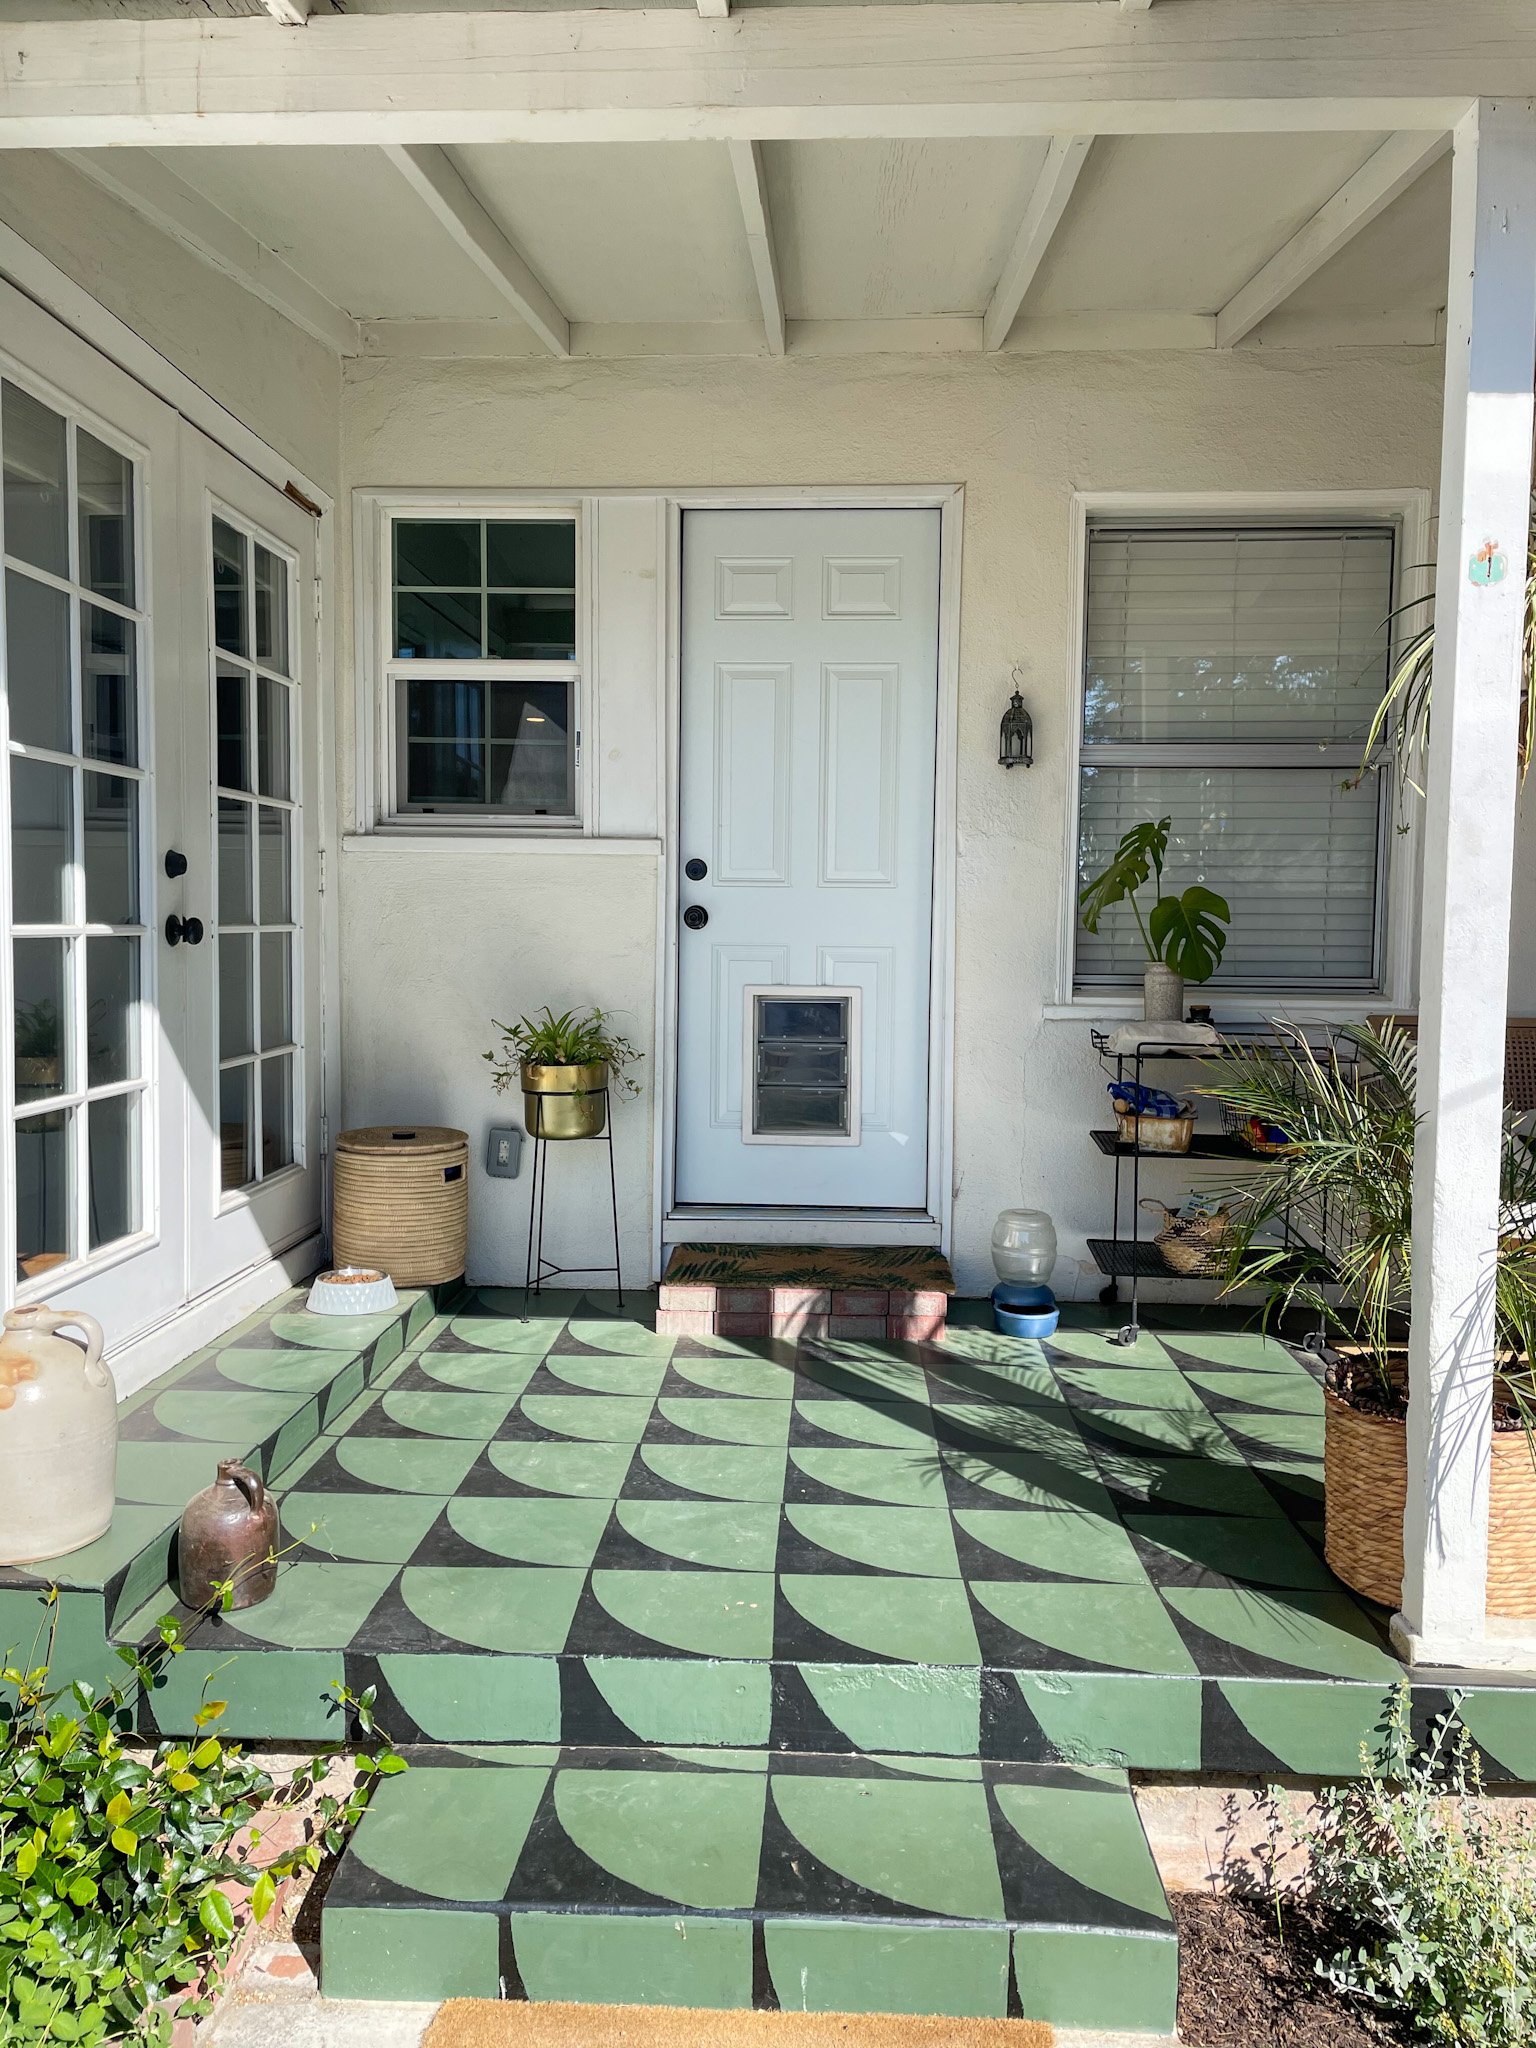
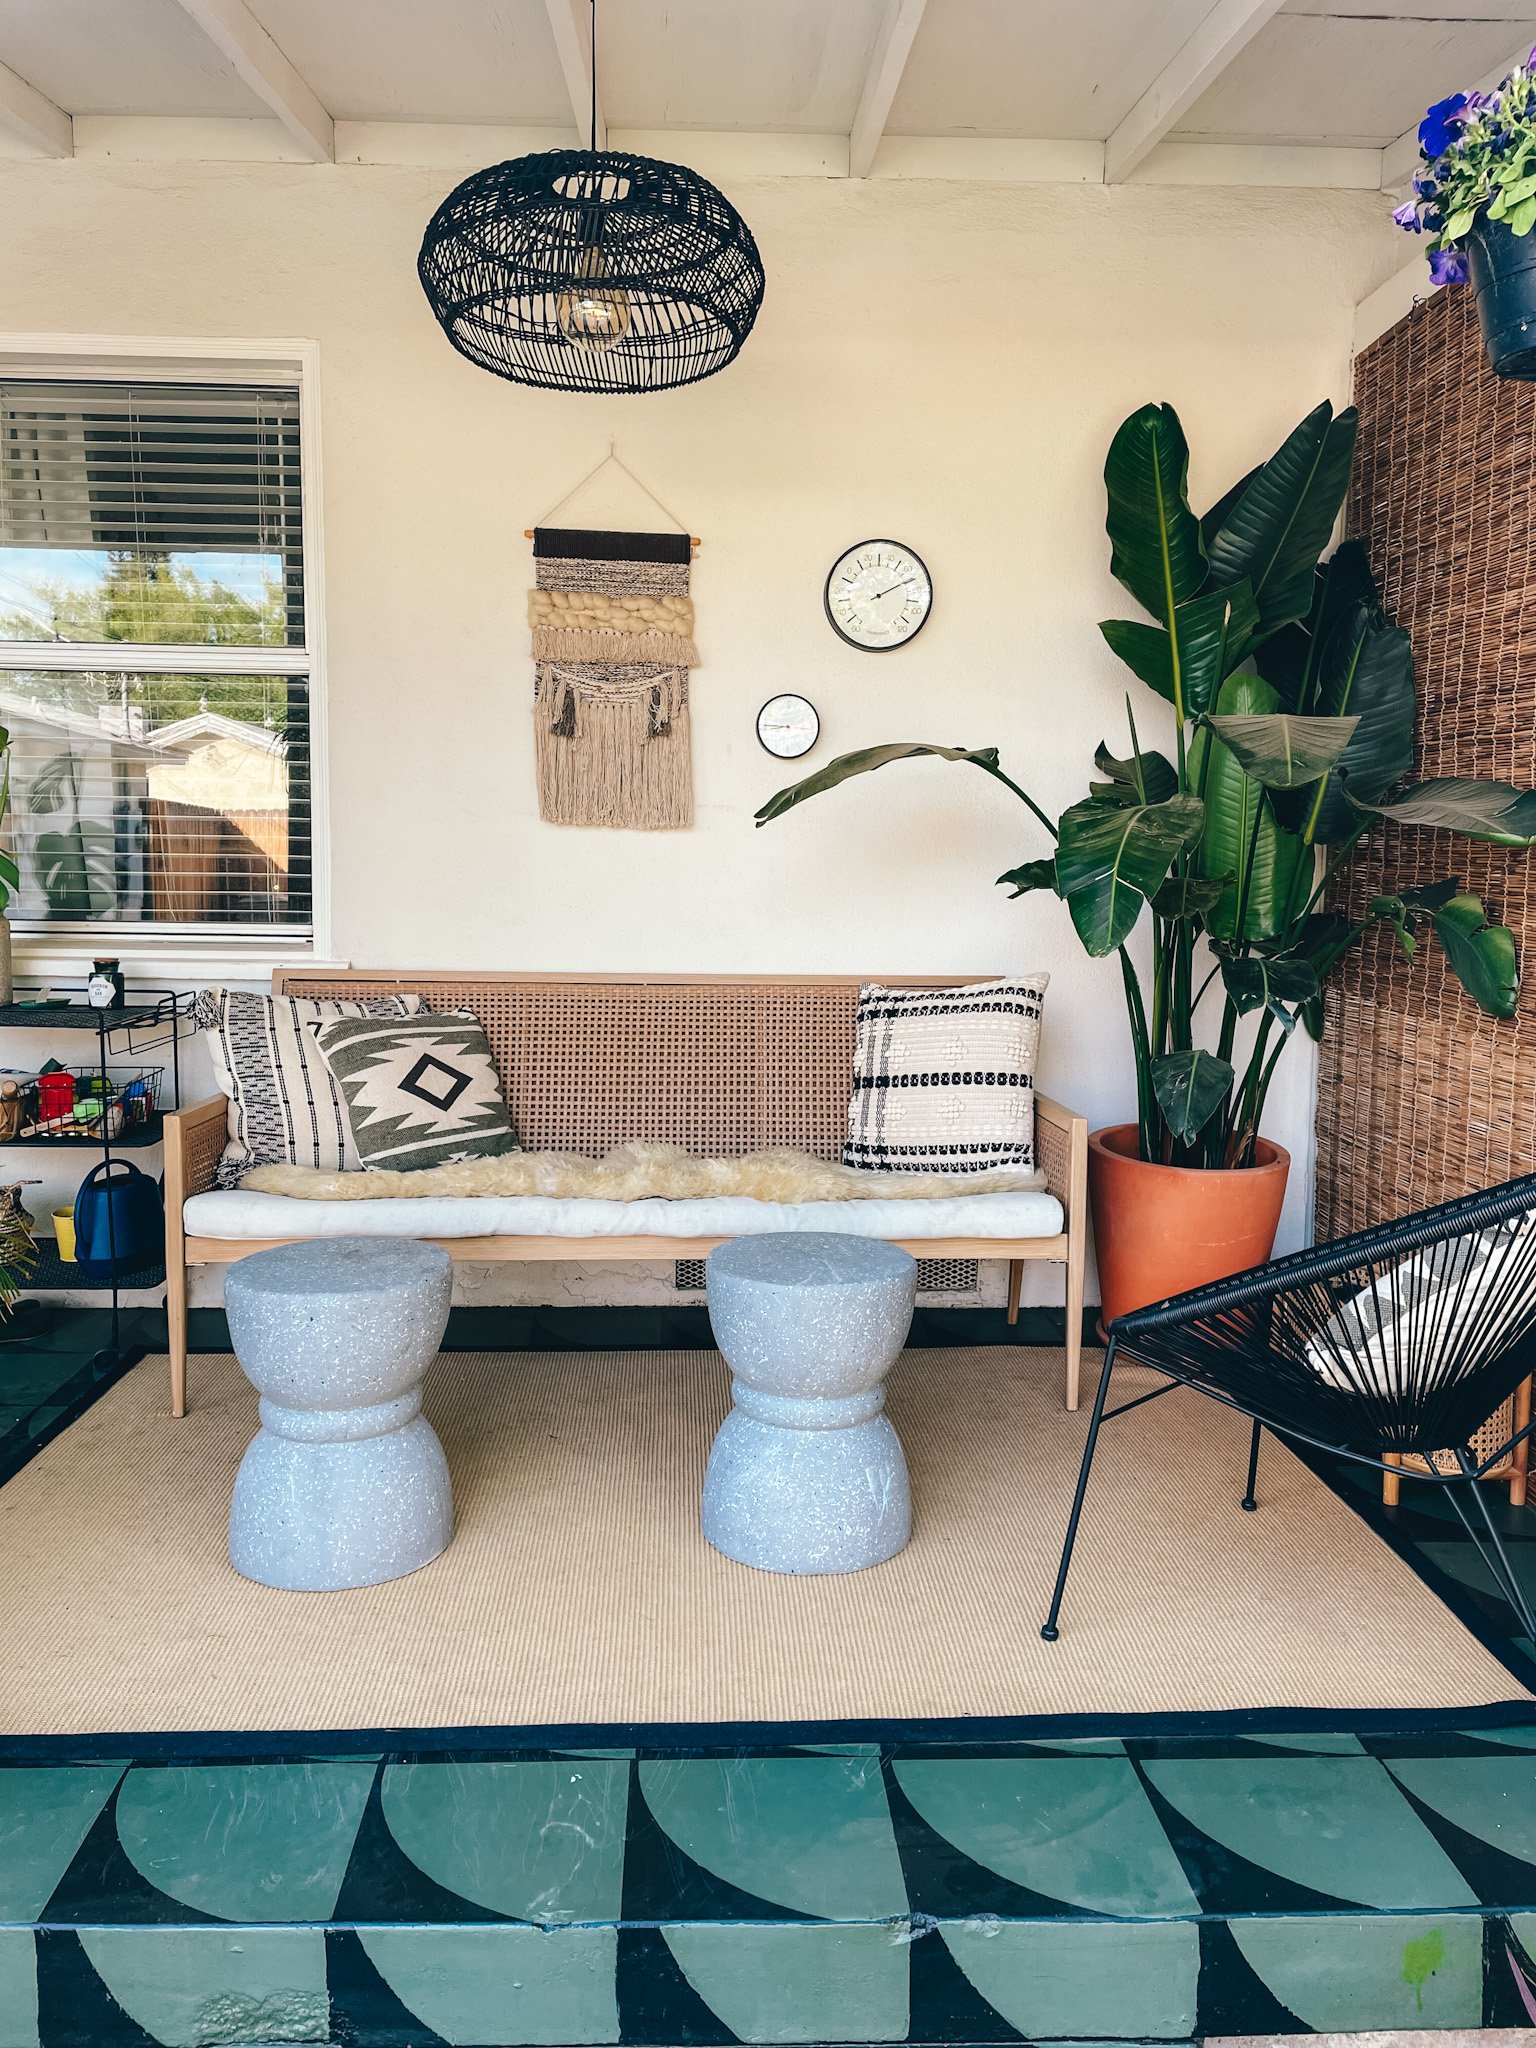
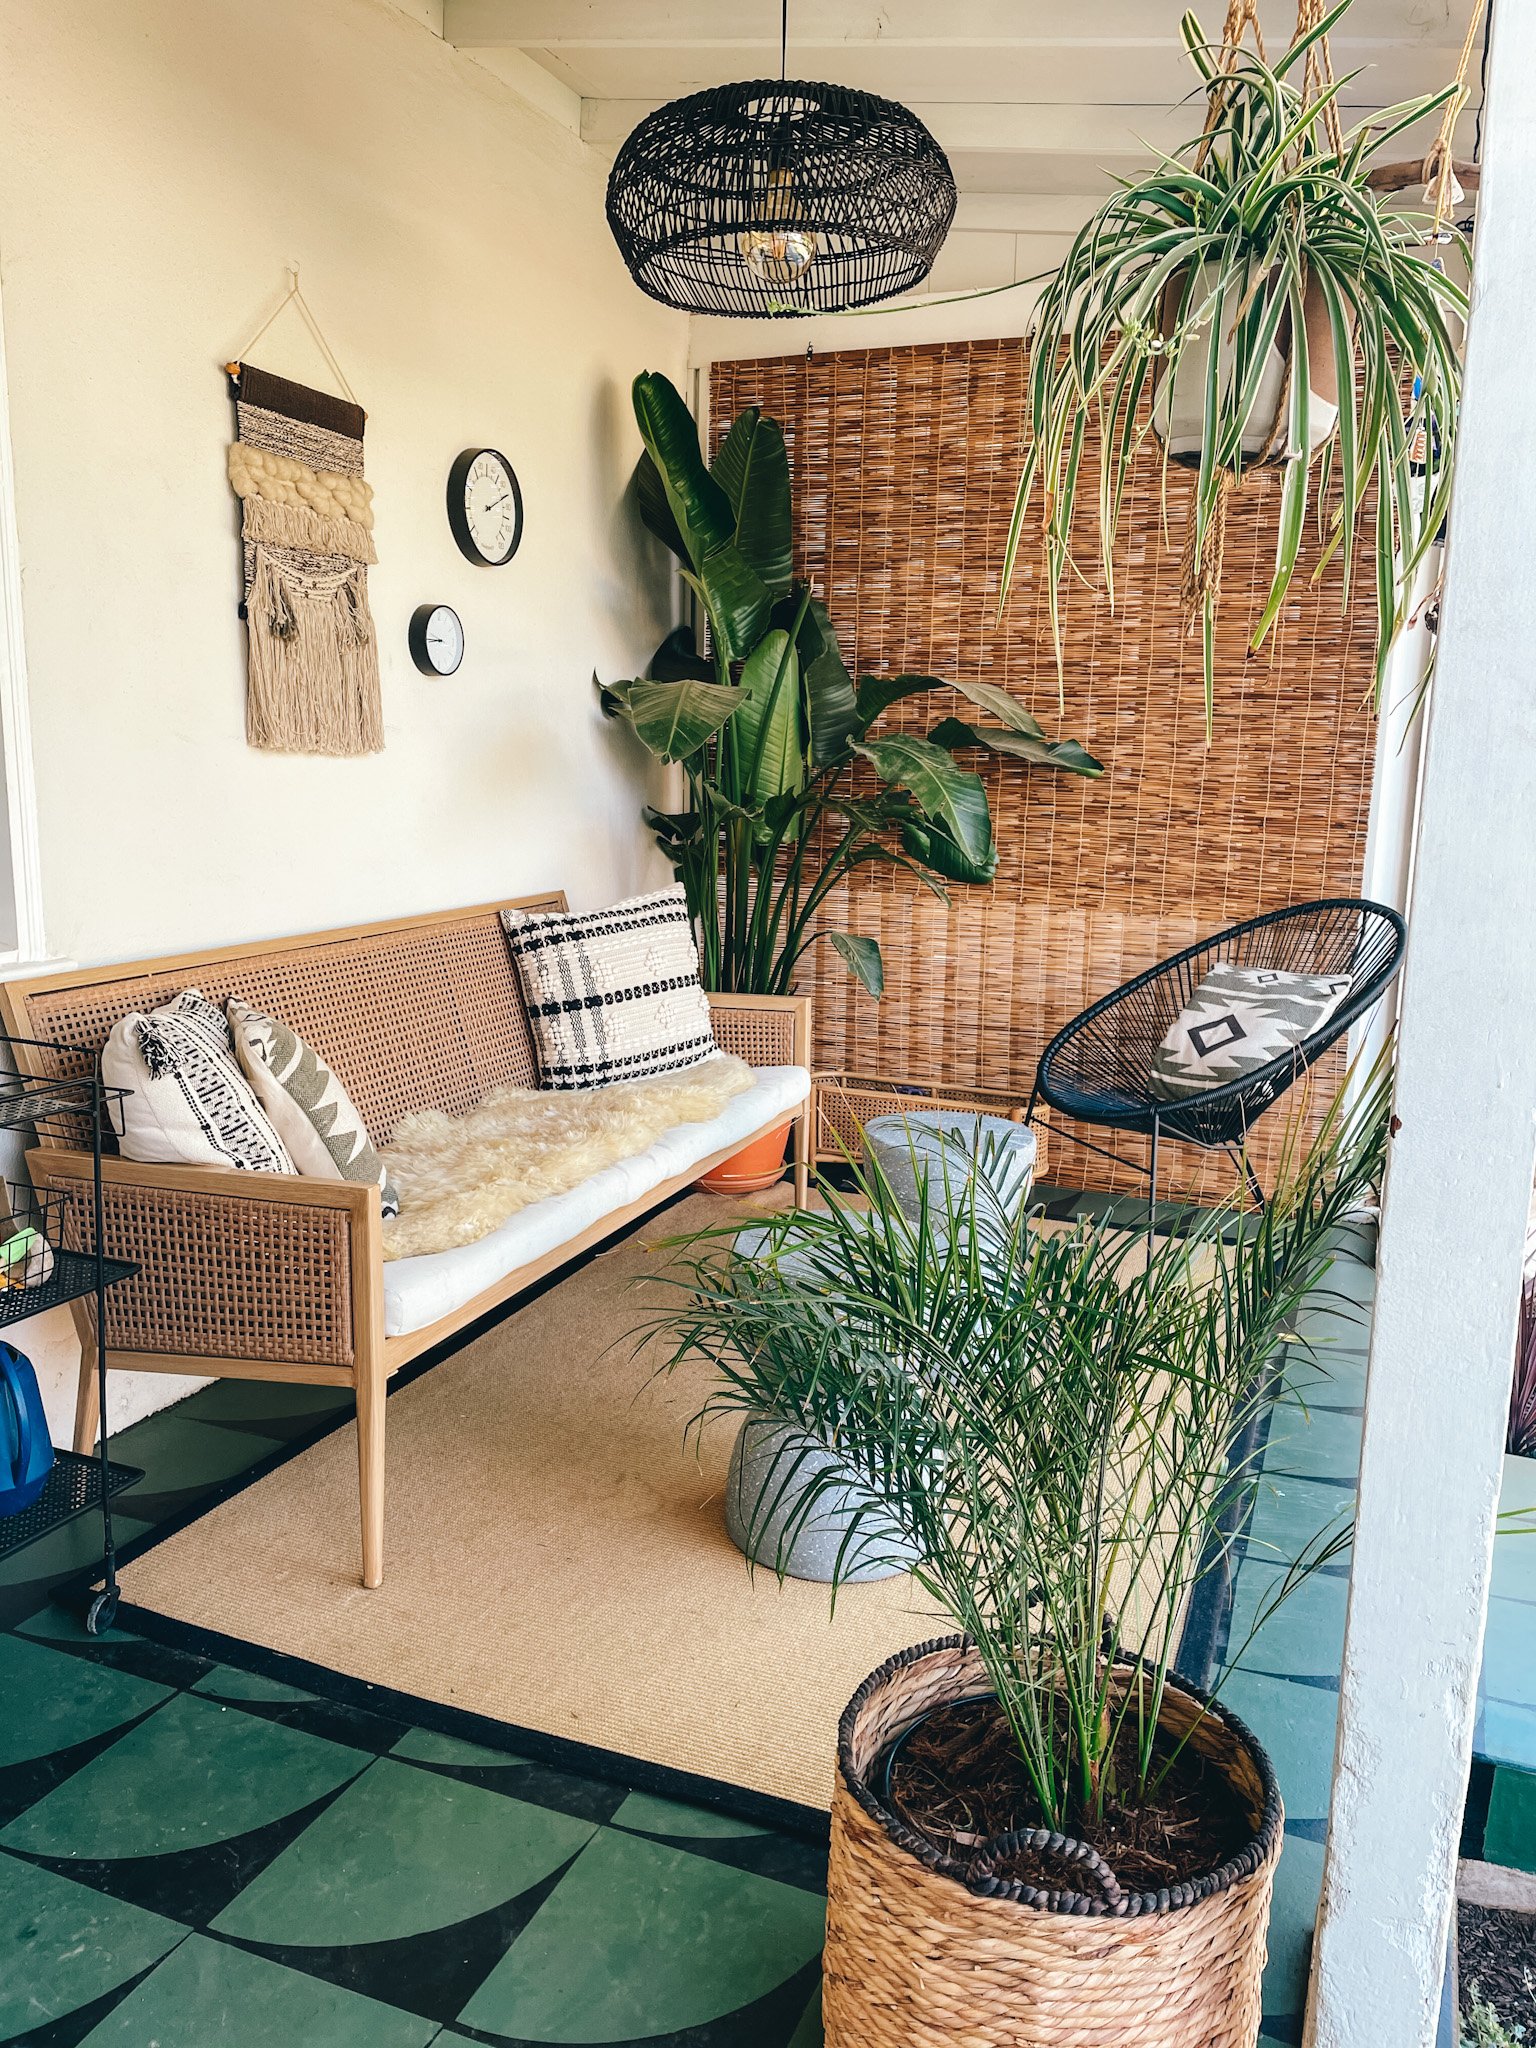
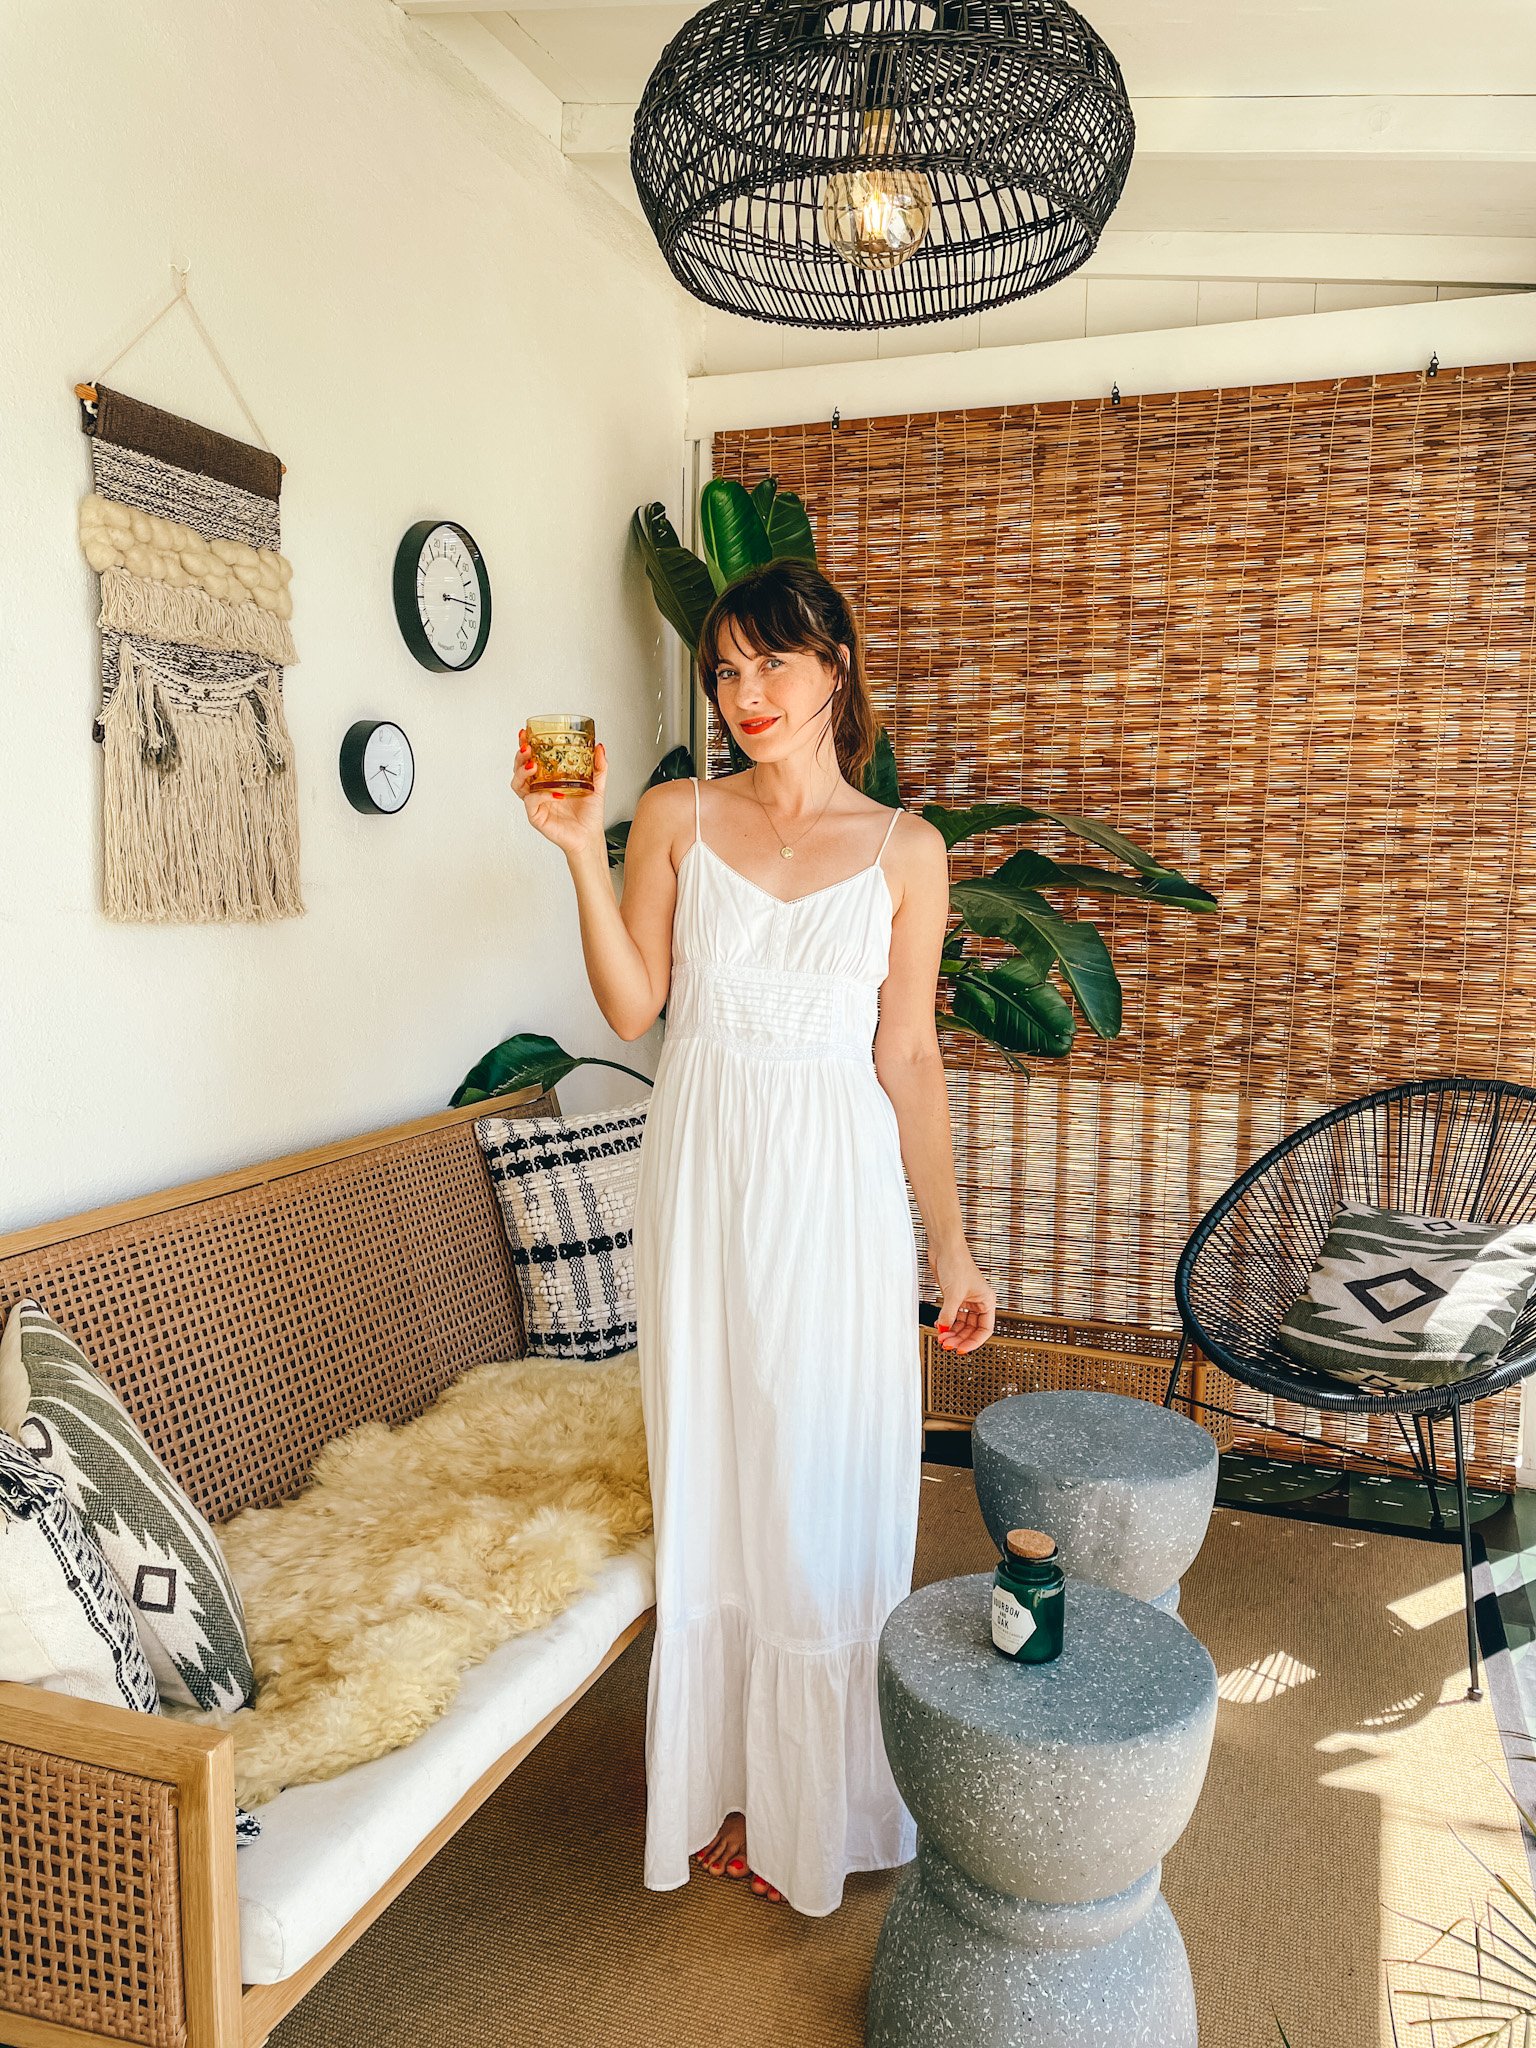
PATIO:
I spend a lot of the time sitting in the backyard watching Monty play. But every time I would go sit out on our concrete patio I would get mildly depressed! It just did NOT feel good and I never wanted to sit out there. I had to convince my husband that it was worth spending the money to make this space a space we would want to hang out in. Thankfully, he let me have my way! I like to remind him every evening when we are sitting out enjoying our beautiful new patio what a smart man he was to let me make it over! ;)
BEFORE:

We had grand plans to cover the concrete with decking, but after getting a few quotes it looked like we would have to come up with a cheaper solution for the time being. I don’t remember how, but the thought struck me to paint it. I really love the vibe of these beautiful hotels in Marrakesh and I started collecting some inspo pics on Pinterest (see the mood board here). The beauty of the tile and all the green plants really stood out to me. I bought a stencil for the faux tile and I got to work. I am proud to say that I pretty much did the entire thing by myself! WATCH THE FULL REVEAL HERE. From primer, to paint, to touch ups, to sealant- it took 10 coats! The hardest part was having to wait days in between coats. With the painting, and shopping for new pieces to furnish the patio, the entire project took about a month.
I will be honest that while I was doing this makeover, I spent SO MUCH TIME hunting for just the right pieces and trying to get really good deals. In the end I was so happy with all the pieces and how they fit together. Some of the things I really love are the authentic Mid Century bar cart that I picked up at an antique store, the beautiful Bird of Paradise plant in the corner, the secondhand couch, the Acapulco chair from Home Goods, and the basket with a lid concealing Margot’s dog food. The hanging pendant lamp from World Market makes it such a beautiful and cozy place to hang out in the evenings and read a book.
AFTER:

In Conclusion:
I am so proud of how far we have come in just one year of living here! I have to be honest that it was a TON of work. It wasn’t easy and I needed help. We still haven’t gotten around to redoing our main bedroom and bath, but I know that will come in the future. I am content for now, and I am looking at all the ways I can take baby steps to making the space more and more reflective of us. If you are looking to refurbish a room or two in your house, just remember that a home isn’t built overnight. It takes time and collecting pieces that you love and cherish are so much better then just going out and buying everything new in the Magnolia collection at Target, or West Elm, or wherever. If something holds some sentimentality for you then don’t get rid of it! Find a way to incorporate it into your design, or even just store it away for a season and bring it out later when you can find a place for it. Remember to be true to yourself and don’t worry about what the latest interior design styles are or trying to keep up with them. You will feel the best in your space when it reflects your personality and all the things you love.